Peacekeepers Heroes
This is a compilation of all the Peacekeepers Heroes in Battleborn. Check the changelog every so often to see if a guide for your favorite character has been added!
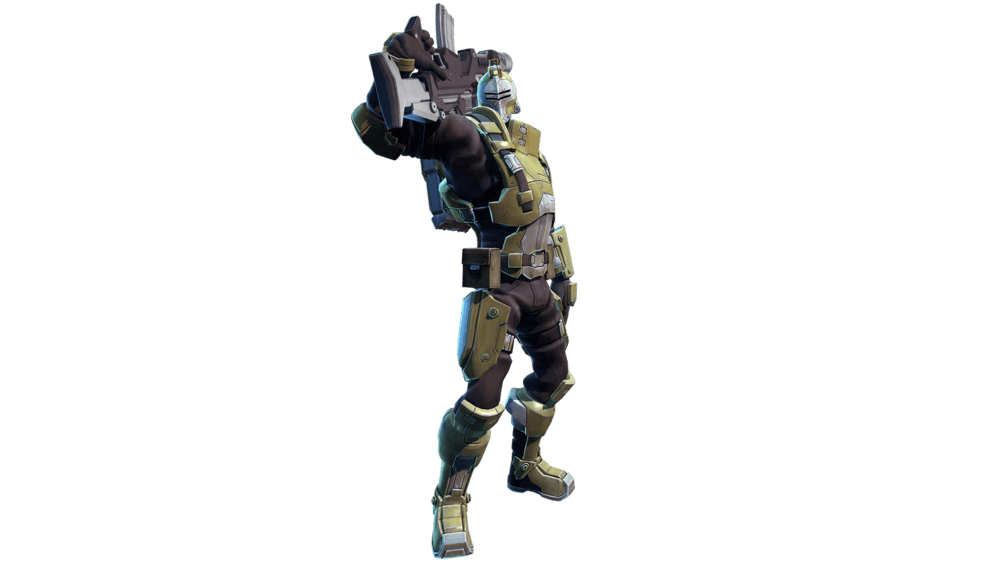
Oscar Mike (Attacker)
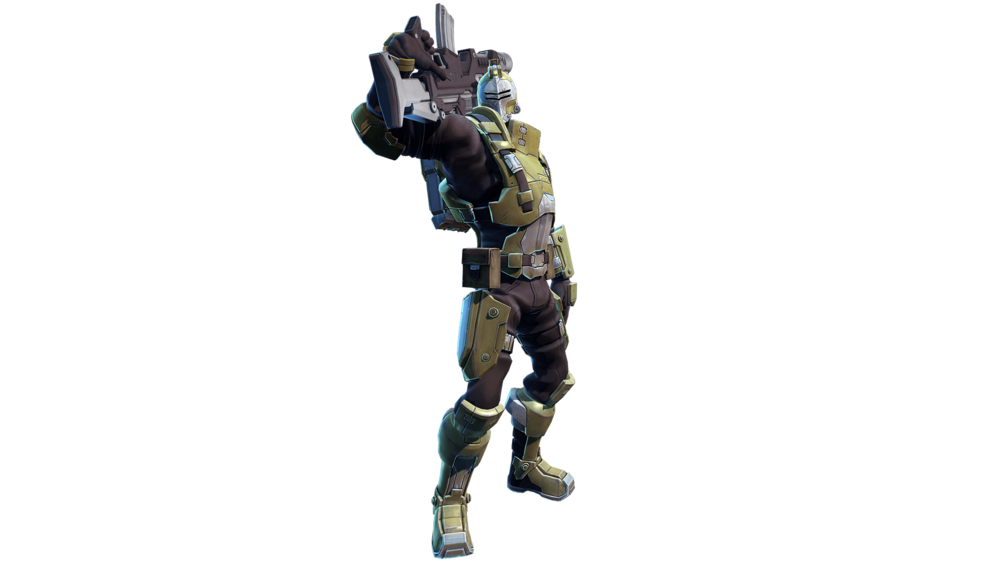
Biography: A discarded clone soldier from a long-forgotten war, Oscar Mike is a capable front-line fighter, engaging enemies at range with his assault rifle, cloaking for quick exits from tight spots, and inspiring his allies with his… unconventional personality. Full information on Montana's abilities, weapons, and talents can be found in-game or here.
How to Play Oscar Mike:
Oscar Mike is a ranged attacker that excels at harassing enemies from an annoying distance, without being a sniper. If an enemy is in sight, you should start shooting.
Like most characters, if Oscar Mike over-extends into the enemy group, it's the end for him. So make sure to hang back a fair distance, especially once you get the Scope Helix.
If an enemy is right on your trail, fire your grenade at the ground for the blanket of napalm, then stealth and run, Serpentine Style, as far away from them as you can. Until you get Double Tap, it's important to reload your magazine once the damage of your bullets (after the first 15) very clearly drops. There's not much use in hurting the enemy by an 18-damage bullet at a time, especially when most enemies have around 1,000 health.
When an enemy gets close, don't bother aiming down the sights; it actually makes it easier for them to dodge your bullets. Firing from the hip may be less accurate, but it isn't nearly as bad as shrinking your hit box by using the iron sights. Once you get Scope, you'll want to make hip-firing your norm at close range, while you always use the scope mid- to long-range.
Sharp-eyed enemies can still see you in stealth, so don't go calling out "hax" just yet when they keep shooting you when you're supposedly "invisible." Just use the stealth for what it is: a neat little way to slip past enemies while they're otherwise preoccupied. The movement speed stealth buff, Tactical Espionage Action, will make this strategy even better, as you'll be able to slip past enemies like a cheetah, while appearing as nothing more than a shimmer.
And finally, don't be overly-aggressive with your Ultimate. It takes a second or so for Oscar Mike to set his gun to "Airdrop" setting. So make sure to use the ability early on, before you actually want to use it, then aim it carefully. One effective strategy is using it on enemies when they're in chokepoints, putting it ever so slightly behind them, so they have the option to run straight into your team, or brave the massive damage the Airdrop will do if they stay in it any longer. While it's always fun to rain death on enemies, it's important to keep in mind the map control usage the Airdrop offers; control the map effectively, and the enemy may as well surrender.
Helixes: The following is a list of which Helixes I feel are the best option for Oscar Mike players that want to do damage and annoy their enemies. This may change as I unlock more mutations.
1. Impact Trigger (Frag Grenades detonate on impact). While it doesn't have the same "extra damage" snazzy ring to it as Sneak Attack does, the explosion waiting time on Frag Grenades can really screw you over. Being able to get an instantaneous burst of explosive (and later napalm) damage is a must.
2. Fragcendiary Grenade (Frag Grenades leave behind a blanket of napalm in the explosion radius, dealing 720 damage over 6 seconds). It has an awful name, but this Helix not only gives you more map control, it also does a hell of a lot more damage than the child grenades from the other Helix option. This is just an all-around better choice.
3. Scope (Fits your assault rifle with a long-range scope). The assault rifle is a rather accurate weapon; when an enemy is close enough for you to be using the Red Dot Sight, you may as well be hip-firing. It's far more useful to have a long-range sight attached for picking at enemies from a distance (which is where you should want to be in the first place).
4. Tactical Espionage Action (Move 30% faster while stealthed). Honestly, both options are decent, but I much prefer this one. For one, a stray enemy bullet can instantly cancel out Back in a Jiff, while Tactical Espionage Action is always helping you out while you're stealthed. The extra mobility while being unseen allows for some great re-positioning ability, and it can also help you traverse the map much quicker than most other Battleborn.
5. Double Tap (All bullets in a magazine now benefit from your 50% extra damage passive). Without the constant fear of having to frequently reload to do more damage on your back, you're more free to consistently harass the enemy. This can greatly increase your damage output.
6. Stealthy Shields (105 Shield Recharge per second while stealthed). If you're able to stay stealthed for just a few seconds, your shields will recharge nearly instantly. This is helpful for getting you back into a fight, and for keeping you in a fight longer. The extra grenade velocity from the other Helix is nice, but not as practical.
7. Disruption Rounds (+25% shield penetration). Extremely good Helix. Especially paired with Double Tap's increased damage, you can now lay into enemies, even if they have a nice beefy shield. Just all-around helpful for increasing Oscar Mike's damage output.
8. Embiggened Boom (+50% Frag AoE radius) While the initial explosion radius increase isn't something to gawk at, this greatly increases the size of your napalm field, giving you yet more map control.
9. Operation Sneaky Ghost (+6 seconds maximum stealth time). Being able to stay stealthed for longer lets you move even further, quicker. It also lets you sneak past enemies for a much longer time. Having a lower cooldown (the other Helix) is nice, but doesn't compare to staying stealthed so much longer when the ability is actually used.
10. Holy Crap, Space Lasers! (All of your Ultimate's damage is focused into a smaller area, into a laser, but is dealt out much quicker and brutally). While this makes your Ultimate harder to aim overall, if it does hit an enemy Battleborn, it doesn't matter who it is, they're nearly dead. If they stay in it for its entire duration, they're certainly dead. The laser is hard to aim, but absolutely devastating when used correctly.
Loadouts: Oscar Mike players, in my opinion, should prioritize Reload Speed, Shield Penetration, and Attack Speed. The first is obvious; shooting more often means more damage. Shield Penetration is a good way to punish overly-confident shielded enemies, and Attack Speed does make your bullets fire faster (from what I've seen). And if an enemy is standing still, and you empty a magazine of bullets into them before they realize you pulled the trigger, it's over for them.
How to Unlock Oscar Mike:
Starter Character.
* * * * * *
Montana (Defender)

Biography: When he’s not clotheslining bears for fun, Montana can be found suppressing enemies with his fearsome minigun and soaking up industrial-sized buckets of hurt on behalf of his comrades. Self-appointed morale officer of the Battleborn and friend to all. Full information on Montana's abilities, weapons, and talents can be found in-game or here.
How to Play Montana:
More information coming soon.
How to Unlock Montana:
Starter Character.
* * * * * *
Ghalt (Attacker)
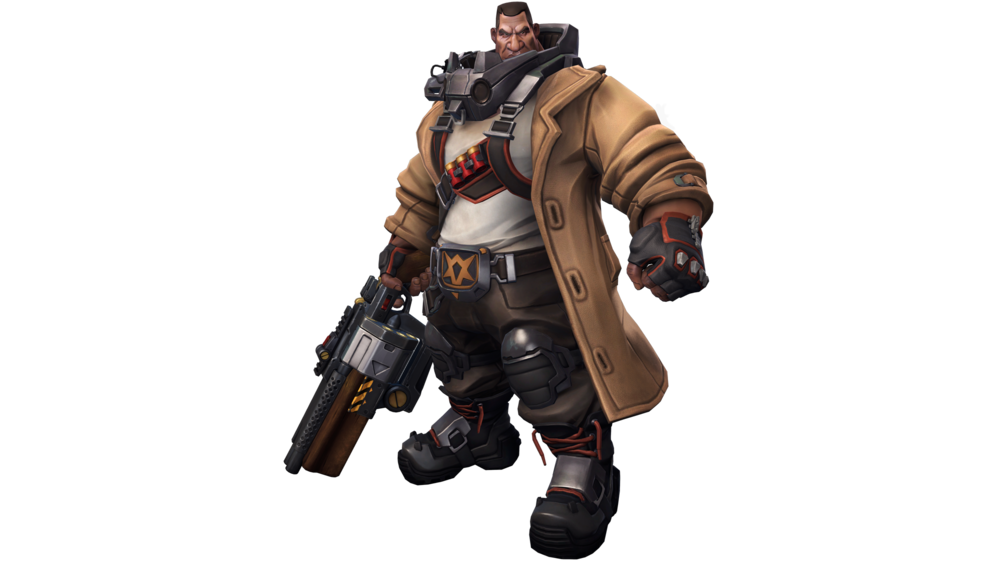
Biography: Former Peacekeepers officer and capable commander Captain Trevor Ghalt wields his charisma and shotguns with equal effectiveness. As one of the first among the factions to call for unity against the Varelsi, Ghalt is considered the first Battleborn. Full information on Ghalt's abilities, weapons, and talents can be found in-game or here.
How to Play Ghalt:
Ghalt, aside from being the biggest pain to unlock, is also a pretty good character.
Excluding snipers, Ghalt's Revolver Shotgun is one of the highest damaging weapons in the entire game. At close range, that thing absolutely demolishes anyone in your way. Because of this, Ghalt is very good at clearing out minion waves, discouraging enemy melee dive-bombs, and punishing any enemy that happens to get stunned nearby. How convenient that his kit has a stun, in that case.
The most important thing to know when playing Ghalt is his standard Hook/Scraptrap combo. This is one of the most devastating things that can happen to anyone in-game. Place your Scraptrap down (it should be stealthed from your first Helix), and whenever you feel it's necessary, Hook an enemy in while standing just behind that trap. With luck, it'll trigger before they realize what's happening. That's really good damage on them, plus a 2-second stun for you to pump an offensive amount of schrapnel into their body. Always have one Scraptrap placed strategically, where you know an enemy is going to go at some point, but keep one available for this combo. It's one of the best things in Ghalt's arsenal. Obviously, don't sit by a Scraptrap all day, waiting for an enemy to wander by so you can Hook them, you lady of the night. Try leading them to the pre-placed Scraptrap, or go out and fight minions until you pick out a target for your team.
Ghalt's Dual Wield seems bland on the surface, but it's literally a 100% damage per second increase for 10 seconds, provided you can aim your shots. Still complaining? The best times to use it are to finish off retreating enemies, or to punish enemies that are charging in to your team. Remember how devastating your shotgun is in close range. Except with this Ultimate, now you have two of them!
Do your best to stick with your team. This seems obvious, but Ghalt's great damage and crowd control is a great asset to any team; you'd be doing them a disservice by not showing up to team fights. As long as you're there for your team when they need you, you're doing your job. Oh, and kill enemies. I'd go into more detail, but killing people as Ghalt is pretty straight-forward. Pull the trigger, place a trap, and hook them in. Enjoy!
Helixes:
The following are the Helixes that I feel make Ghalt the best he can be in Versus matches. Builds may slightly differ for Story, but when it comes to Versus, this Helix build makes Ghalt absolutely terrifying.
1. Stealth Scrap (Cloaks your Scraptraps.) This Helix gives enemies a helping hand, making them wander into your traps more frequently. Plus, the alternate Helix just makes it easier for you to hit the wrong target with your Hook.
2. The Scrappening (Scraptraps spawn 3 additional shrapnel bombs when triggered). Pulling enemies into your Scraptraps is now gonna cause an explosion that the Joker from Batman would deem a bit much.
3. Your Decision. This is honestly just up to you and your playstyle. I personally prefer Slug Rounds, as pumping an entire clip of shrapnel into a stunned enemy causes very high numbers to float above their head.
4. Efficient Extraction (Increases Hook's travel speed and range by 35%). Let's be honest, the base range on Hook isn't all that good. Plus, it moving faster makes aiming a bit easier, and brings enemies into your team much quicker, giving their team less time to react.
5. Hobbling Shot (Tactical Shell shots slow enemies for 2 seconds). The alternate Helix doesn't really compare to this guy. Adding 15% extra damage to the Tactical Shells is noticeable, but slowing enemies just lets you get even more shots into them. In a way, this Helix is its own extra damage. In my honest opinion, with only a few exceptions, you should always take Slows when you can.
6. Drain Chain (Enemies hit with Hook have their shields and health drained). This gets an enemy nice and ready to be absolutely demolished by your Scraptrap. It's an extremely useful Helix, honestly.
7. Depends. If you can aim at all, then go with Both Barrels Blazing. This helps your damage massively. Otherwise, go ahead and grab the extra reload speed, it does make a significant difference.
8. Short Fuse (Reduces Scraptrap trigger delay by 1 second). Your goal is to have an enemy that you pull in with Hook get immediately stunned by your Scraptrap. Reducing the trigger delay pretty much guarantees that.
9. Easy Target (Enemies hit with Hook take 15% increased damage for 5 seconds). Not only are they pulled towards you, and preferably into an explosive Scraptrap, they're also taking more damage from all sources for five whole seconds. Need I say more?
10. Incendiary Shells (Loads Revolver Shotguns with incendiary rounds during Dual Wield, causing shots to deal 36 additional damage over 1.5 seconds). This massively increases your damage output during your Ultimate (especially paired with the extra shotgun). Pretty much anything you shoot is now going to melt away like a moist witch.
Loadout:
With Ghalt, a lot of his power lies in his burst damage, especially with his Hook/Scraptrap combo. So I like to build Skill Damage to help that along, Attack Damage to give his basic attacks more of an impact, and Reload Speed to keep those guns blazing.
How to Unlock Ghalt:
Achieve Command Rank 40 OR Get a Silver Rating on all Story Missions on Advanced difficulty.
(seriously)
* * * * * *
Galilea (Defender)
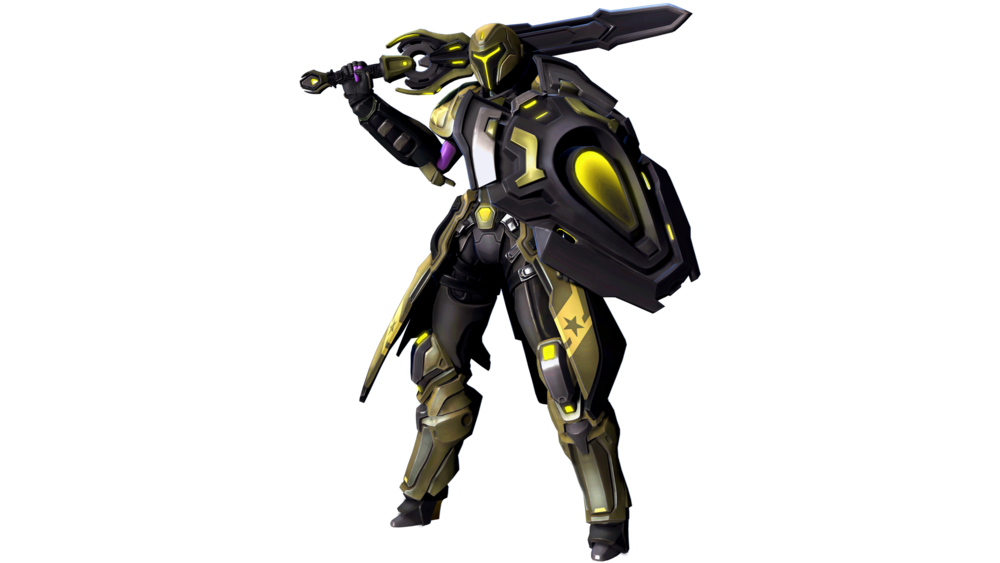
Biography: Warped by a corruptive agent in a mission against the Jennerit, Galilea endured hundreds of years of self-imposed exile on Bliss before joining the Battleborn. The darkness within her is both her greatest strength and most profound struggle. Full information on Galilea's abilities, weapons, and talents can be found in-game or here.
How to Play Galilea:
More information coming soon.
How to Unlock Galilea:
Achieve Command Rank 12 OR Kill 800 minions of any type.
* * * * * *
Benedict (Attacker)
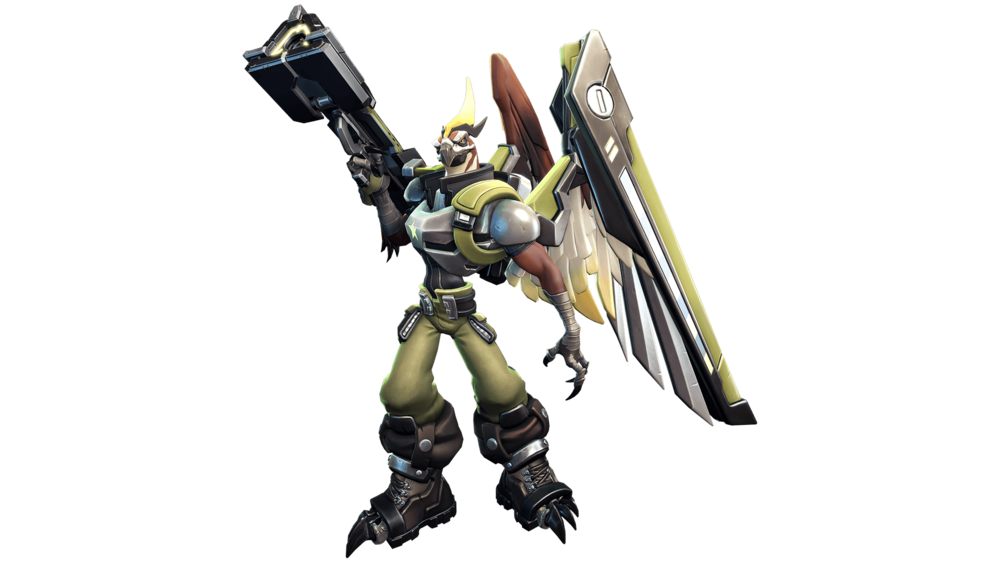
Biography: Brash and arrogant Benedict loves three things: himself, rockets, and himself. Though his left wing was crippled during the evacuation of his homeworld, Benedict is still capable of limited flight, raining down rockets from a high vantage point. Full information on Benedict's abilities, weapons, and talents can be found in-game or here.
How to Play Benedict:
If you want to play Benedict, repeat after me: "I am not a bird. I am a bunny."
Benedict's built-in double-jump can be aimed in any direction, letting you dodge the Average Joe's attacks pretty easily. While flying in the air might sometimes make you an easier target, it can also give you a distinct tactical advantage over both your opponents and your allies. It's best to take to the sky when the enemy team is already distracted; while they're busy fighting off your team, you can rain explosions on them from above.
Don't rely on your glide. Flying is an awesome feeling, but anyone that's half-decent at aiming a gun will still be able to hit you. You're not invincible in the sky. Reserve Liftoff for escapes, or aggressive plays when an opponent is trying to escape. Also, keep in mind your double-jump and glide sometimes let you get to places quicker than enemies. If there's a ledge leading to an area, you can probably glide to it from a high location.
Try to never have zero rockets ready. Fire a maximum of four, and unless an opponent is on you like a facehugger from Half Life, start reloading. Having no rockets available when an easy target is running away is going to be pretty common if you're not careful with your ammo. Keep in mind your rockets don't need to be direct hits to harm opponents, and they don't hurt you. So if someone is invading your personal bubble, don't shy away from firing a couple rockets at your feet before using Liftoff, then firing rockets at them from above. And while this should go without saying, after you fire a Hawkeye, start firing the rockets at the enemy. You want to get every second you can get out of the homing missile time. If you're certain the Hawkeye will hit, don't worry too much about aiming, but it's always smarter to try to aim than it is to just fire randomly, even if you are confident that it's going to land on them.
Benedict's Ultimate can either be really good or plain useless. Keep in mind that you're aiming it yourself, so using it leaves you vulnerable to attack. Use it from a safe location, then pilot it into the sky. It's far easier to scope out enemies from above, then shooting the rocket down like a raindrop than it is to weave through structures on the map and minions. Don't go too high up, though; your Ultimate does have limited time to aim (fuel). Don't use the Ultimate when their health can easily be regenerated, or if their Overshield is just going to block it all. Boomsday excels at chasing down an enemy that's running away, or flanking the enemy team during a teamfight and exploding in the support's face. It's going to be worthless if you use it without thinking about how it's going to actually help secure a kill or confuse the enemy.
Much like Thorn, Benedict needs to aim where his targets are going, not where they are. Moreso than Thorn, actually. Your rockets are extremely slow projectiles, even with the Speedy Delivery Helix. It's far easier to aim at an opponent's feet than it is to aim at their body. If it misses their body, the rocket will keep flying by like nothing happened. Even if they move to the left a bit, if the rocket hits the ground, it's going to hurt them.
And finally, it's sometimes a smarter decision when running away to fall to the ground rather than glide away. Again, in the air, you can be a pretty easy target. Falling to the ground as Benedict is usually unexpected, while gliding just leaves you out in the open.
Helixes:
The following is my Helix list for Benedict in PvP. While figuring out this build, I primarily played Capture and Incursion, though I think it works on anything for the most part.
1. Evasive Pattern Benedict (Liftoff now launches you upwards and backwards). While the extra homing rocket second Helix might sound nice, it doesn't begin to compare to the mobility and escape abilty Benedict gains from this Helix. Plus, if you're playing Benedict, you should be able to aim your rockets on your own.
2. Make Some Room (On Liftoff, nearby enemies are pushed away). Again, the alternate Helix boasts a 1 second slow, but it's barely even noticeable. Pushing enemies away has more map control and throws them off more. For instance, if you manage to be behind an enemy that's trying to escape, just use Liftoff, and they'll be pushed back to your team.
3. Speedy Delivery (Rockets move 25% faster). This is just my personal preference, as your rockets will get to their destination much faster, allowing you to attack enemies from a bit farther away. Reload speed shouldn't be your focus anyway, as you'll get Rapid Reload next.
4. Rapid Reload (Using Hawkeye instantly reloads all of your rockets). Not only does this guarantee a couple of free homing rocket shots, it also lets you immediately reload if you're in a tight spot, homing rockets or not.
5. Tailwind (Increases your glide speed by 25%). Benedict's base glide is decent, and it's bound to throw some enemies off, but it's slow as hell. A Benedict in the air is usually an easy target for any decent sniper, or soldier with a gun. Speeding up your glide a bit makes it more versatile and reliable in a combat situation.
6. Heavy Bombardment (Increases homing rocket damage by 20%). This is especially useful, as with Rapid Reload, you're essentially guaranteed two or three hits that deal 20% more damage. Damage on Liftoff offered by the other Helix is okay, but it doesn't begin to compare to this.
7. Depends. If you're extremely good at aiming Benedict's rockets, first off, that's impressive. Second, get Surgical Strike. If you can hit enemies directly, that Helix will benefit you immensely. Otherwise, and there's no shame in this, get Danger Zone. The 45% increased blast radius is excellent for killing Shards in just a couple hits, clearing out minion waves, and forcing an enemy team to spread out.
8. Frequent Flyer (Liftoff cooldown is decreased by 25%). Odds are, if you use Liftoff, you're already being shot at. So having your shields regenerate instantly from the other Helix isn't that great. Plus, being able to use your "insta-flight" ability more frequently is really nice.
9. Less Talk, More Hawk (Hawkeye's cooldown is decreased by 25%). This lets you have your instant reload more frequently, and you get more homing rockets. What's not to like?
10. Rockets Launchin' Rockets (Reactivating Boomsday mid-flight fires a bunch of smaller rockets). More explosions, more fun! Not much more to say. The alternate Helix's bigger explosion radius looks badass, but Boomsday is a more aggressive ability; it shouldn't really be used to explode a large area. Rather, it should be used to litter an enemy's face with explosions.
Loadouts:
Benedict is a bit of a tricky character to get right. He has slow reload times and even slower projectiles. Personally, though, I prefer to prioritize Attack Speed, Sprint Speed, and Shield Penetration. Being able to fire more rockets in less time lets you get more homing missile hits, and in general, just lets you litter the battlefield with really painful explosives. Sprint Speed gives Benedict more of what he needs: mobility. You should be jumping around the battlefield all the time, resembling a bunny more than a bird. Sprint Speed just aids in that. And finally, Shield Penetration lets your explosives go through shields. Explosives. With a decent piece of gear, upwards of 21% of your massively harmful explosive rockets can just ignore an opponent's shield and start clawing away at their health. It's awesome.
How to Unlock Benedict:
Achieve Command Rank 10 OR Win 5 matches as a Peacekeeper Hero.