——————————————————————————————-
Survivor mission (Winnie – ): Investigate North Bridge
Reward: 15,000 PP + Follower (Winnie)
Objective: Defeat spec ops
Once again, another kill a small group of spec ops and save the survivor mission. Grab your ranged explosive weapons and fire away.
Objective: Talk to Winnie
Another grateful follower and a mission reward awaits Nick.
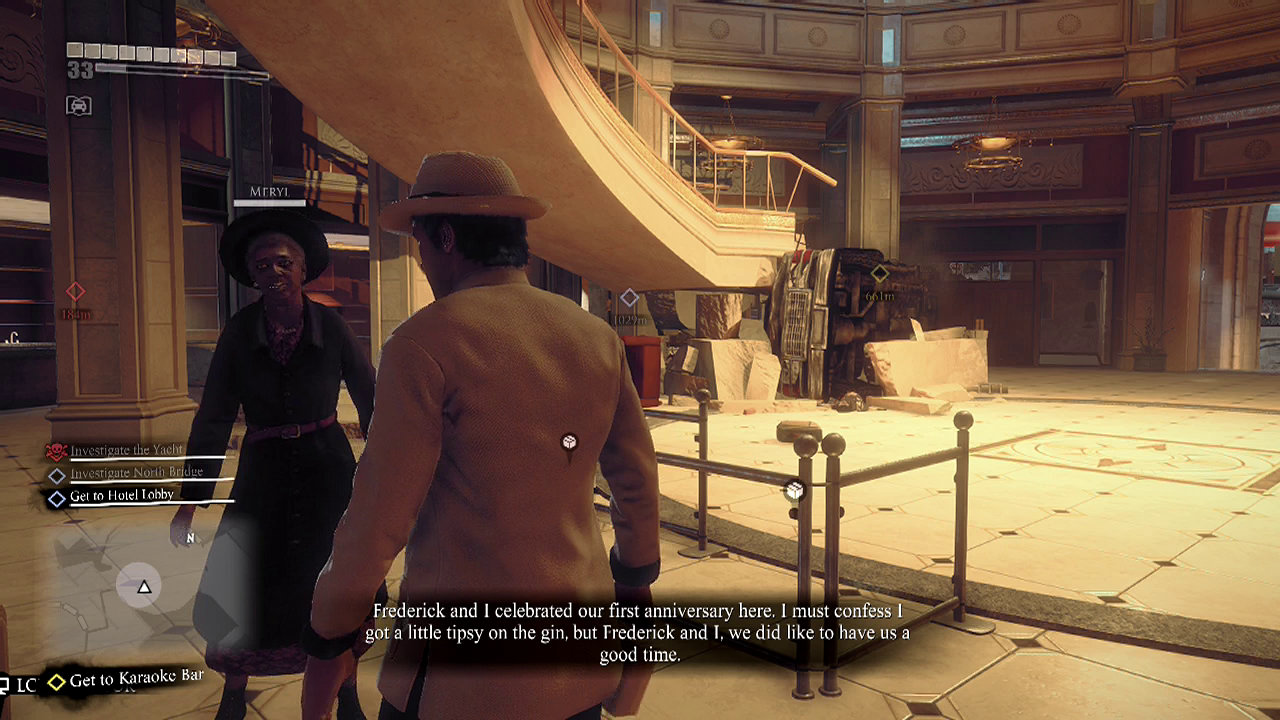
Survivor mission (Meryl – Central City): Investigate the hotel
Reward: 20,000 PP
Objective: Talk to Meryl
After the last few easy survivor mission the difficulty factor comes back with a vengeance. Meryl want to take the scenic tour of town before she passes on and Nick will be her chauffeur for the evening. Due to the large distances between locations, use vehicles as much as possible and make sure to have a few healing items to give to Meryl. She isn't very good at breaking out of a zombie's grasp and will take damage pretty fast when grappled.
Objective: Get to hotel lobby
About fifty meters away. Will take ten seconds to reach.
Objective: Get to Charms of Desire + Objective: Get to Almuda Central + Objective: Get to the Mausoleum
All of these locations have to be visited in sequence and at each spot you have to listen to Meryl's tale.
Objective: Take Meryl home
When you finally arrive and drop Meryl off you will get your much deserved mission reward.
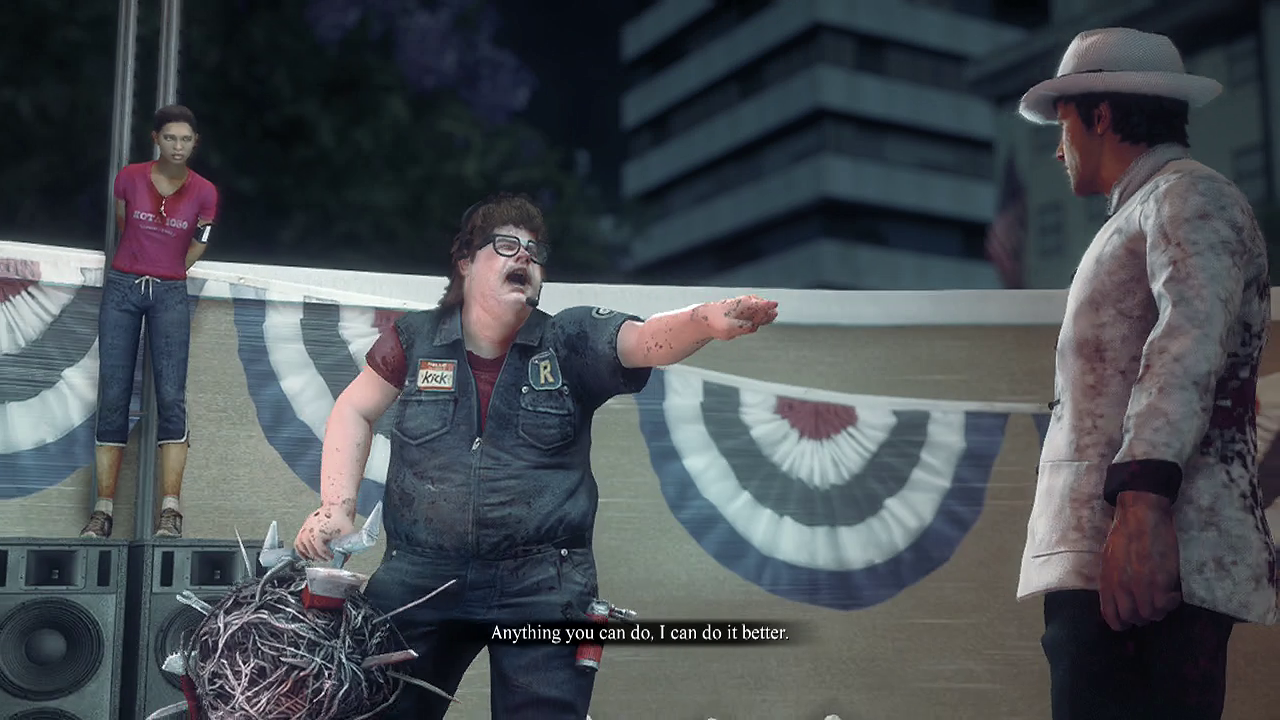
Psychopath (Kenny – Central City): Investigate the yacht
Reward: 40,000 PP + Followers (Kenny + Regina) + Schematic (Junk Ball)
Attacks:
Ball swing – Kenny will swipe his junk ball at Nick. Stay a little out of range to avoid this attack (or just keep moving).
Ball rotation – Kenny will spin around several times with the junk ball outstretched. This will knock back Nick if he is in range and do decent damage.
Throw junk – During the second phase Kenny will start throwing pieces of junk at Nick or releasing it during his ball swing attacks. Keep moving at all times to dodge the flying projectiles.
Charge – Kenny will run at Nick but not immediately attack. You can interrupt Kenny during this before he begins attacking for some free damage.
General strategy – Seems like Kenny doesn't just want to be like Nick. He wants to BE Nick. When you arrive at the yacht in Central City and reach the forward deck Kenny (or Kick rather) will be waiting. Kenny will be lugging around a junk ball which can cause some nasty damage if it connects so constantly stay out of melee unless you are going in for the attack.
Heavy damage melee weapons are a must here to keep Kenny flinching. The game wants you to create combo weapons to stun Kenny but due to the time and the fact you cannot see around you while doing so. It makes it a lot harder to avoid both Kenny and the zombies roaming the deck. Instead use your strongest weapons and have some healing items handy and once Kenny is down to one square of health, the battle will end.
——————————————————————————————-
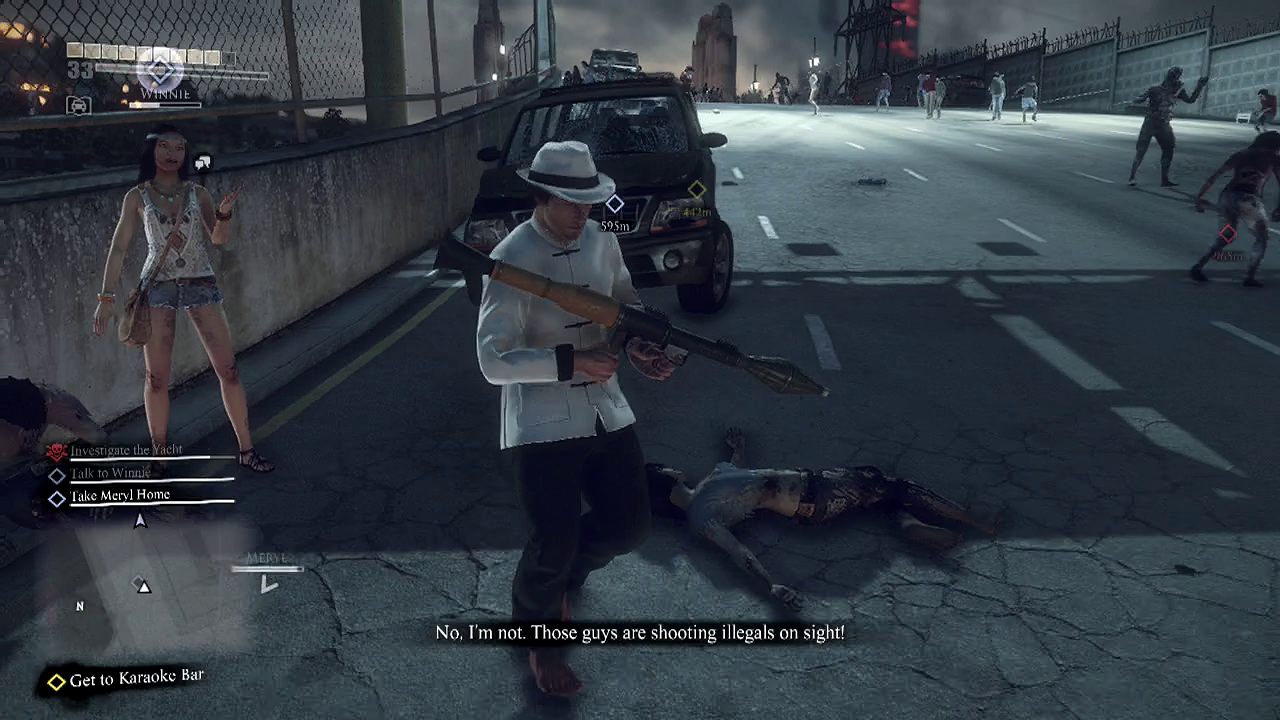
Objective: Get to the Karaoke Bar
Stock up before heading over there as once you enter you will be trapped inside the metro with a ton of zombies.
Objective: Unlock the doors + Objective: Turn on the power + Objective: Find some wire (then reverse the sequence)
If you stocked up before arrival this will be a cakewalk. Otherwise things can get real dangerous fast due to the sheer number of zombies in the metro. Head for each of the marked locations in turn. The first one you can actually do is to find the wire. Once you have this you can complete the other two objectives in reverse order.
Objective: Escape the Metro
After the doors have been opened make a hasty retreat from the densely populated metro and resume your original objective.
Objective: Get to the Karaoke Bar
The Diamond club is your next destination but guess who's blocking your path. Yup, Gary's back. He wants you to do him a favour in order for him to let you in (what a surprise).
—————————————————————————-
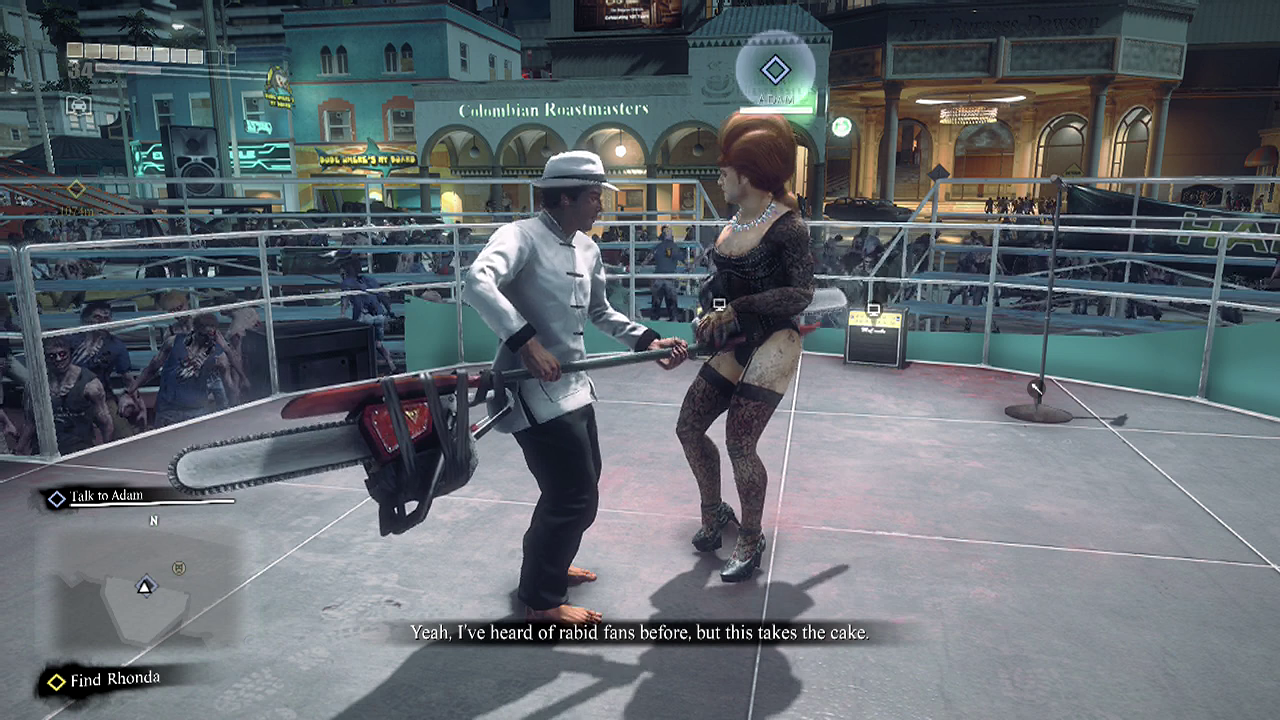
Survivor mission (Adam – Central City): Investigate the stage
Reward: PP + Follower (Adam)
Objective: Talk to Adam
Bring along a boom cannon here. Don't ask why, just do it. Adam (who looks like a reject from the Rocky Horror Picture Show) will be having an argument with himself. He wants to stop the music before he can leave.
Objective: Destroy the speakers
Use the boom cannon to one shot each of the speakers. This will make a tedious task very quick and stop you from having to brave the infected swarm. Talk to Adam once you are done and he will join Nick. You will also get your final mission reward here.
—————————————————————————-
Objective: Find Rhonda
Rhonda will be all the way back at her garage in Ingleton. Before you get there, stock up on some ranged explosive weapons and a couple of health items as things are going to get interesting.
Objective: Find first aid kit
When you arrive it appears things have gotten serious in your absence. Rhonda will be in trouble so Nick will have to brave a mass of spec ops soldiers and a time limit to rescue her. All in a day's work. Right? The first aid kit will be in the pharmacy across the street but a lot of spec ops will be in your way. Blast them with the boom cannon and make a break for the first aid kit (you don't have to kill all the soldiers – the first aid kit is what's important here). Sprint back across the street and talk to Rhonda again.
Objective: Stop Rhonda's bleeding
Use the first aid kit on Rhonda and tell her about finding Gary. Before she meets him again she wants to be a little more presentable.
Objective: Find an acetylene tank + Objective: Find a soldering iron + Objective: Find a hinge
All three items are nearby in the garage and should only take a few seconds to gather up.
Objective: Bring Rhonda to Gary
Get in a vehicle (or make one) and travel back to the Diamond club. Gary will be so happy to be reunited he will want to be reunited even more somewhere private. But at least he opens the door for you first.
Objective: Clear zombies around Annie
Enter and clear the room to rescue Annie.
Objective: Help Annie
Untie the girl from the pole to share an awkward moment.
Objective: Take Annie to the plane
Now that everyone is ready to go, jump back in the vehicle and head for the plane hangar. The streets are crawling by this point so use vehicles to travel whenever you can. Grab some good ranged weapons (non explosive), strong melee weapons and all the healing items you still have room for as getting away is never easy.
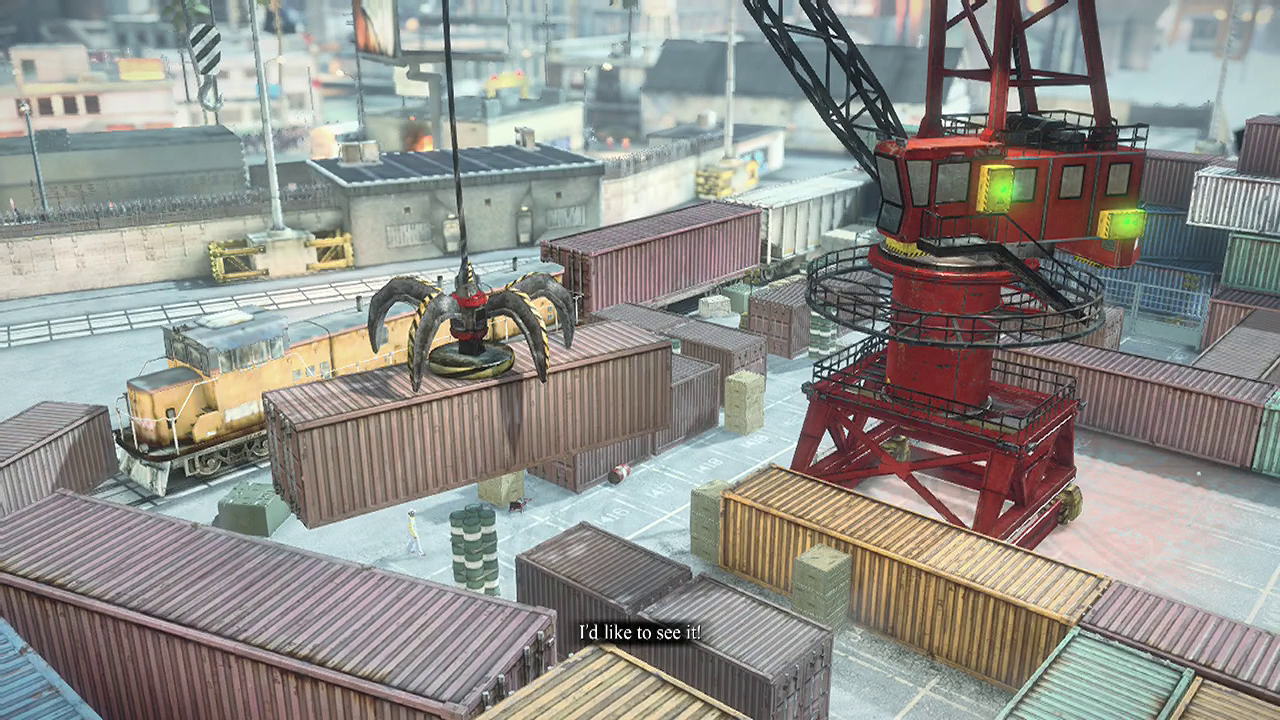
Objective: Destroy the crane
After the totally unexpected plot twist happens (as obvious as most beloved mentors turning out to be evil) you will have to beat down the crane he is riding. Add to that zombies and hurled explosive barrels and you have a barrage that needs to be ended quickly or Nick will die. Focus fire with your ranged weapons and strafe as you do so to avoid the giant claw, explosives and zombies. If you take the weak points on the crane out quickly you will take little damage and you can rescue the damsels in distress.
Objective: Free Annie and Isabella
Head up the newly created ramp and open up the shipping container.
Objective: Defeat Red
Surprise, surprise. Red isn't dead and he's ready to kick Nick's ass. Those strong melee weapons will come in handy here. Red's attacks aren't fancy, but they are quick and damaging. He will repeatedly charge Nick, stabbing him if he makes contact or just knocking him around. He also likes to slash with his knife and kick you around. Keep him in a flinching state as much as possible to avoid taking heavy punishment and use those heavy melee weapons to their fullest. He will, after enough pain, run out of steam.

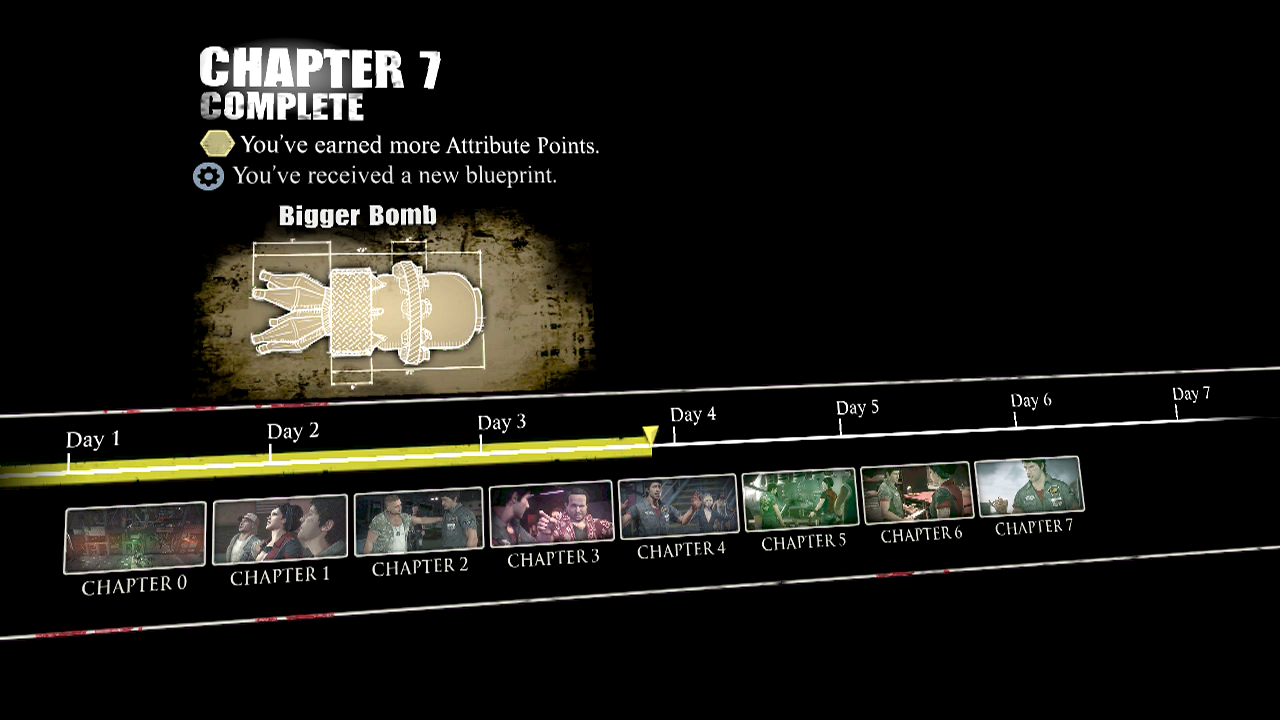
Chapter reward: Attribute points + Schematic (Bigger bomb)