
MINUTEMEN QUEST 03 – Taking Independence
Note: On higher difficulties (especially survival) the enemy you are going to face at the end of this quest is extremely dangerous. The best method of killing it is to bring a fatman launcher with at least four mini-nukes (as seen in the video). You can also abuse poor AI tracking and long range weapons but the first option is the easiest. The other enemies in this quest are slightly weaker to energy weapons, so you may want to bring along one of those as well.
Objective: Talk to Preston
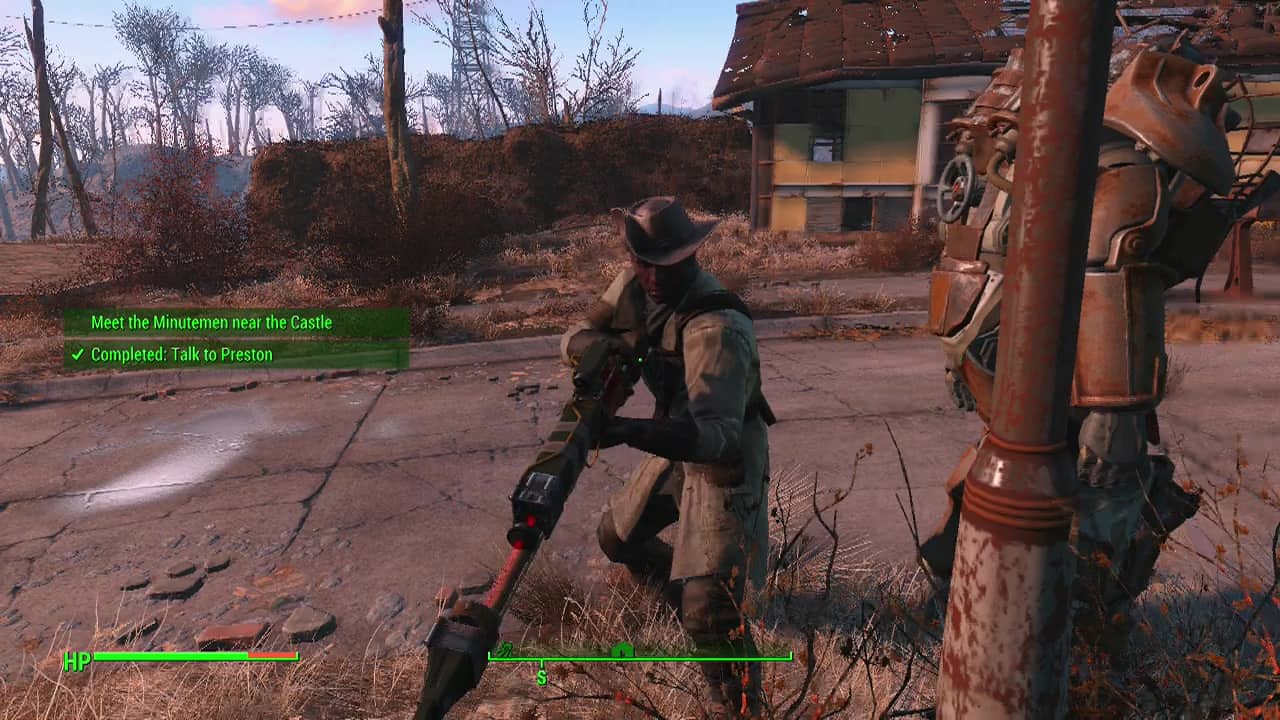
After completing a couple of quests for the Minutemen, Preston will talk to you about retaking the Castle which is the old Minutemen headquarters. You can put off the decision or agree to meet him and several recruits near the Castle in a bid to retake it.
Objective: Meet the Minutemen near the Castle
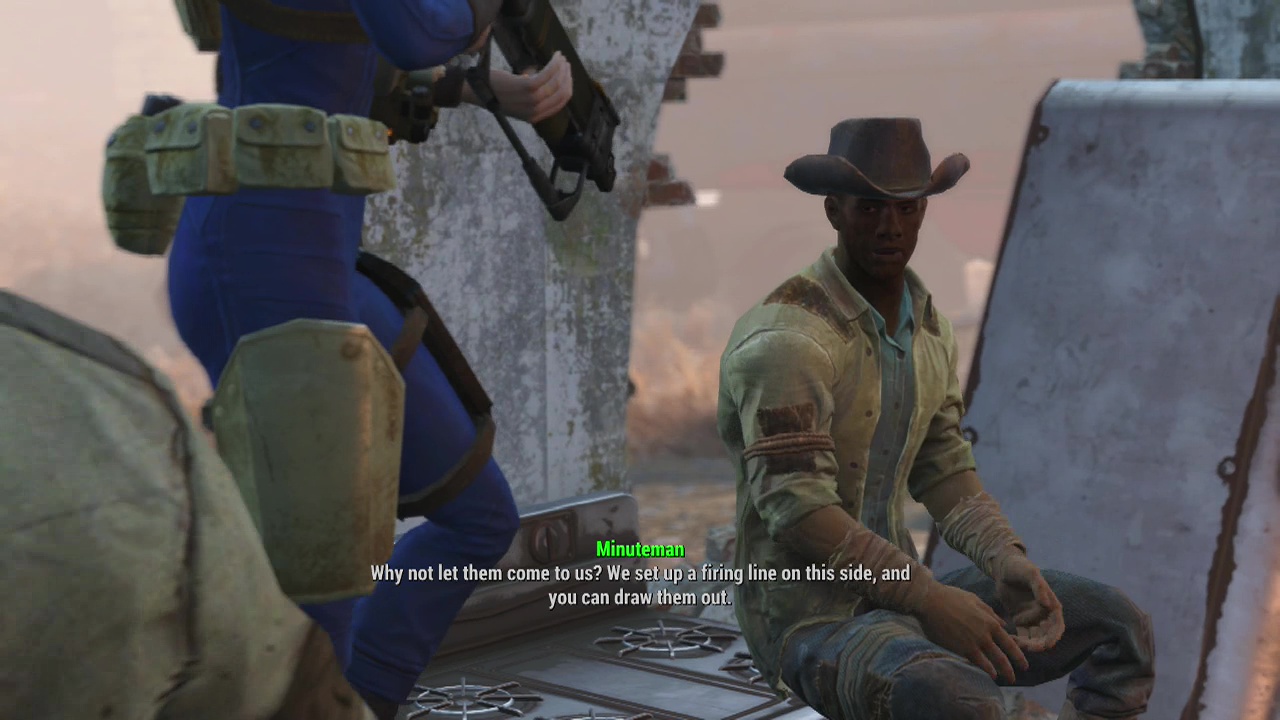
The Castle is located a fair distance to the South-East from Diamond City, so be prepared for a bit of a trek to reach the rendezvous. Keep in mind you can use the aquaboy/ girl perk to swim along the waterfront if the land approach gets too dicey. When you arrive, you'll find the group holed up in a wrecked diner in front of the imposing structure. Make sure to grab the loot off the counter before talking to Preston.
Objective: Decide on a plan of attack
You will then be presented with three options on how the Minutemen will enter and attack the Castle. But it makes little difference as you'll have to do most of the hard work yourself. If anything I would suggest the pincer strike so that there is a crossfire across the courtyard during the attack.
Objective: Wait for the Minutemen to get into position
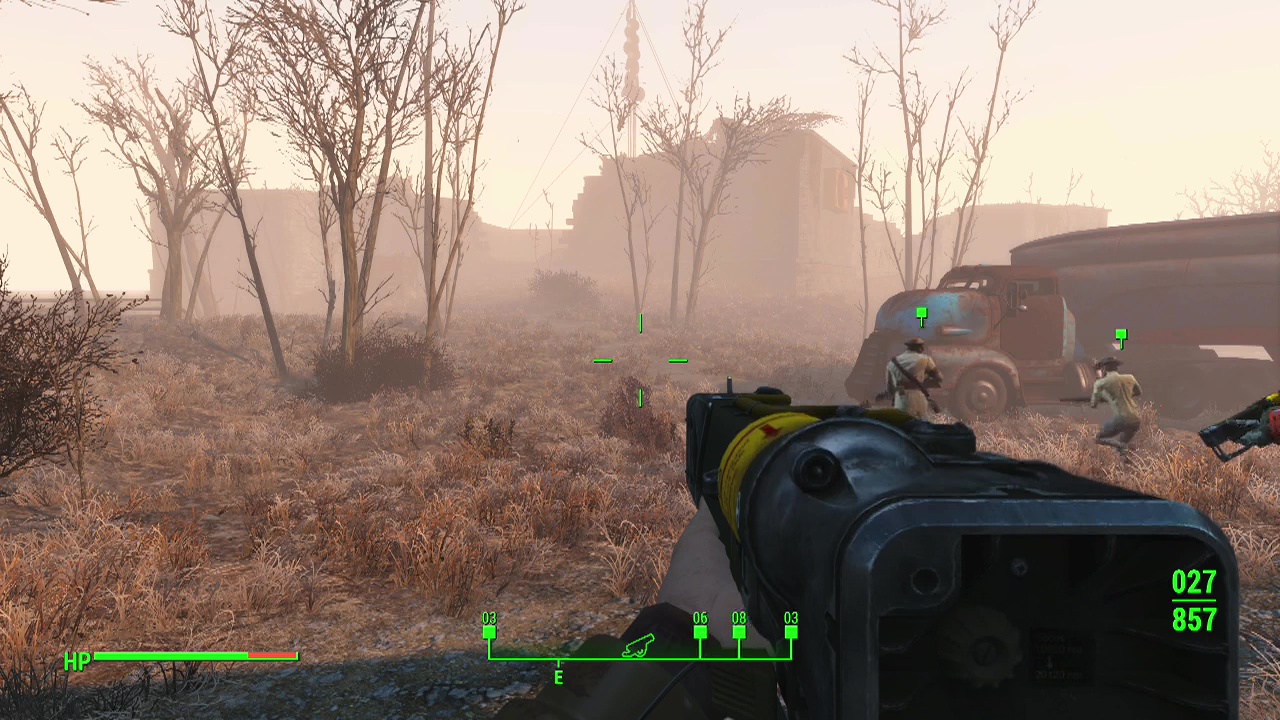
The Minutemen will troop out of the diner and start moving towards the Castle. Follow after the group and when you all reach the main courtyard area the attack will begin.
Objective: Clear the courtyard
As you enter the area you'll see the place is full of mirelurk eggs as well as mirelurks. When your squad gets close enough, the mirelurks will attack your forces. Be careful moving up onto the walls here on higher difficulties as there are several submerged mirelurks and egg clutches up there as well (and getting attacked alone by a sudden legendary or high level mirelurk can be a death sentence). You will want to clear out those walls though as they provide the best firing positions against the upcoming main enemy of the quest. Help the Minutemen kill the mirelurks roaming the area (be thorough as you don't want to be blindsided while you are fighting the main enemy later) and a new objective will pop up.
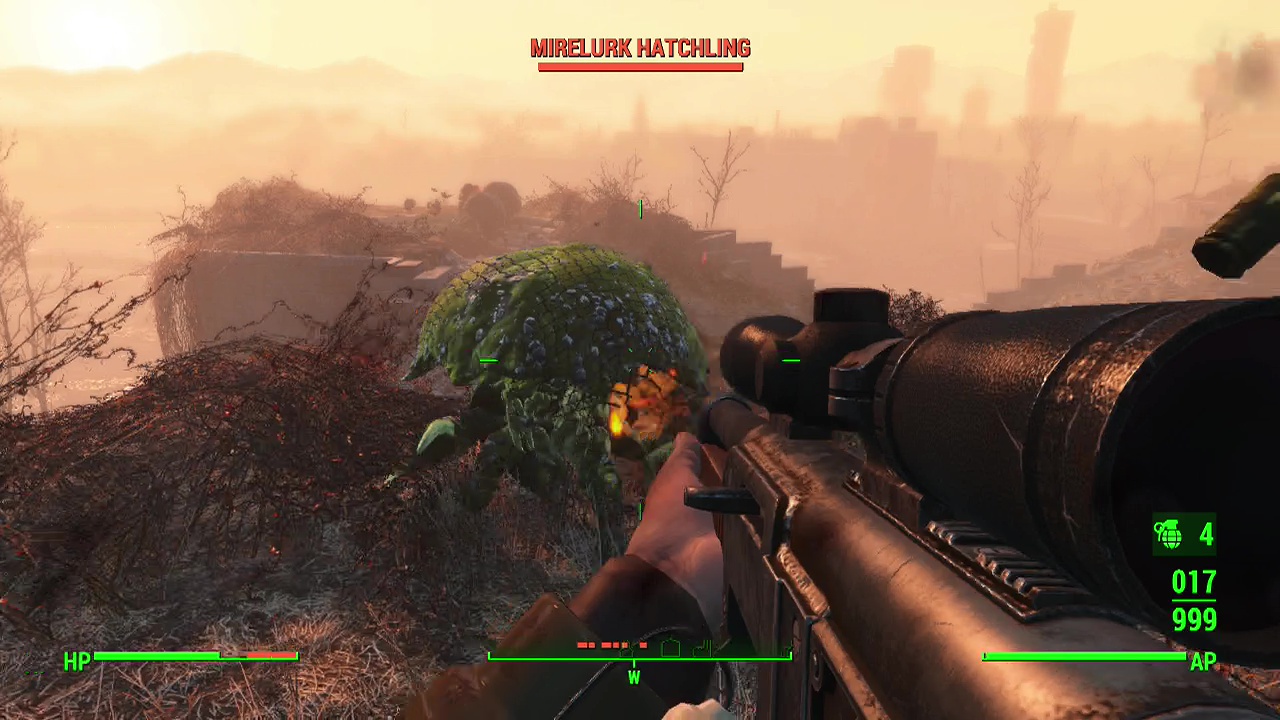
Objective: Destroy the egg clutches
Scattered around the courtyard and the surrounding walls are clusters of mirelurk eggs. Approaching them will release mirelurk hatchlings (weak enemies that leap at you to attack). Use melee strikes with your weapon to kill these weak opponents and destroy the eggs as well. You'll notice the ground starts to shake after taking down a few egg clusters, triggering the arrival of the mirelurk queen when you have smashed enough.
Objective: Kill the mirelurk queen
Welcome to the big time enemies folks. The mirelurk queen is extremely lethal on any difficulty (but obviously far more dangerous on survival mode). Her ranged attack deal poison damage, bypassing your armour and defenses and dealing direct damage to your health if she hits you. Her melee attack deals massive damage as well so avoiding being hit is your main strategy here. She is extremely accurate as well, meaning that you will need to have solid cover if you hope to evade her attacks.
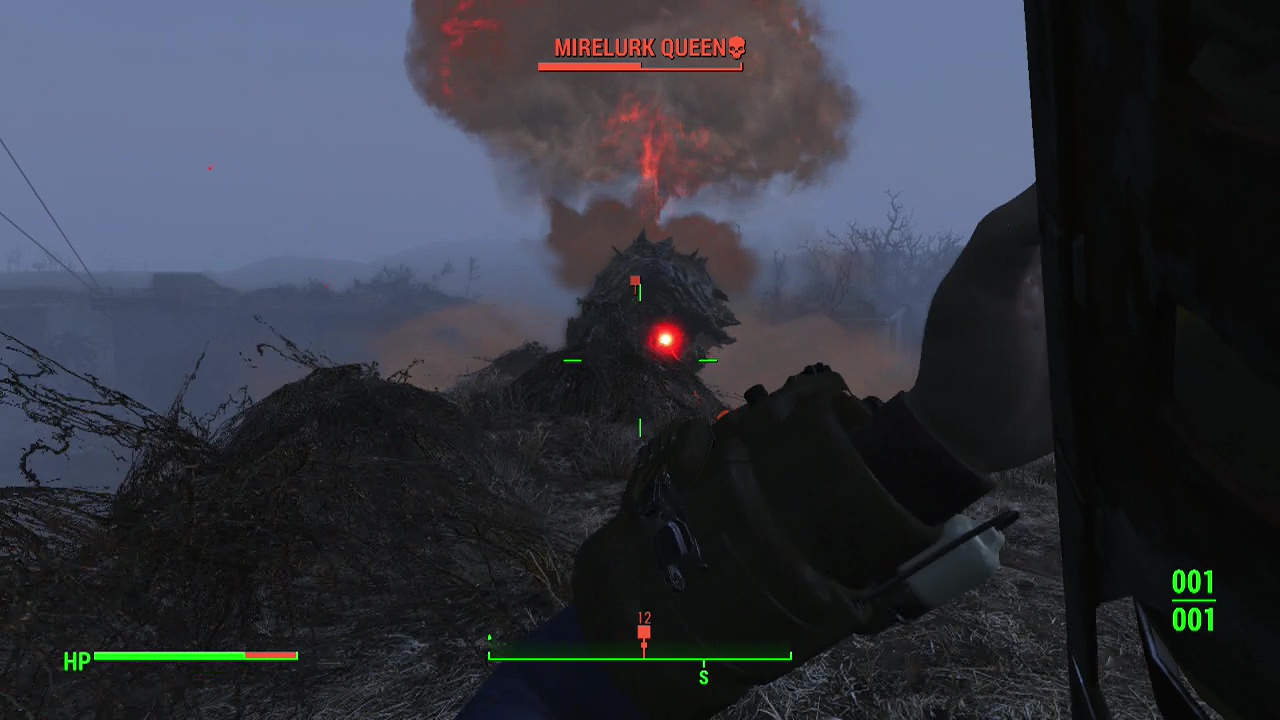
The best way to deal with her is to get up onto the walls while she is initially distracted by your companion and the Minutemen forces and fire down mini-nukes with your fatman. On survival difficulty it will take at least four shots to bring her down, but you should manage to survive. If you do get hit by her poison attack, immediately take stimpaks to counteract the damage over time effect. You can also use the walls and gateways to mess with her path-finding to try and exploit her AI or leave everything to your allies as you fire long range weapons from far away.
Objective: Meet the Minutemen in the courtyard
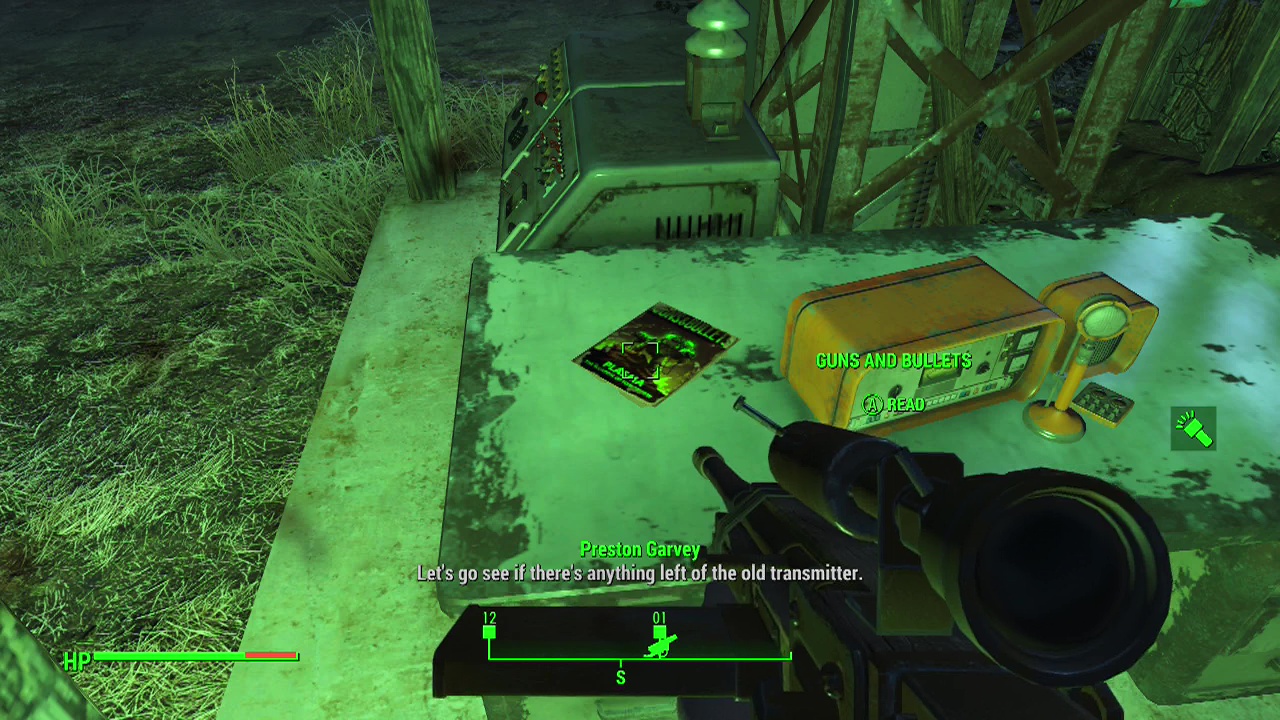
Regroup with Preston and any other surviving members of the group, looting the mirelurk queen for some meat along the way. After a quick chat, you will be tasked with powering up a radio transmitter to herald the return of the Minutemen to the Castle.
Note: On the table beside the transmitter in the center of the courtyard is a copy of Guns and Bullets for you to grab.
Objective: Power up the radio transmitter
You are going to need to build enough generators to provide ten power to activate the transmitter here. The easiest way is to build two medium generators for 6x screws, 6x gears, 14x steel, 6x rubber, 6x copper and 2x ceramic. You can always pick up the items from your main settlement and fast travel back as the enemies won't repopulate the area while you are gone. Connect the generators to the transmitter using wires and the Castle will be up and running once more.
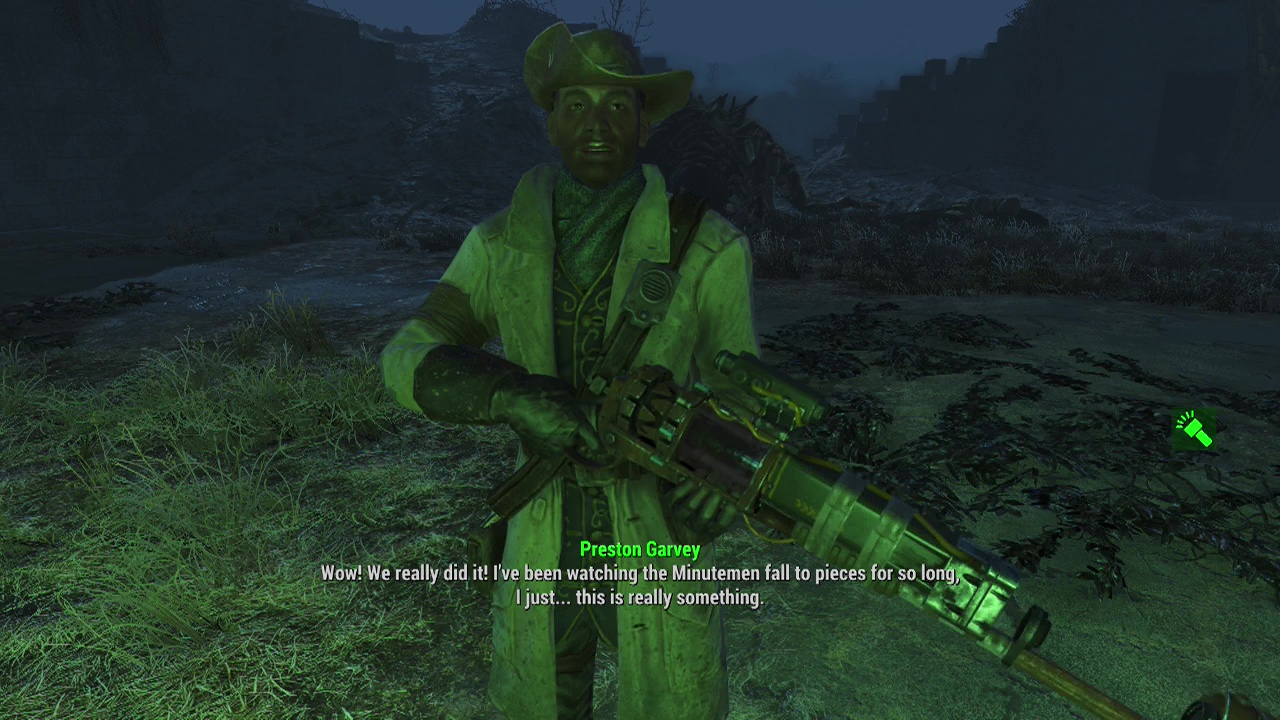
Objective: Talk to Preston Garvey
After the transmitter is online, trundle over to Preston to finish things up and and end this quest.