
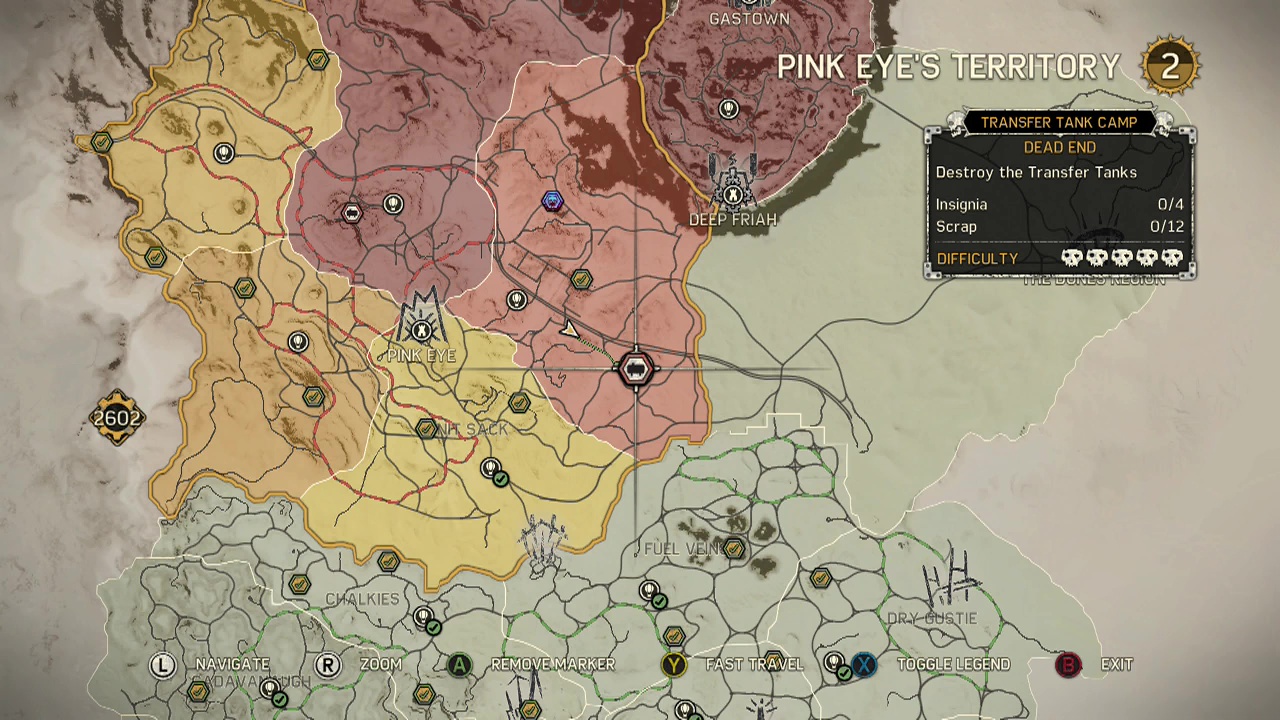
DEAD END
Area: Rot 'n' rusties
Difficulty Rating: 5/5
Base Defenses:
Sniper x 3
Fire tower x 3
Flame stream x 1 (gas tank is slightly to the left of the gate on the top of the fence)
Massive gate
Collectibles:
Insignia – 4
Scrap – 12
Timeline:
0:03:02 – Scrap 1
0:04:50 – Scrap 2
0:04:52 – Scrap 3
0:06:19 – Scrap 4
0:07:04 – Scrap 5
0:07:14 – Insignia 1
0:08:45 – Scrap 6
0:09:03 – Scrap 7
0:11:07 – Scrap 8
0:11:27 – Scrap 9
0:11:35 – Insignia 2
0:14:07 – Scrap 10
0:15:06 – Scrap 11
0:16:54 – Scrap 12
0:17:00 – Insignia 3
0:20:40 – Insignia 4
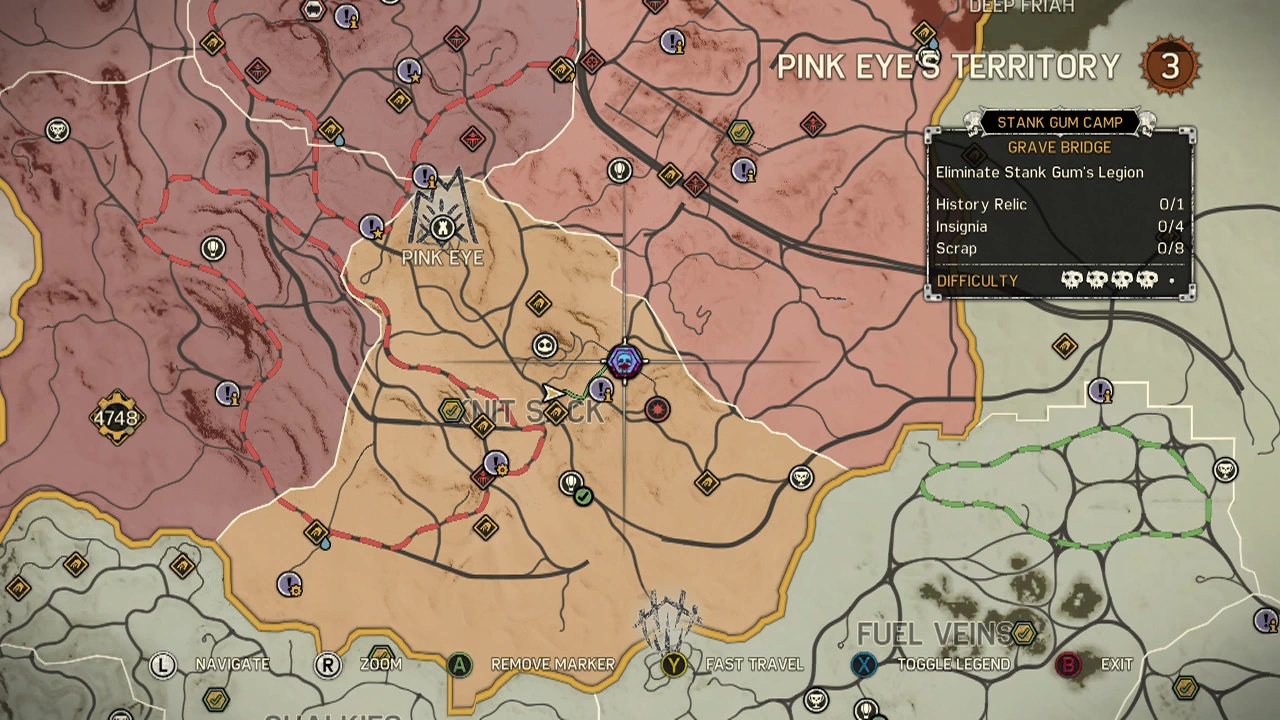
GRAVE BRIDGE
Area: Knit sack
Difficulty Rating: 4/5
Base Defenses:
Sniper x 3
Flame stream x 2 (both gas tanks are on raised platforms behind the fence on each side of the bridge)
Collectibles:
History relic – 1
Insignia – 4
Scrap – 8
Timeline:
0:05:20 – Scrap 1
0:06:16 – Scrap 2
0:06:30 – Insignia 1
0:06:40 – Scrap 3
0:08:33 – Insignia 2
0:09:47 – Scrap 4
0:09:52 – Scrap 5
0:10:27 – Scrap 6
0:12:15 – Scrap 7
0:12:29 – Relic 1
0:13:22 – Scrap 8
0:13:40 – Insignia 3
0:14:54 – Insignia 4
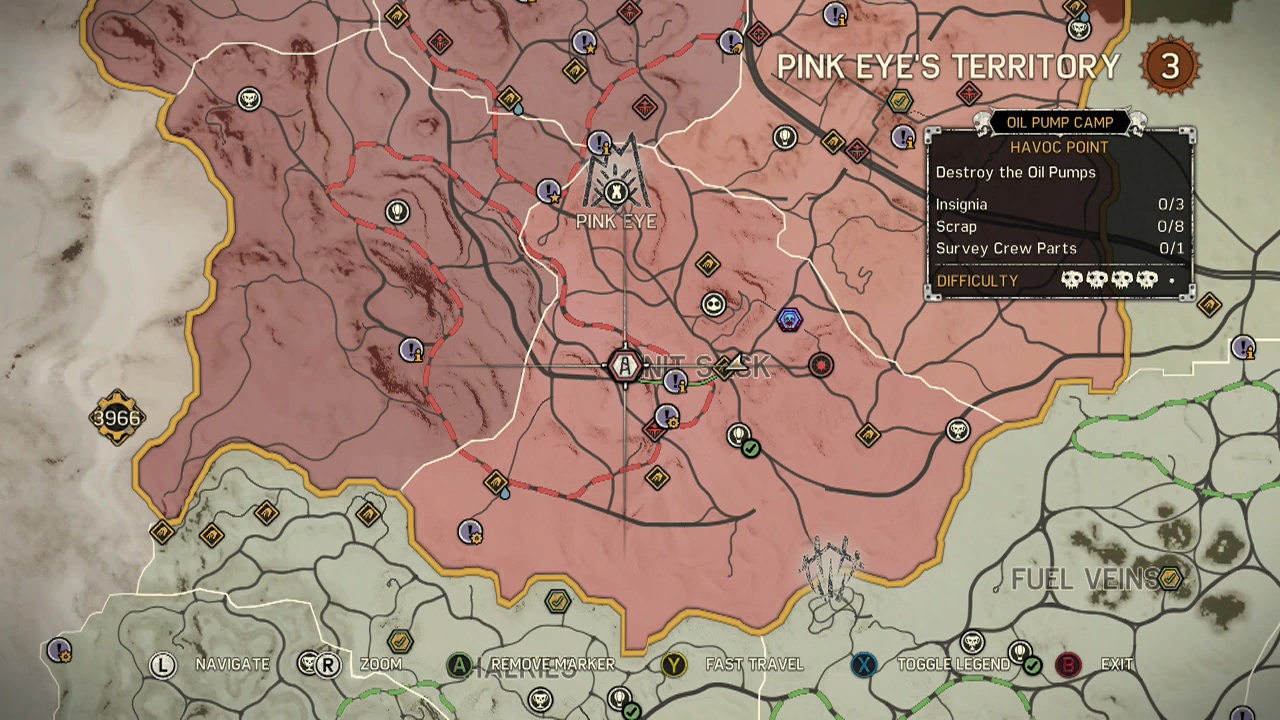
HAVOC POINT
Area: Knit sack
Difficulty Rating: 4/5
Base Defenses:
Fire tower x 3
Sniper x 2
Flame stream x 2 (one gas tank above the fence line to the right of the flame streams, the second is on a rooftop further inside the camp to the left of the flame stream)
Fortified gate (explosion restricted)
Note: You will face four waves of enemies upon entering the camp, so make sure you are well prepared and upgraded before entering.
Collectibles:
Insignia – 3
Scrap – 8
Survey crew parts – 1
Timeline:
0:12:08 – Scrap 1
0:12:33 – Survey crew parts 1
0:12:33 – Insignia 1
0:12:45 – Scrap 2
0:12:45 – Scrap 3
0:13:20 – Scrap 4
0:13:36 – Insignia 2
0:14:00 – Insignia 3
0:14:51 – Scrap 5
0:15:10 – Scrap 6
0:15:32 – Scrap 7
0:15:32 – Scrap 8
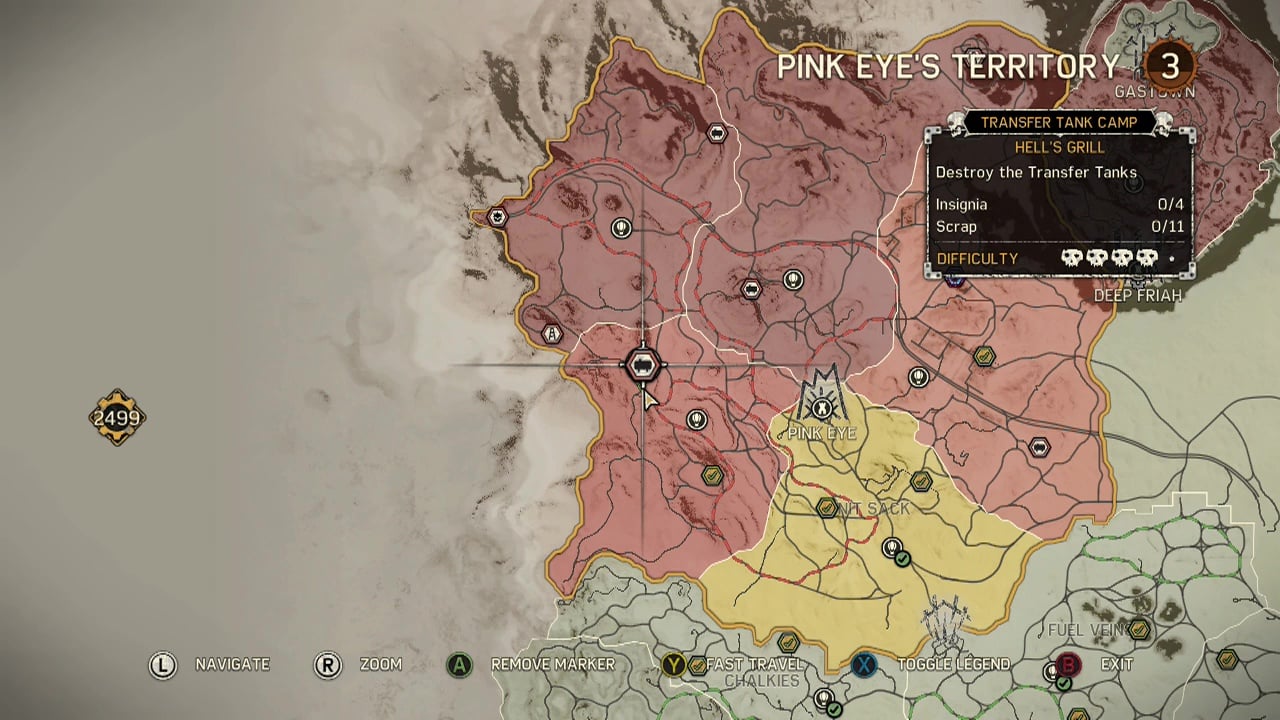
HELL'S GRILL
Area: Wailing wind
Difficulty Rating: 4/5
Base Defenses:
Sniper x 3
Fire tower x 2
Massive gate (ramming restricted)
Collectibles:
Insignia – 4
Scrap – 11
Timeline:
0:03:42 – Scrap 1
0:04:15 – Scrap 2
0:04:30 – Scrap 3
0:04:56 – Insignia 1
0:08:11 – Insignia 2
0:08:57 – Scrap 4
0:09:40 – Scrap 5
0:10:15 – Scrap 6
0:11:24 – Scrap 7
0:11:34 – Scrap 8
0:11:45 – Insignia 3
0:12:24 – Scrap 9
0:15:29 – Scrap 10
0:17:49 – Scrap 11
0:20:46 – Insignia 4
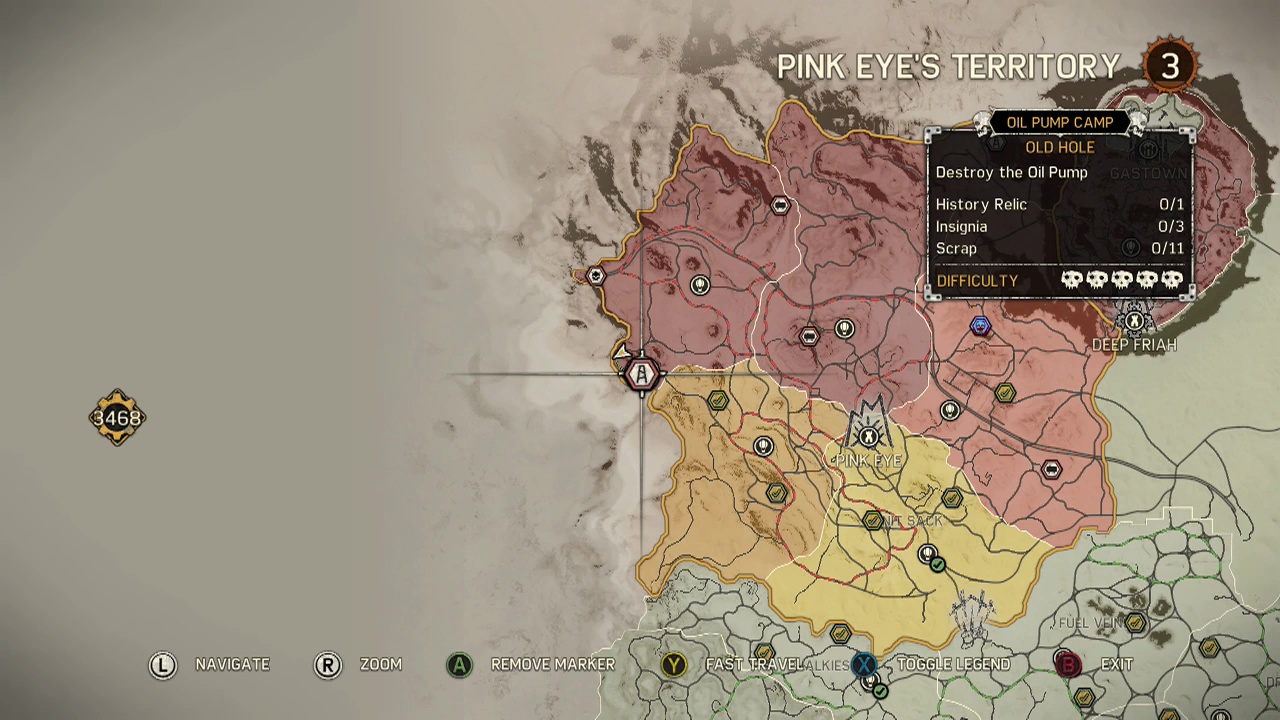
OLD HOLE
Area: Grandrise
Difficulty Rating: 5/5
Base Defenses:
Sniper x 2
Collectibles:
History relic – 1
Insignia – 3
Scrap – 11
Timeline:
0:02:45 – Scrap 1
0:02:45 – Insignia 1
0:03:01 – Scrap 2
0:03:27 – Scrap 3
0:05:58 – Scrap 4
0:06:25 – Scrap 5
0:06:55 – Insignia 2
0:07:03 – Scrap 6
0:10:22 – Insignia 3
0:10:29 – Scrap 7
0:12:10 – Scrap 8
0:12:27 – Relic 1
0:12:47 – Scrap 9
0:13:04 – Scrap 10
0:13:52 – Scrap 11
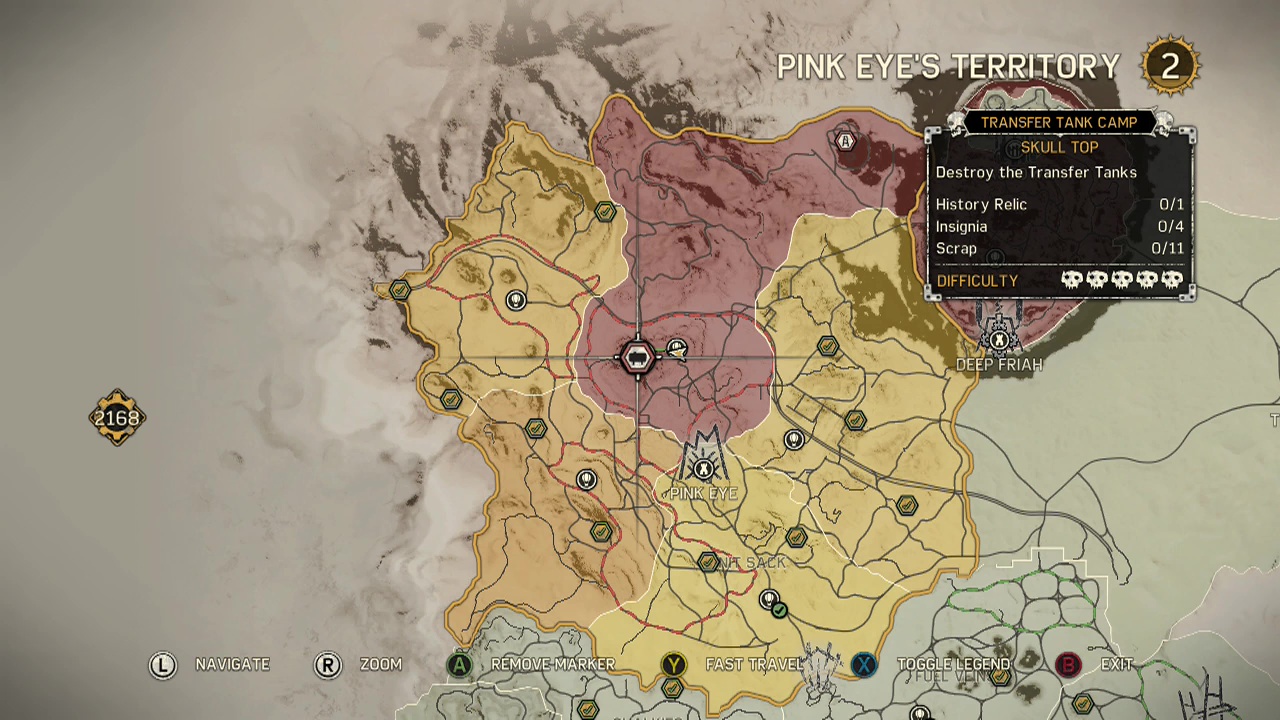
SKULL TOP
Area: The heights
Difficulty Rating: 5/5
Base Defenses:
Fire tower x 3
Massive gate
Collectibles:
History relic – 1
Insignia – 4
Scrap – 11
Timeline:
0:04:47 – Scrap 1
0:05:27 – Insignia 1
0:05:39 – Scrap 2
0:08:54 – Scrap 3
0:09:23 – Scrap 4
0:09:28 – Relic 1
0:09:28 – Insignia 2
0:10:37 – Scrap 5
0:14:08 – Insignia 3
0:14:14 – Scrap 6
0:14:25 – Scrap 7
0:15:04 – Scrap 8
0:15:19 – Scrap 9
0:15:33 – Scrap 10
0:18:26 – Insignia 4
0:18:48 – Scrap 11
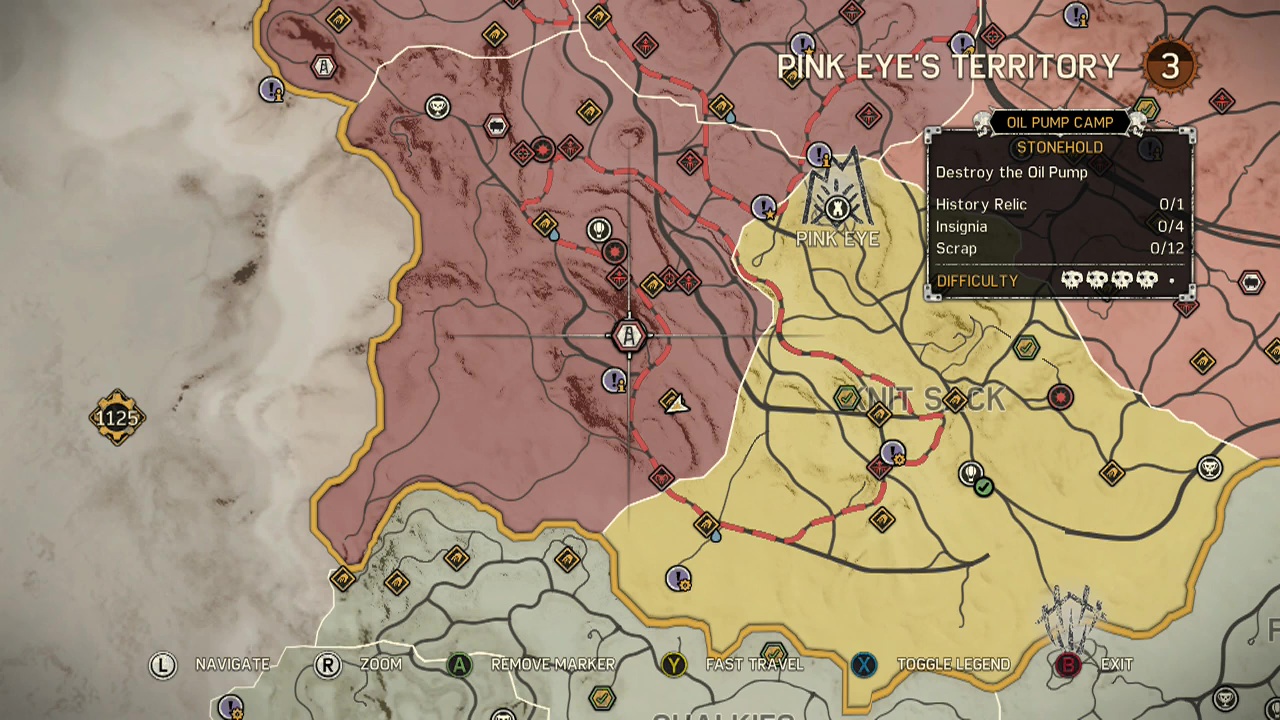
STONEHOLD
Area: Wailing wind
Difficulty Rating: 4/5
Base Defenses:
Fire tower x 2
Sniper x 1
Massive gate
Collectibles:
History relic – 1
Insignia – 4
Scrap – 12
Timeline:
0:02:58 – Scrap 1
0:05:10 – Scrap 2
0:05:31 – Insignia 1
0:07:23 – Insignia 2
0:07:45 – Scrap 3
0:08:01 – Scrap 4
0:08:22 – Scrap 5
0:08:29 – Scrap 6
0:09:04 – Insignia 3
0:09:06 – Scrap 7
0:09:25 – Scrap 8
0:11:11 – Insignia 4
0:12:00 – Scrap 9
0:12:13 – Scrap 10
0:12:21 – Relic 1
0:13:01 – Scrap 11
0:14:47 – Scrap 12
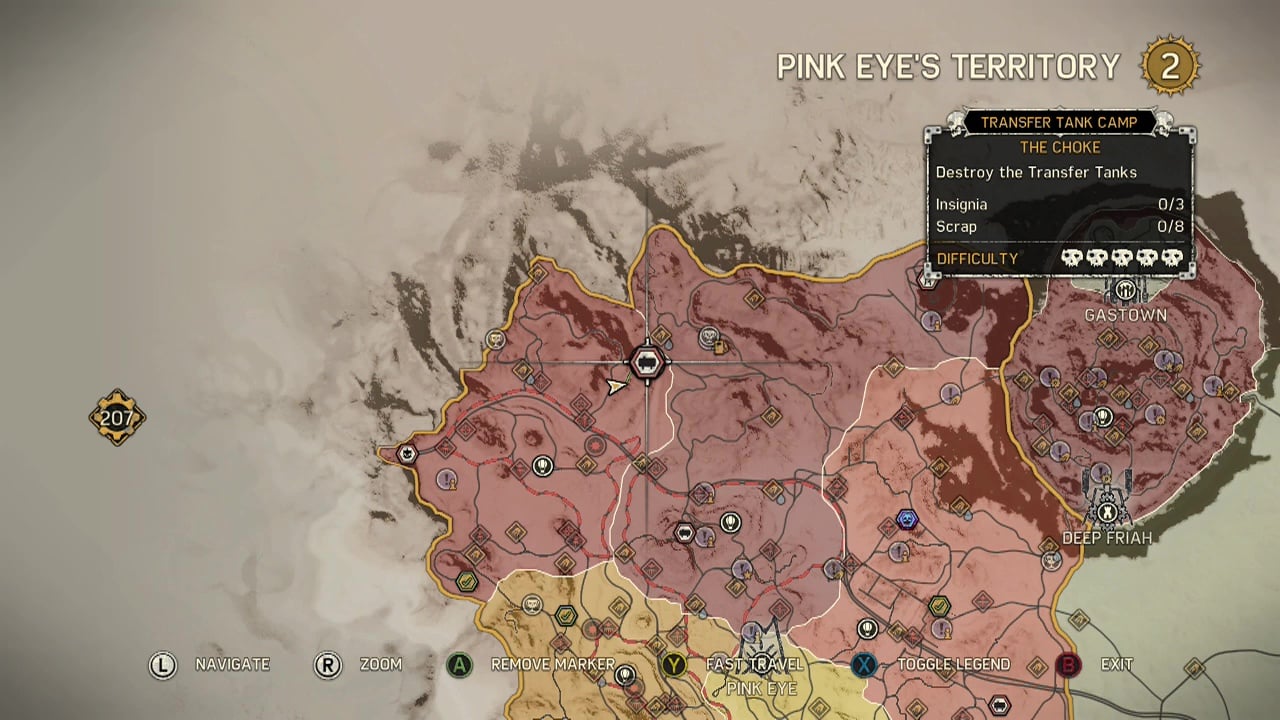
THE CHOKE
Area: Grandrise
Difficulty Rating: 5/5
Base Defenses:
Fire tower x 3
Sniper x 3
Flame stream x 2 (gas tank above the wall to the left of the South flame stream, )
Massive gate x 2 (explosion restricted)
Collectibles:
Insignia – 3
Scrap – 8
Timeline:
0:05:16 – Scrap 1
0:06:05 – Scrap 2
0:06:24 – Insignia 1
0:06:46 – Scrap 3
0:07:13 – Insignia 2
0:07:42 – Scrap 4
0:08:51 – Scrap 5
0:10:28 – Scrap 6
0:13:09 – Insignia 3
0:13:16 – Scrap 7
0:13:16 – Scrap 8
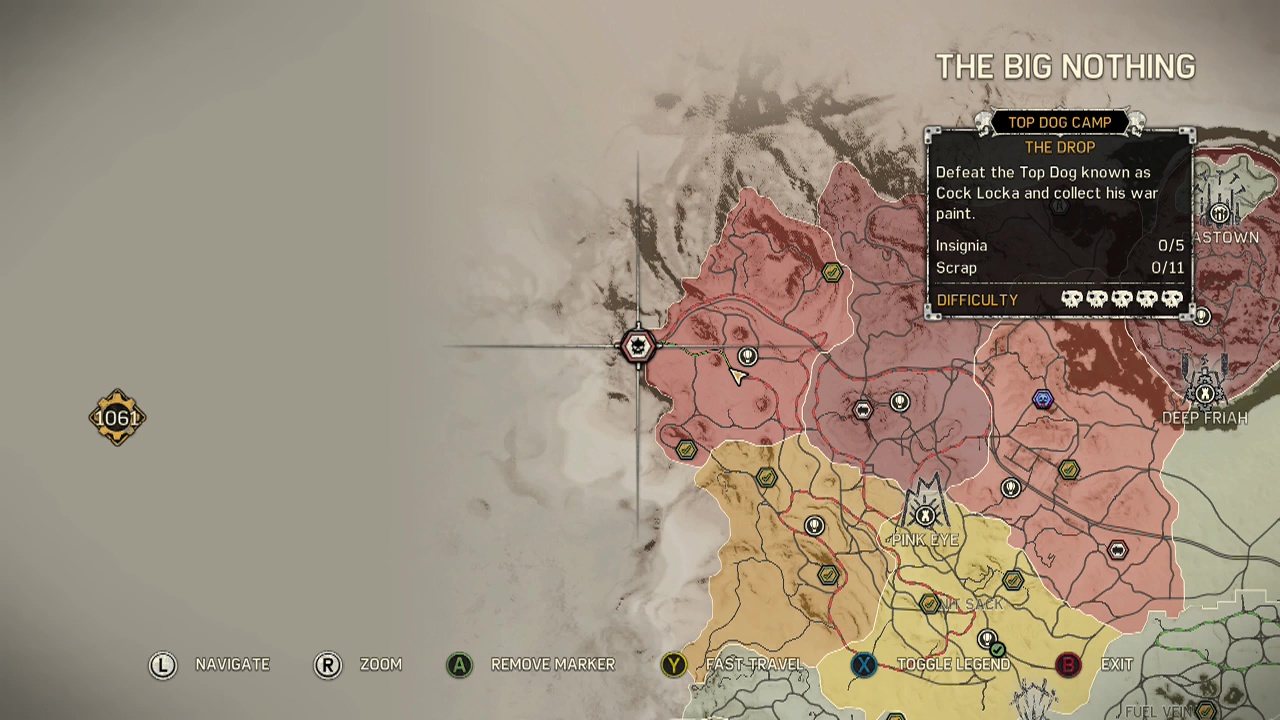
THE DROP
Area: Grandrise
Difficulty Rating: 5/5
Base Defenses:
Sniper x 2
Fire tower x 4
Massive gate
Collectibles:
Insignia – 5
Scrap – 11
Timeline:
0:04:28 – Insignia 1
0:04:32 – Scrap 1
0:04:41 – Scrap 2
0:06:52 – Scrap 3
0:06:52 – Insignia 2
0:07:56 – Insignia 3
0:08:04 – Scrap 4
0:08:09 – Scrap 5
0:08:20 – Scrap 6
0:08:57 – Scrap 7
0:09:03 – Scrap 8
0:09:09 – Insignia 4
0:09:17 – Scrap 9
0:09:49 – Scrap 10
0:15:16 – Insignia 5
0:15:59 – Scrap 11
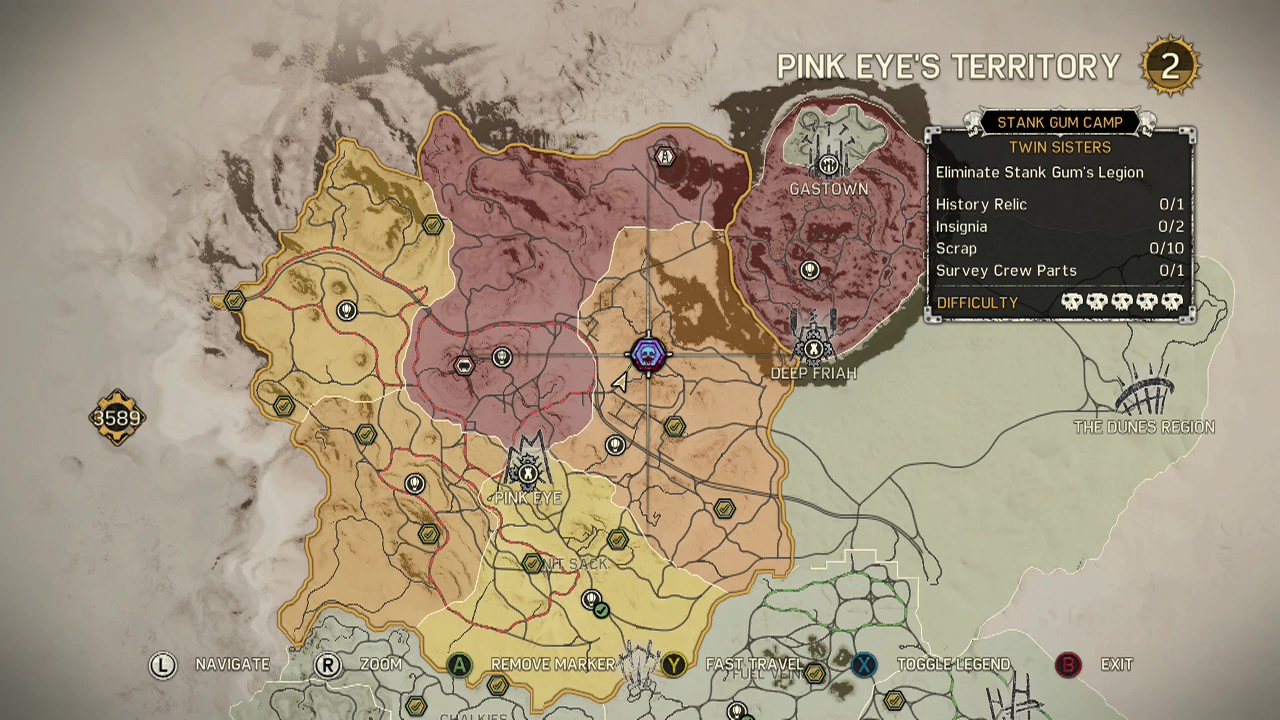
TWIN SISTERS
Area: Rot 'n' rusties
Difficulty Rating: 5/5
Base Defenses:
Sniper x 4
Fire tower x 2
Flame stream x 1 (gas tank at the very top of the same silo as the flame stream)
Collectibles:
History relic – 1
Insignia – 2
Scrap – 10
Survey crew parts – 1
Timeline:
0:05:10 – Scrap 1
0:05:30 – Scrap 2
0:05:49 – Scrap 3
0:06:36 – Scrap 4
0:09:27 – Scrap 5
0:09:52 – Insignia 1
0:15:08 – Insignia 2
0:16:04 – Scrap 6
0:16:08 – Survey crew parts 1
0:17:00 – Scrap 7
0:17:48 – Scrap 8
0:17:59 – Scrap 9
0:18:12 – Relic 1
0:18:34 – Scrap 10
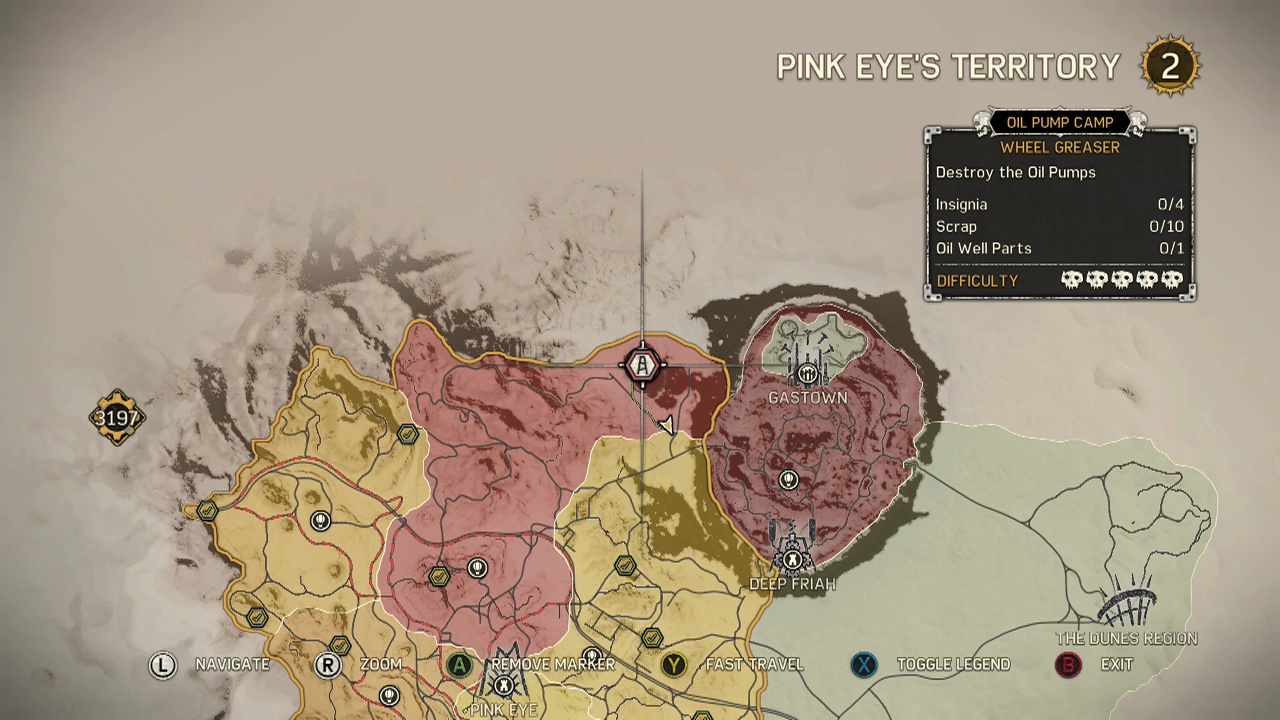
WHEEL GREASER
Area: The heights
Difficulty Rating: 5/5
Base Defenses:
Sniper x 4
Fire tower x 5
Flame stream x 1 (On the South edge of the camp, the gas tank is up high above the walls to the left of the flame stream)
Massive gate (harpoon restricted)
Collectibles:
Insignia – 4
Scrap – 10
Oil well parts – 1
Timeline:
0:04:57 – Scrap 1
0:05:05 – Scrap 2
0:05:15 – Scrap 3
0:05:28 – Scrap 4
0:05:34 – Scrap 5
0:05:42 – Insignia 1
0:08:34 – Oil well parts 1
0:08:45 – Insignia 2
0:10:02 – Scrap 6
0:10:08 – Scrap 7
0:10:16 – Insignia 3
0:10:23 – Scrap 8
0:11:55 – Scrap 9
0:12:03 – Scrap 10
0:12:27 – Insignia 4