STORY 08 – Family Matters
Recommended Level: 6
Note: Requires completion of main story quest "Ladies of the Wood" to conclude this quest.
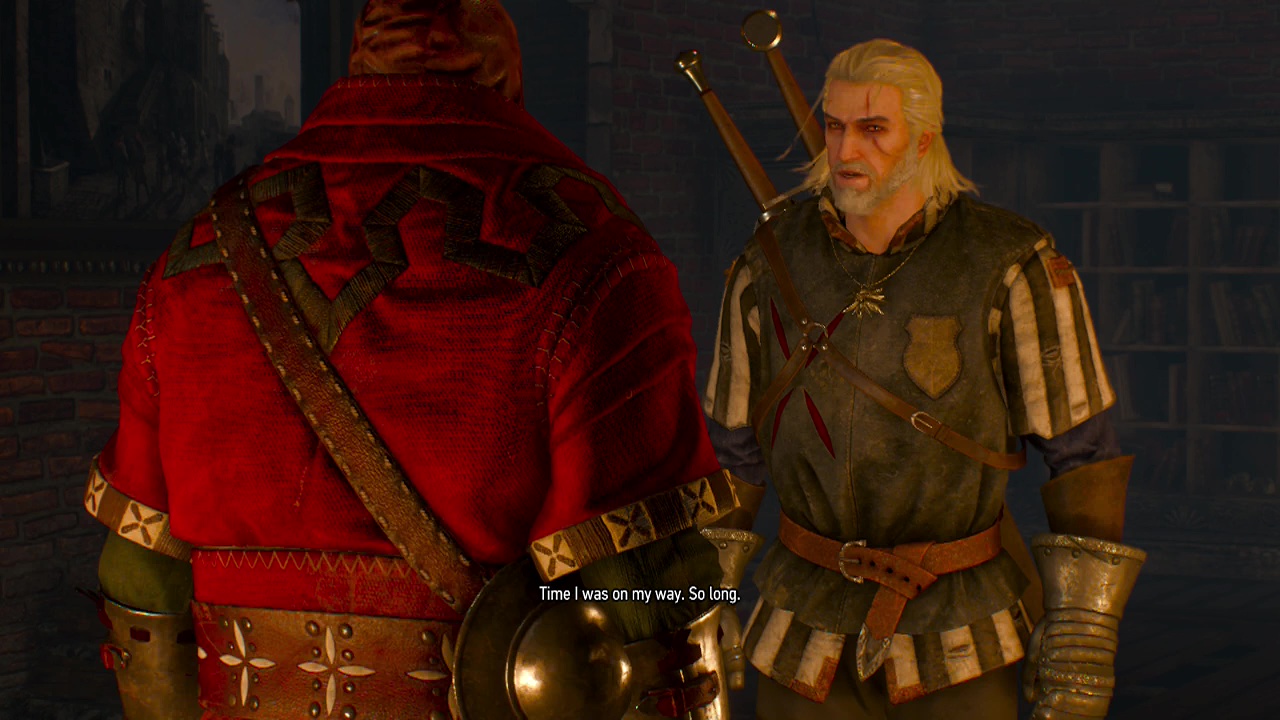
At the end of the Bloody Baron quest, Geralt had insisted on searching the rooms of the baroness and his daughter to discover what happened to them.
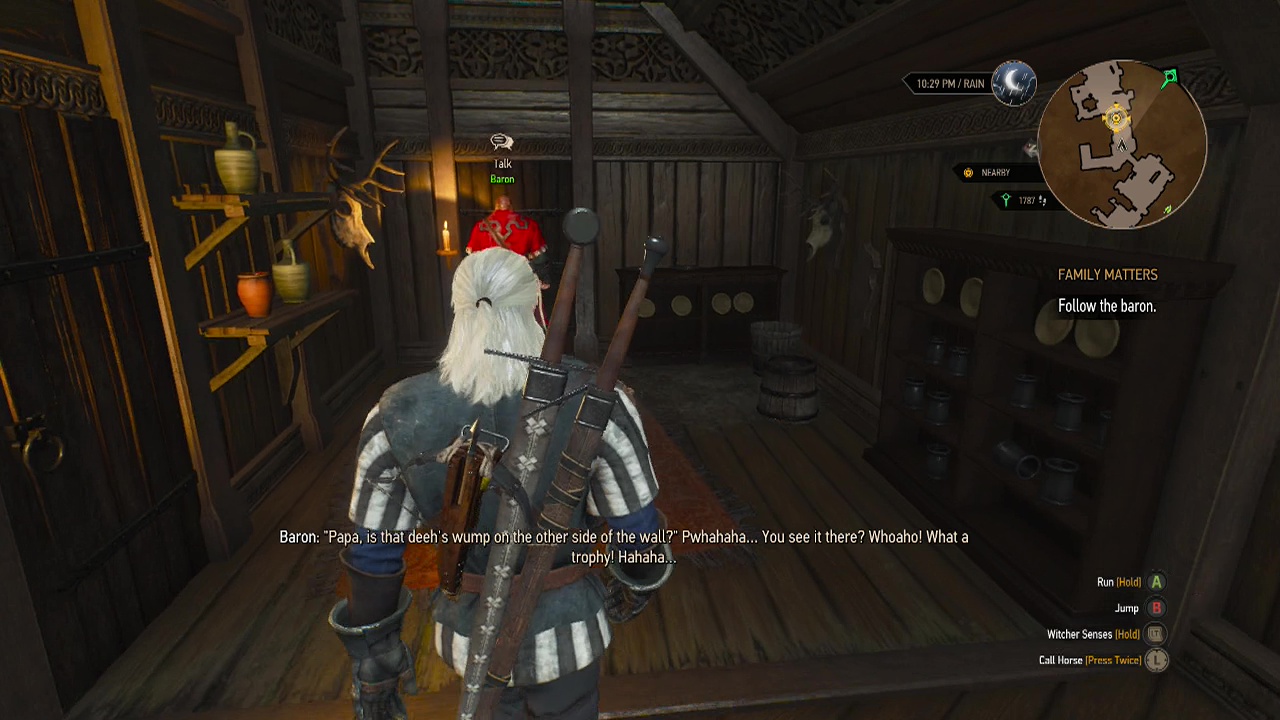
Objective: Follow the Baron
The baron will lurch to his feet and lead you out of the room and up to to where the ladies' chambers can be found. After the baron opens the jammed door, you'll be free to access the rooms.
Objective: Use your witcher senses to search the room
Note: Remember to loot the rooms here as there are a lot of valuables to pick up. Apparently the baron doesn't mind.
Baroness's room
Examine the following items in the room to get a good idea of what happened:
- Candlestick on a table to the left of the door
- Flowers on the desk directly across from the door
- Rectangular 'lighter area' on the wall to the right
- Painting of the Baron and Baroness next to the lighter area on wall
- Large wardrobe on the opposite side of the painting
- Candlestick again, now you have the missing piece wine stains will be visible at the base of it
Objective: Use your witcher senses to locate where the scent is coming from
- Wine stains – Follow the scent trail down the stairs to the loose board partway down
- Loose board – pick up the amulet hidden beneath the board
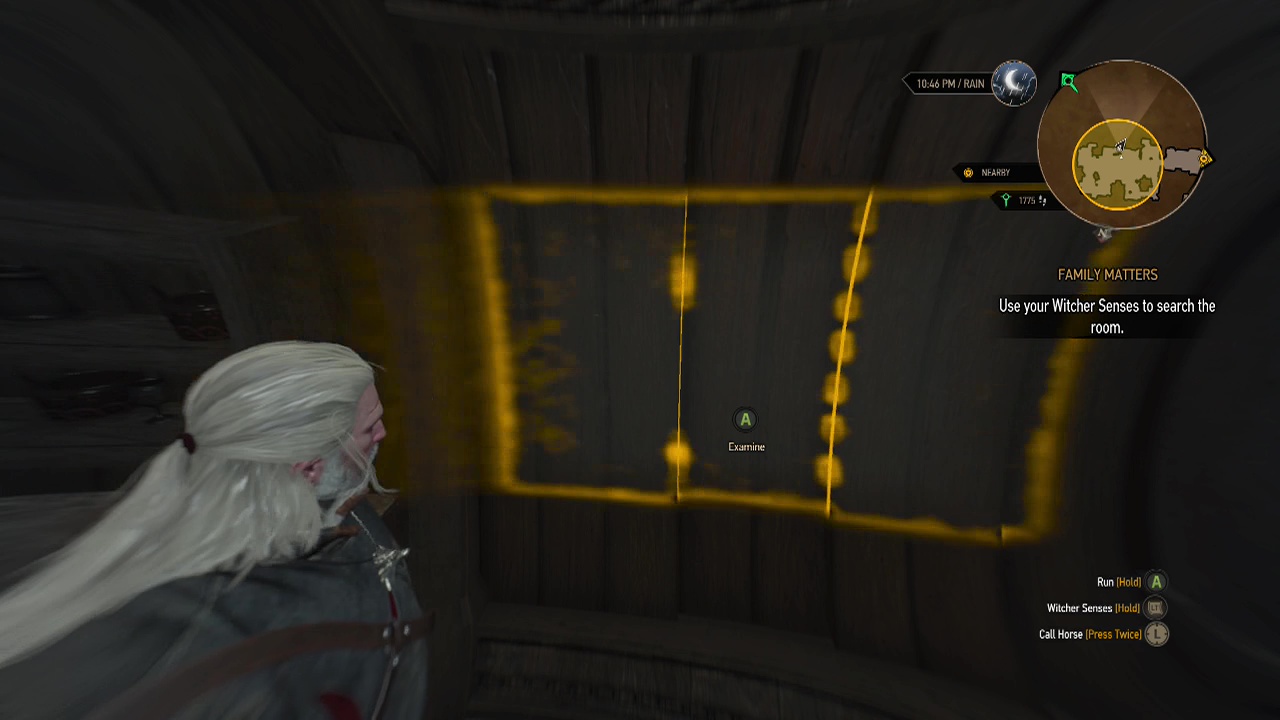
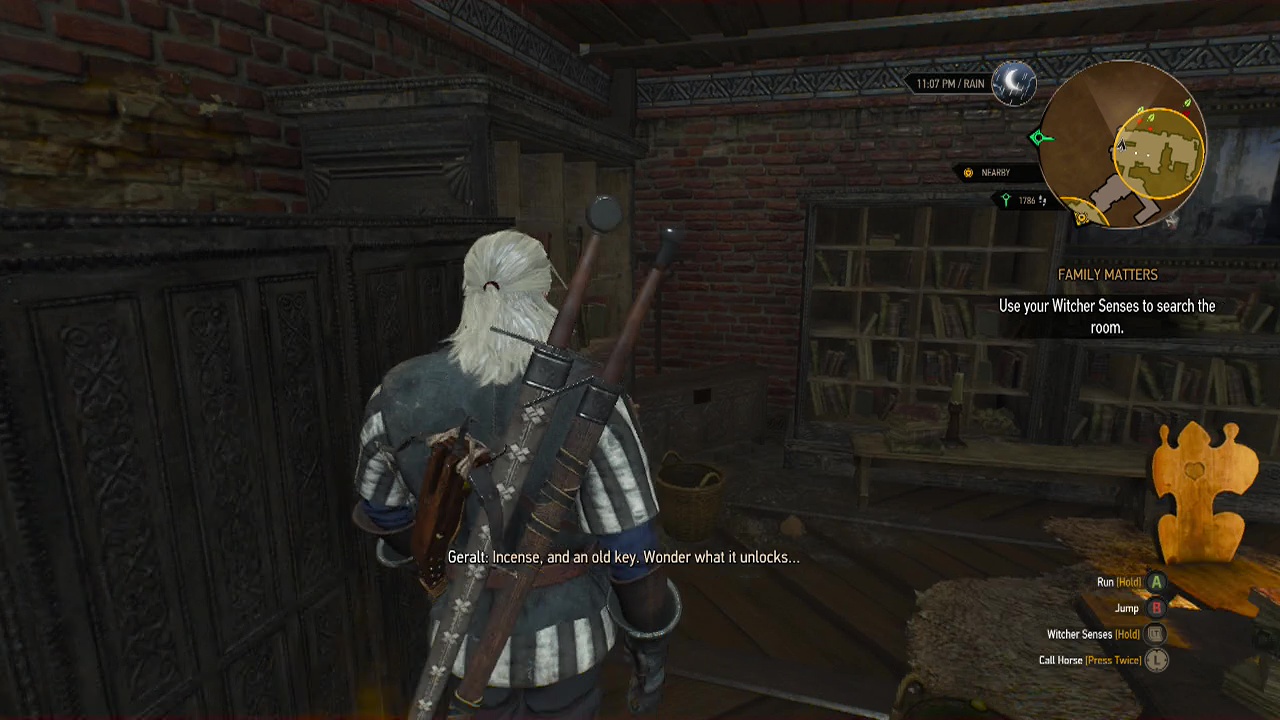
Daughter's room
- Doll next to the daughter's bed
- Rusty key and incense inside wardrobe opposite the door
Once you've got the amulet, you can approach the baron (you can continue investigating as well, but the amulet is all you need to move the quest forward).
Objective: Talk to the baron about what you found
Head back to where the baron is waiting and show him what you found. The amulet will advance the dialogue, but you can ask him about the other items you found as well for some additional information, plus a pretty funny bit of info about the doll.
Objective: Find the pellar's hut
The pellar can be located fairly close by. Blackbough, the nearest village from the Crow's Nest has his hut on the outskirts. Fast-travel and/ or ride to the hut to find a group of the baron's men at the pellar's door. When you near the group, you will enter a discussion with the leader. Here you can convince him to leave using axii or make them leave by force. Either way, once you are done you can talk to the pellar.

STORY SUB-QUEST: A Princess In Distress
Recommended Level: 6
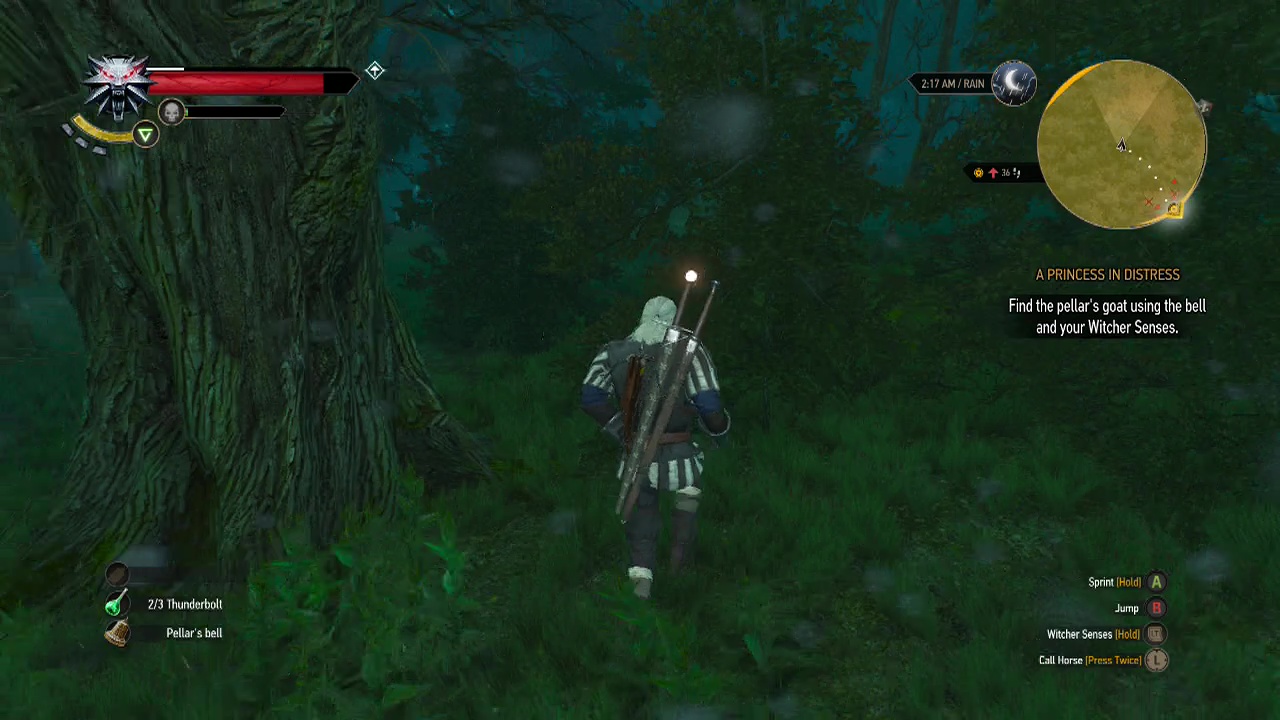
Objective: Find the pellar's goat using the bell and your witcher senses
This is likely the first time you've been given a usable quest item if you've only been taking main story quests so far. The bell should already be equipped in your inventory (in the pockets slot) and can be used by pressing RB. Looks like we have to round up the missing pellar's goat, so follow the mini-map trail into the search area and head straight West across it.
As you cross the area, you'll likely find a group of four wolves near the middle. Quickly dispatch them so you don't have to deal with them while you are leading the goat back shortly. When you reach the Western edge of the search area, you should automatically spot the goat (Geral will say "There you are") and the objective will update. If you don't find princess straight away, just explore the nearby area around the edge of the circle and you should stumble across her.
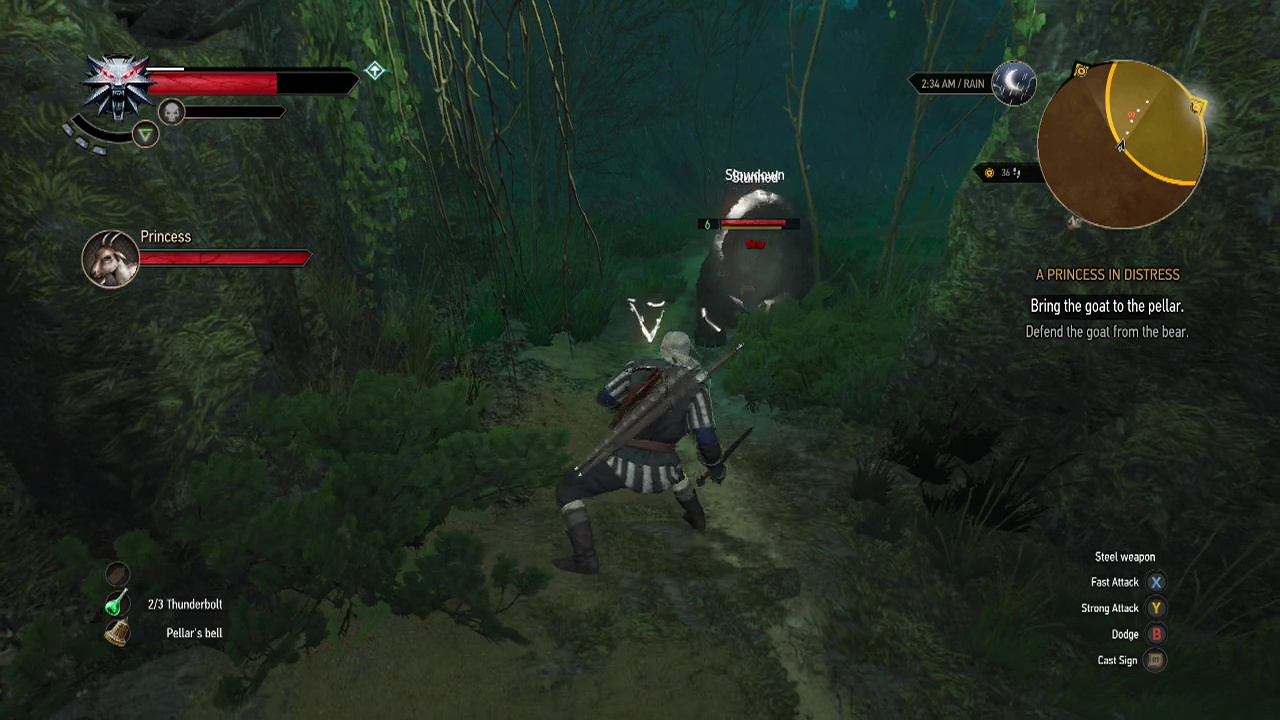
Objective: Bring the goat to the pellar
Before you start leading the goat anywhere, make sure you are prepared to deal with a bear. Bears are vulnerable to beast oil and use of the quen sign for defense. Yes, a bear. As you lead the goat back by ringing the bell, the stupid nanny will decide to wander over to a bear cave, leaving you to fight it before the bear devours the goat. Press RB every few metres as you travel back towards the pellar's hut.
Objective: Defend the goat from the bear
You'll pass over the bodies of the wolves you slaughtered earlier and then the goat will attempt to commit suicide by being eaten by the aforementioned bear. Sigh in weary resignation as you pull out your sword and go to work, using your quen sign to prevent damage, rolling away from the bear's ground smashes and dodging it's vicious claw swipes. Once you emerge victorious, resume your escort quest and finish taking the goat back to the pellar. Dude, buy a better frickin' gate lock next time.
End subquest
Objective: Read the bestiary to learn more about botchlings
Objective: Talk to the baron
Open up the bestiary section of the glossary to find an entry on botchlings. Take note of it's weaknesses when you do so, as depending on your choice later in this quest you may be fighting one of these creatures. Once you've looked up botchlings, return to Crow's Perch once more to see the a building in the castle aflame.
Run through the crowds fleeing from the flames (not like they live in burnable buildings that the fire could spread to or anything. As you near the baron's dwelling at the highest point of the area a scene will trigger. One of the guards asks you to help his brother in the nearby burning stable.
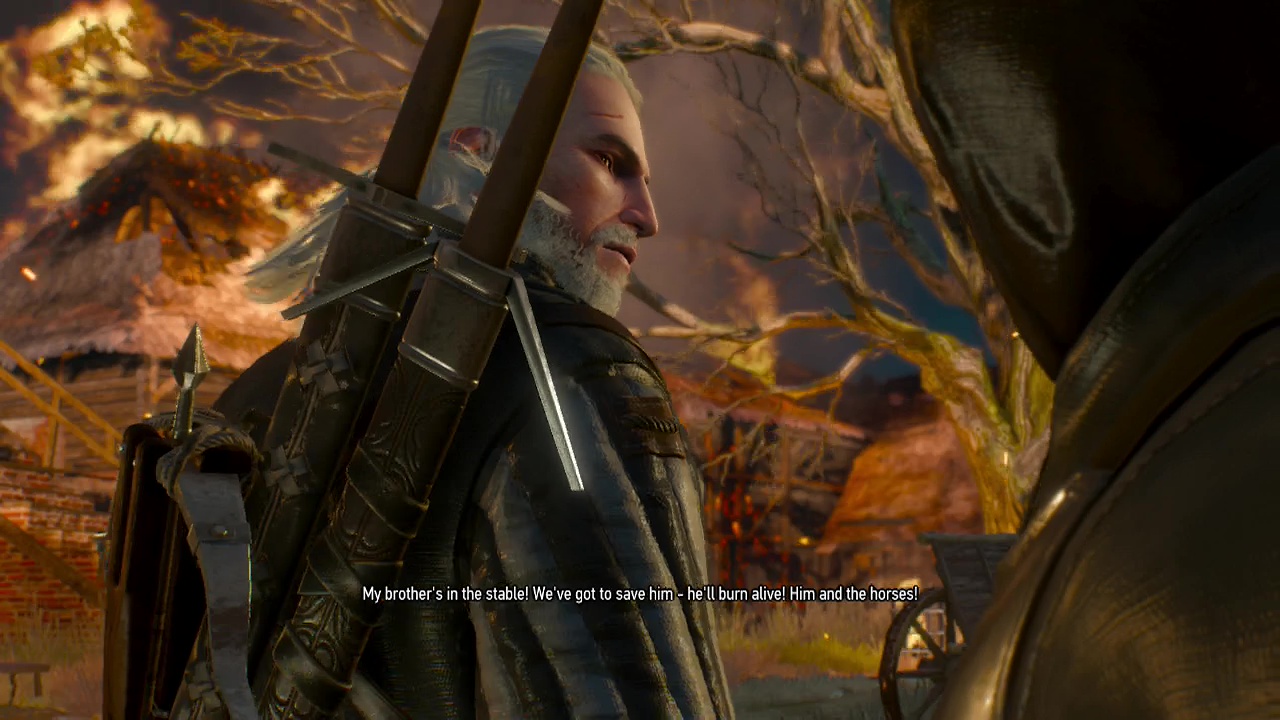
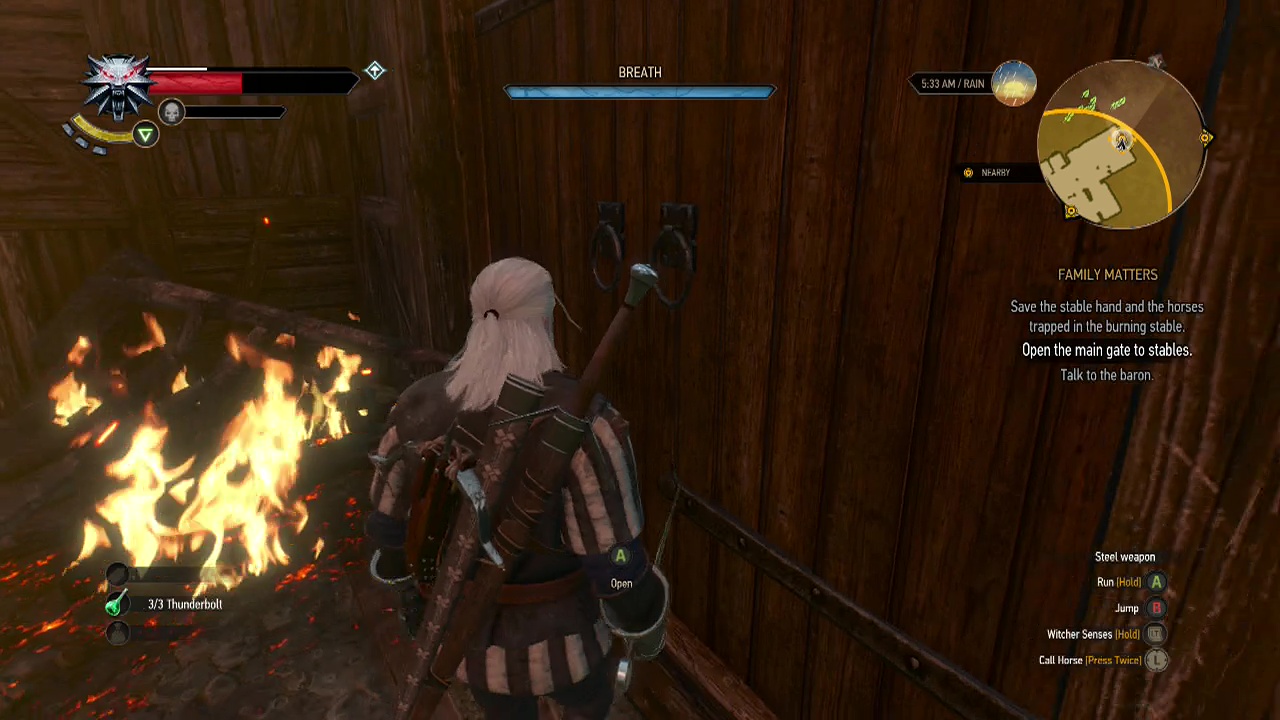
Optional Objective: Save the stable hand and the horses trapped in the burning stable
*Note: Completing this optional objective rewards you with 20 crowns shortly afterward in a quick scene. Wooo. So worth it.
If you do want to rescue Oswin the stable hand, look to the burning stable to spot a convenient ladder leading to the upper level. The objective here is not to talk to Oswin in the barn or release the horses or anything that makes logical sense. Instead, you simply have to get to the main door and press A (Xbox) or X (PS) to open it. Why the stable hand couldn't do this, I have no clue. Climb to the top of the ladder and quickly jump over the barrels blocking your path (you only have a short time before you run out of air and die, so you need to move fast here).
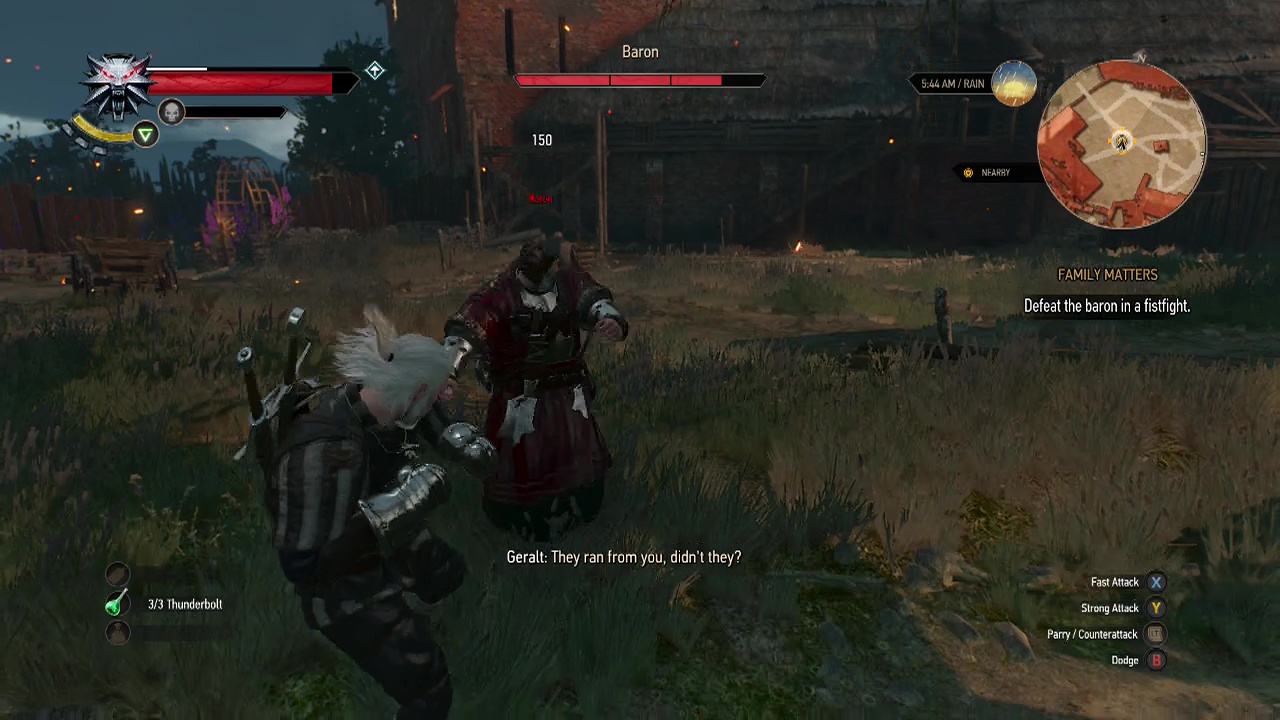
You'll reach a landing overlooking Oswin and the horses below. Jump over the barrels and drop down to the lower area, immediately turning right when you hit the floor. Continue in that direction to find the main door. Look at the middle/ lower area of the door to spot the interation prompt which allows you to open the door and save the stable hand as well as the horses. Immediately after the scene, you'll be confronted by the baron.
Objective: Defeat the baron in a fistfight
If you have the swallow potion or are the correct level for this fight, this should be pretty simple. Spam the baron with light attack chains of three hits, dodging or rolling away after the third hit. He really shouldn't damage you much. If you are underleveled or low on health, you will need to play defensively, watching for the baron's attacks, dodging them and then getting in a quick couple of light attacks before rolling away (hit and run). Once the baron hits the deck, scenes will take over once again.
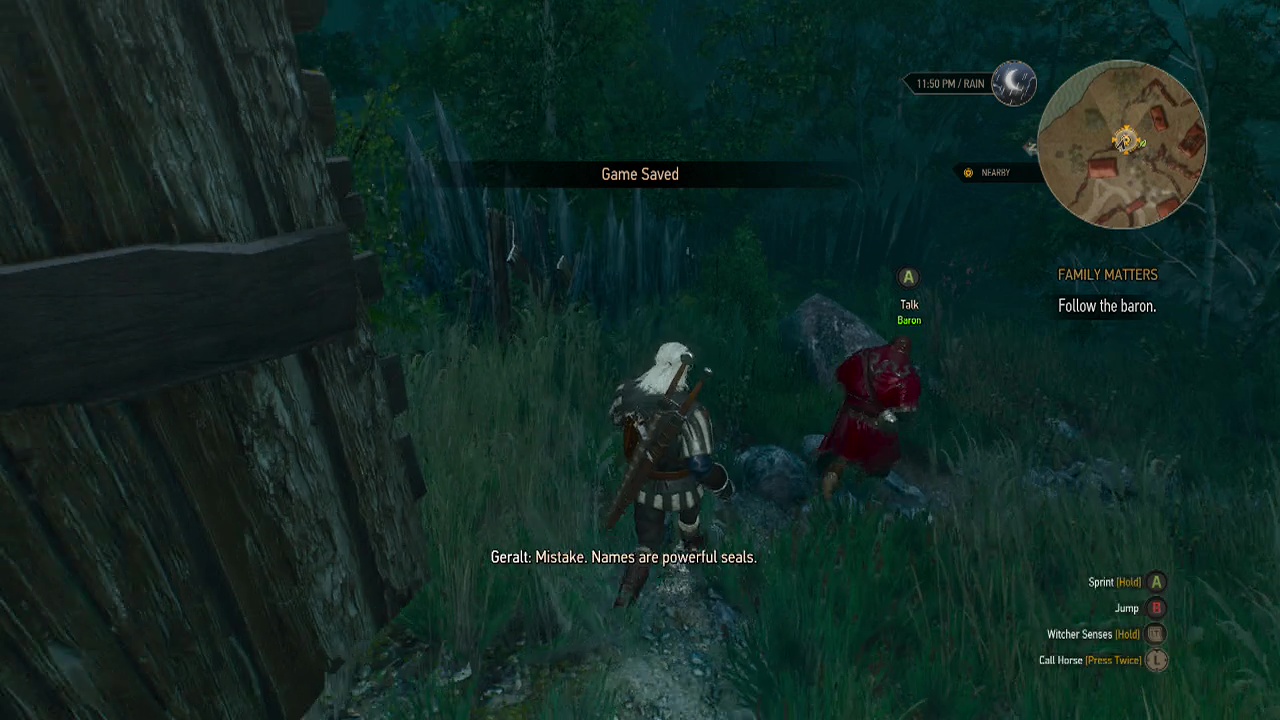
During the scene, you'll find out more about what really happened with the baron and his family, as well as what happened to the lost child. This is the botchling we looked up earlier and Geralt is going to have to use the botchling one way or another to find out what happened to the baron's family.
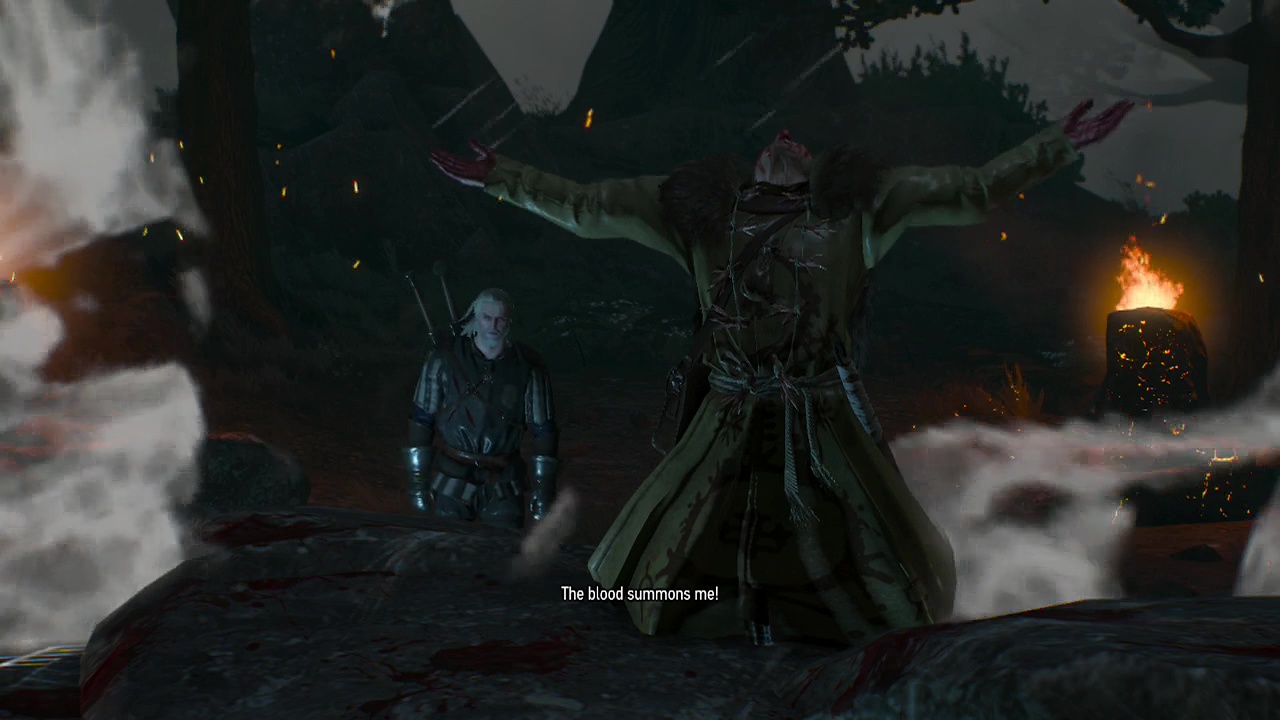
Objective: Follow the baron
After the long talk, the baron will lead you to the place where he buried the body of the dead child. As you arrive, you'll encounter the botchling and get the chance to make a decision on which way you want to deal with it.
[Attack the monster] – Selects option one below
[Turn the botchling into a lubberkin] – Selects option two below
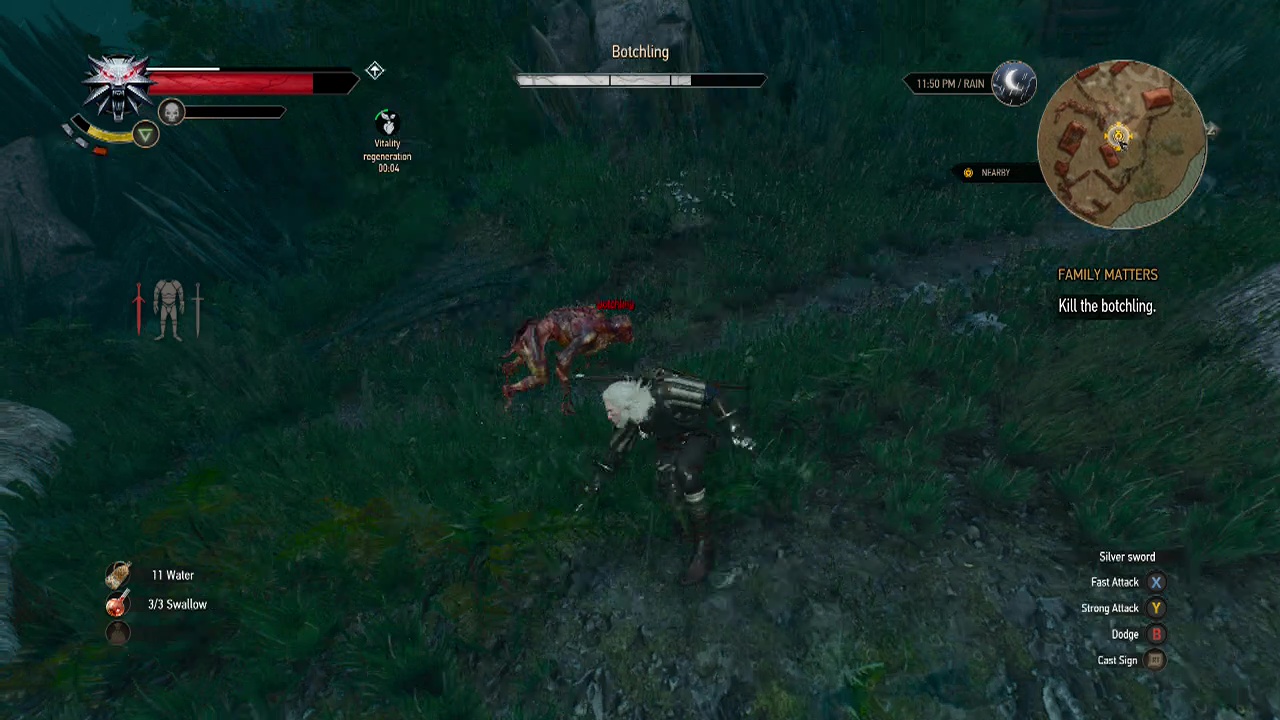
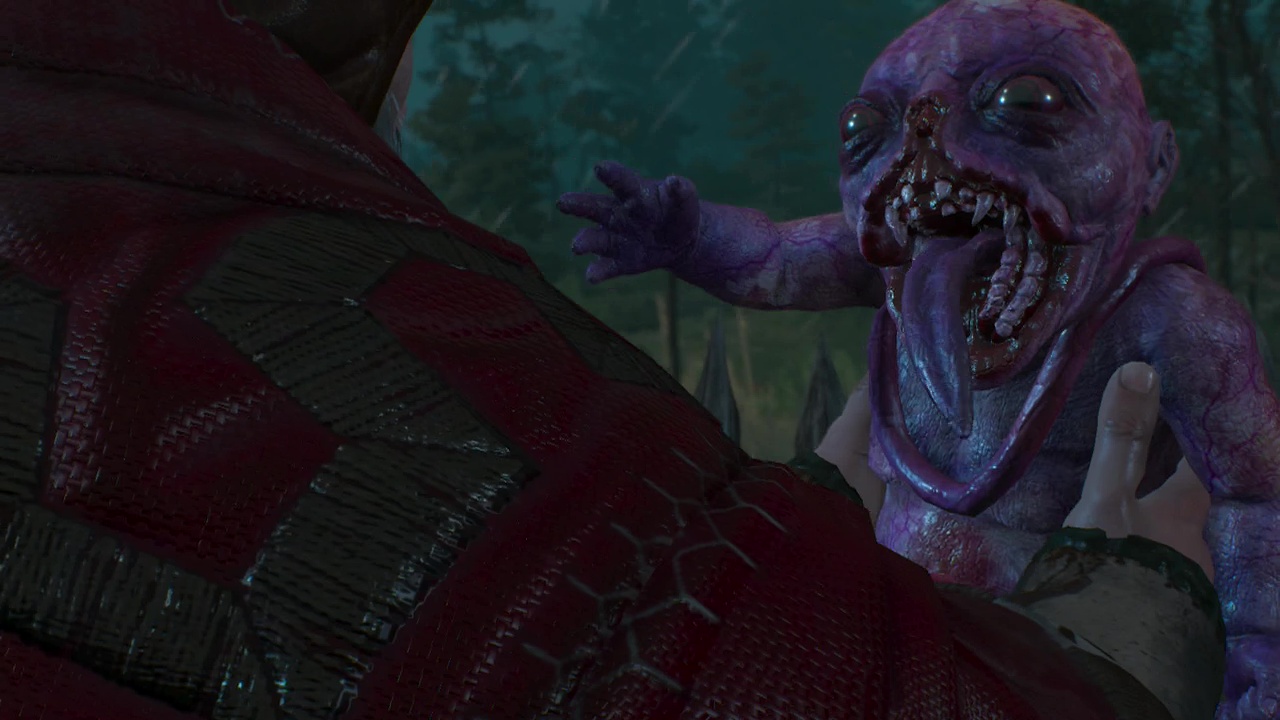
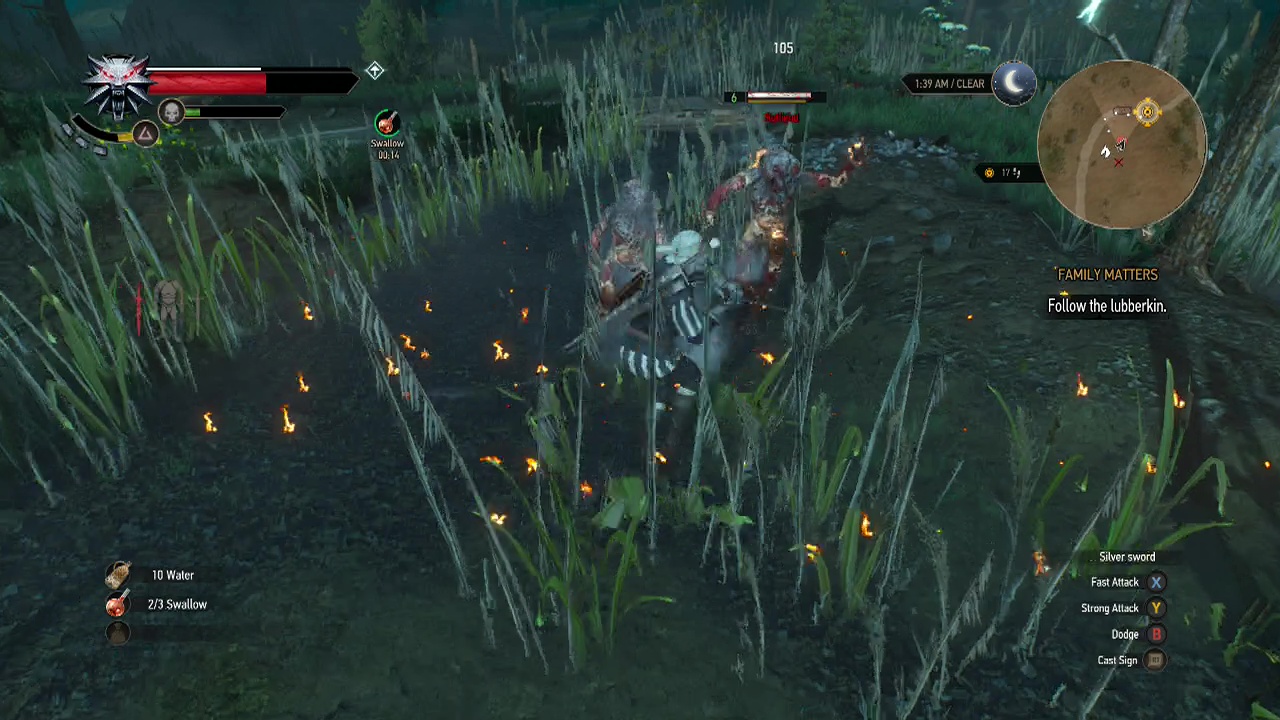
OPTION ONE: Kill the botchling
If you actually read the passage about botchlings in the bestiary, you'll know what to expect and what you should do to deal with the botchling in combat. For those that didn't read it, the botchling is vulnerable to cursed oil and the axii sign. While the extra damage from the oil is nice, your best friend during this battle is the axii sign due to it's stun effect. The botchling will grow in size into a quick and dangerous form, moving around with speed and slashing at Geralt with it's razor claws. If you try to engage it regularly without the axii sign, you will need to play very defensively due to it's speed and high damage hits.
On the other hand, using axii will stun the botchling every time for several seconds. This allows you to walk up and swing into it with a trio of heavy attacks before rolling away from the botchling's damaging counterattack. Occasionally as the botchling takes damage, it will move away from you and try to slowly regenerate it's health. When it does this, you will need to actively search it out and continue to stun and attack it to stop this.
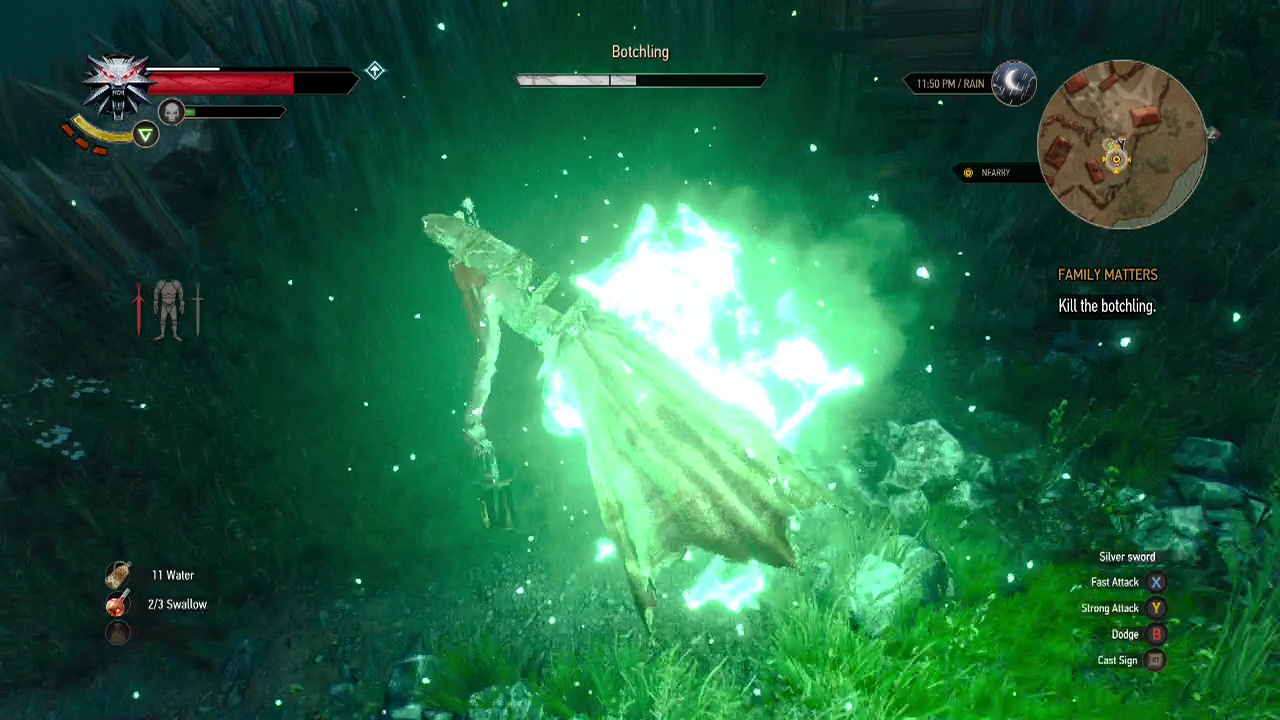
Once the botchling falls below half health, it will trigger two abilities. The first allows it to grow spikes and regenerate a few hundred points of vitality rapidly. While the spikes are visible, any attacks you perform on the botchling will damage Geralt and knock him back slightly (but it may be worth it to reduce the amount of regenerated health). The other ability is to summon a wave of wraiths (three) in the area, that attack Geralt if they near him or vice versa.
When this happens, you will need to maintain focus on the botchling and continue dealing damage to it when you can, only engaging the wraiths if they actively attack you (moon dust bombs, specter oil, yrden and quen signs if you've forgotten). The botchling will trigger both these abilities once more when it hits a third of it's health, so keep up the pressure and maintain the strategies here to pull through for the win.
Objective: Talk to the pellar
The baron won't be happy about the chosen method you used to deal with the botchling, but after the dialogue you'll draw some blood and be off to see the pellar once again. Fast travel back to Blackbough and enter his hut to talk with him.
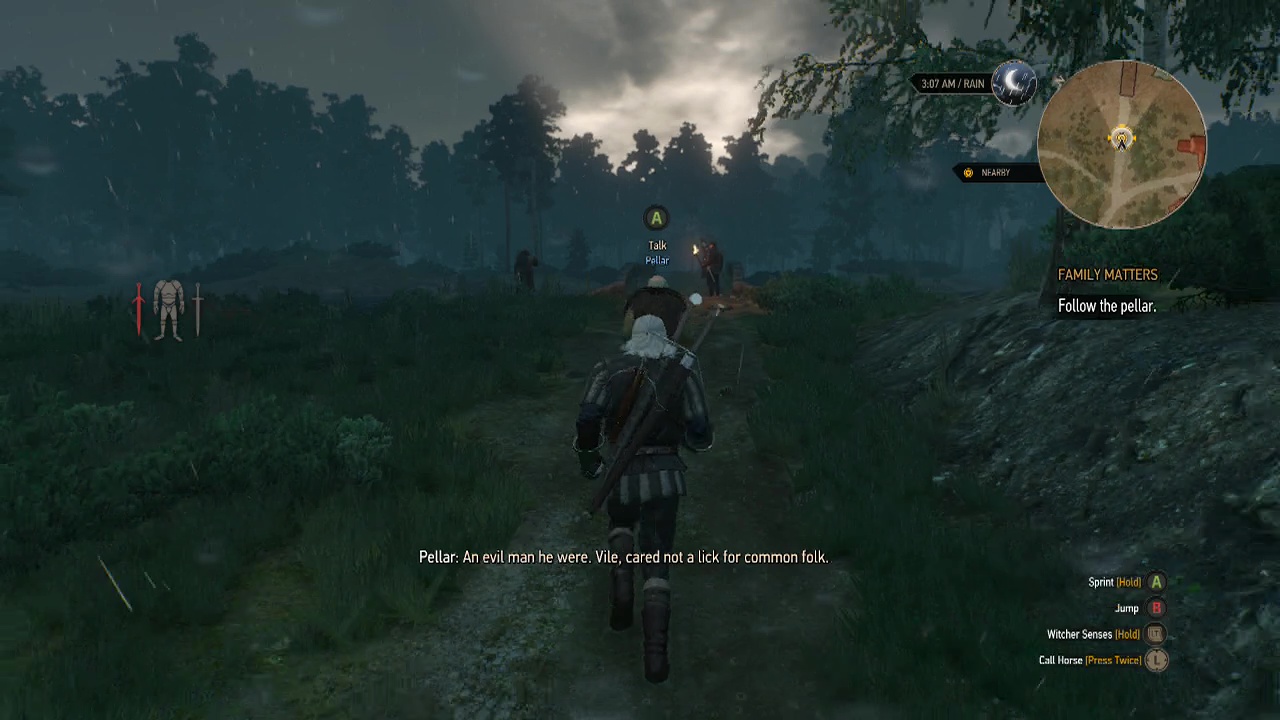
Objective: Follow the pellar
The pellar will leave his cottage and begin traveling. Follow him down the trail and past the village. You'll run into a pack of five wolves along the way that need to be dealt with, but they shouldn't be any worry with all the practice of killing them you've had up to this point. Shortly afterwards the pellar will arrive at his destination.
Objective: Relight the fires in the braziers if they go out during the ritual (3)
I found this "fight" to be the hardest one in the quest (of either choice). The goal here is to keep all the braziers lit for a certain amount of time. You can manually light the braziers by interacting with them, or by casting the igni sign at them to light them at a distance. The problem is, you will be attacked by a swarm of wraiths (five or six) that infinitely respawn until the objective is complete or you are dead.
Casting igni may seem like the obvious and easy choice here, but the console auto aim will nearly always face you toward the nearest enemy. This makes casting accurate signs to light the braziers a royal pain in the butt. In the end, I just ended up running/ rolling around, sprinting up to any unlit brazier I could reach amongst the swarm of attacking wraiths. There is not point attempting to kill the wraiths, as a new one will simply spawn in a second or two.
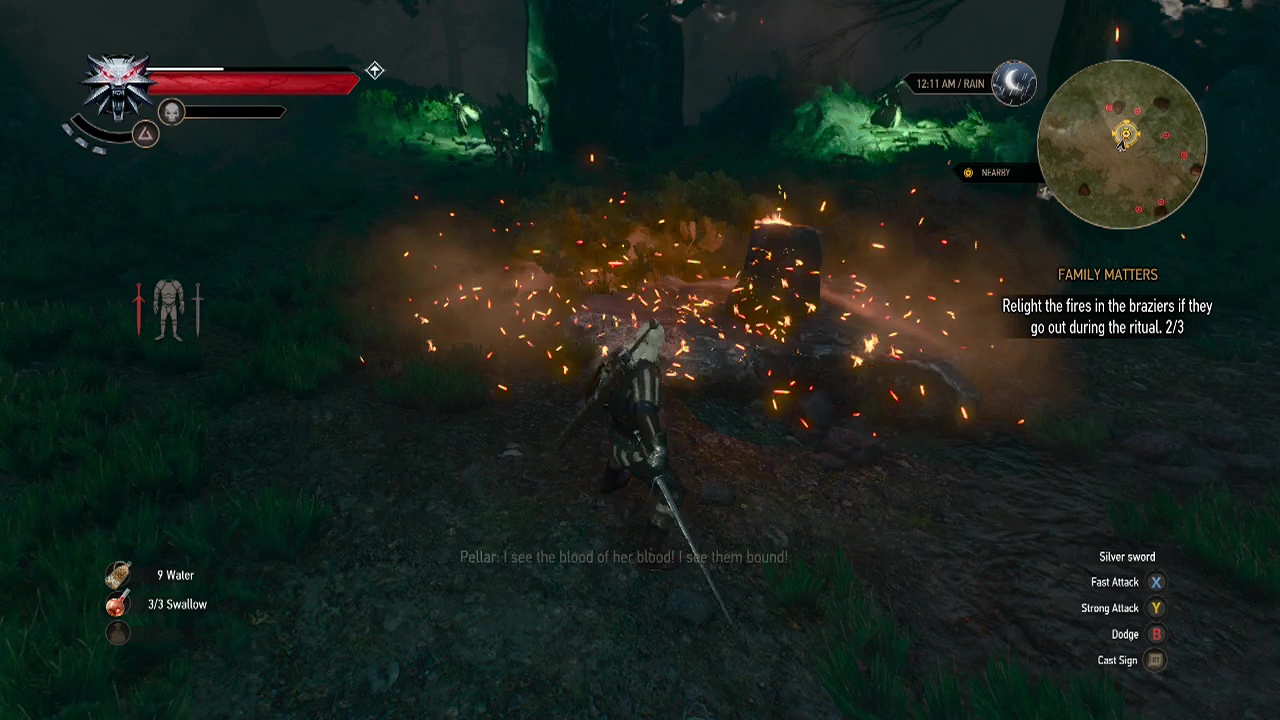
While the yrden sign is useful for slowing the wraiths down and making them materialize, I preferred the quen sign during this battle to protect my health from their attacks. If you manage to keep all three brazier's lit for the set amount of time (interruptions don't reset the clock, but they do stop it until all three are lit again), a scene will trigger (about damn time!) and the wraiths will vanish, leaving Geralt alone with the pellar once more. The pellar will tell you where you need to go to find out what happened to the baron's family.
Note: After this point option one rejoins the main story for the look around the fisherman's hut objective.
OPTION TWO: Turn the botchling into a lubberkin
Objective: Follow the baron to the castle's entrance
During the scene where you encounter the botchling, Geralt will instruct the baron to pick up the monster (who couldn't love a face like that?). After the scene, make sure to prepare yourself to deal with wraiths, a lot of them. For those that don't remember, wraiths are vulnerable to moon dust bombs, specter oil, the yrden sign (to slow them and force them to materialize) and the quen sign (to protect Geralt from back attacks). The baron will begin to stride away towards his residence.
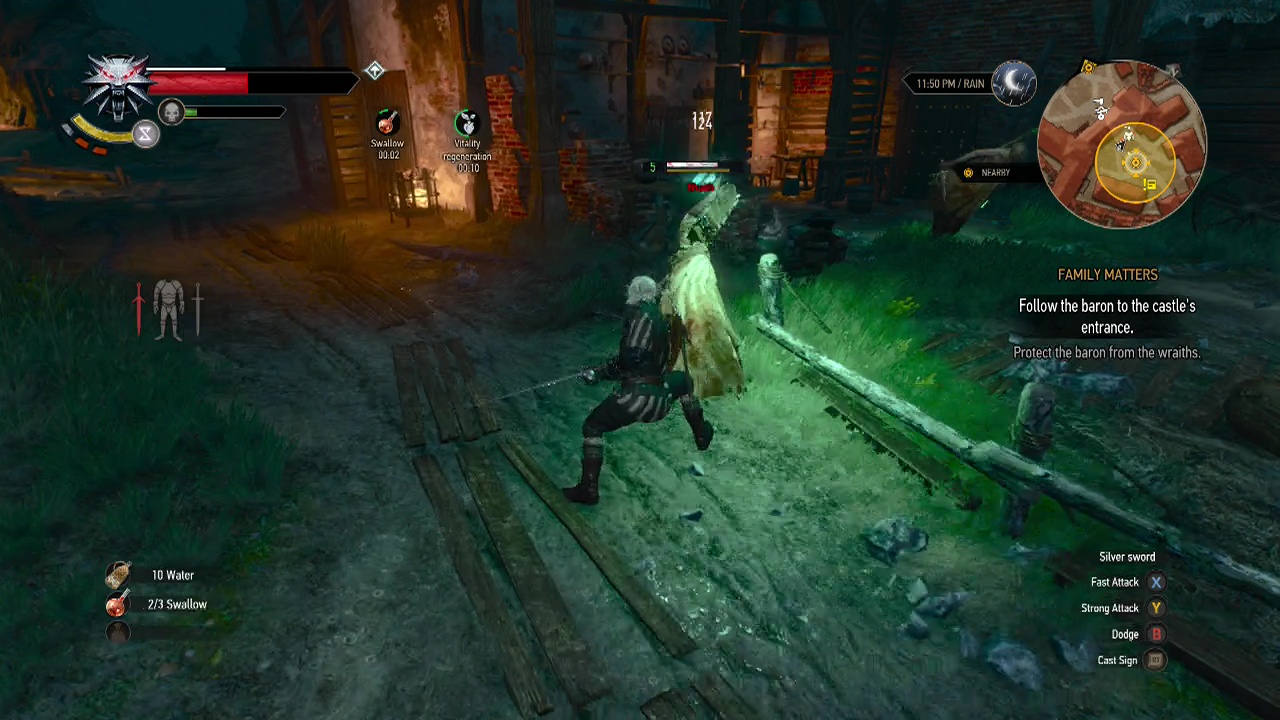
Objective: Protect the baron from wraiths
On the way, the botchling will begin to squirm and a green glow will emenate from it. When this happens, three or four wraiths will appear and begin to attack Geralt. Unlike the wraiths in option one, these wraiths need to be defeated to continue. Dodge the back attacks and use your signs well to gain the upperhand on these enemies.
Objective: Use the axii sign to calm the botchling
Once the final wraith is dealt with, return to the baron and cast the axii sign on the struggling botchling to calm it. This cycle will repeat once more before you reach the castle, so make sure to meditate and replenish your potions if you need to before the second wave hits. Defeat the wraiths and calm the botchling with axii once more to finally reach the grave the baron dug near his residence. Watch as Geralt and the baron perform the ritual and lay the botchling to rest.
Objective: Summon the lubberkin where the botchling is buried
Approch the grave and press A (Xbox) or X (PS) to sit and wait for the botchling to transform into a lubberkin before summoning it.
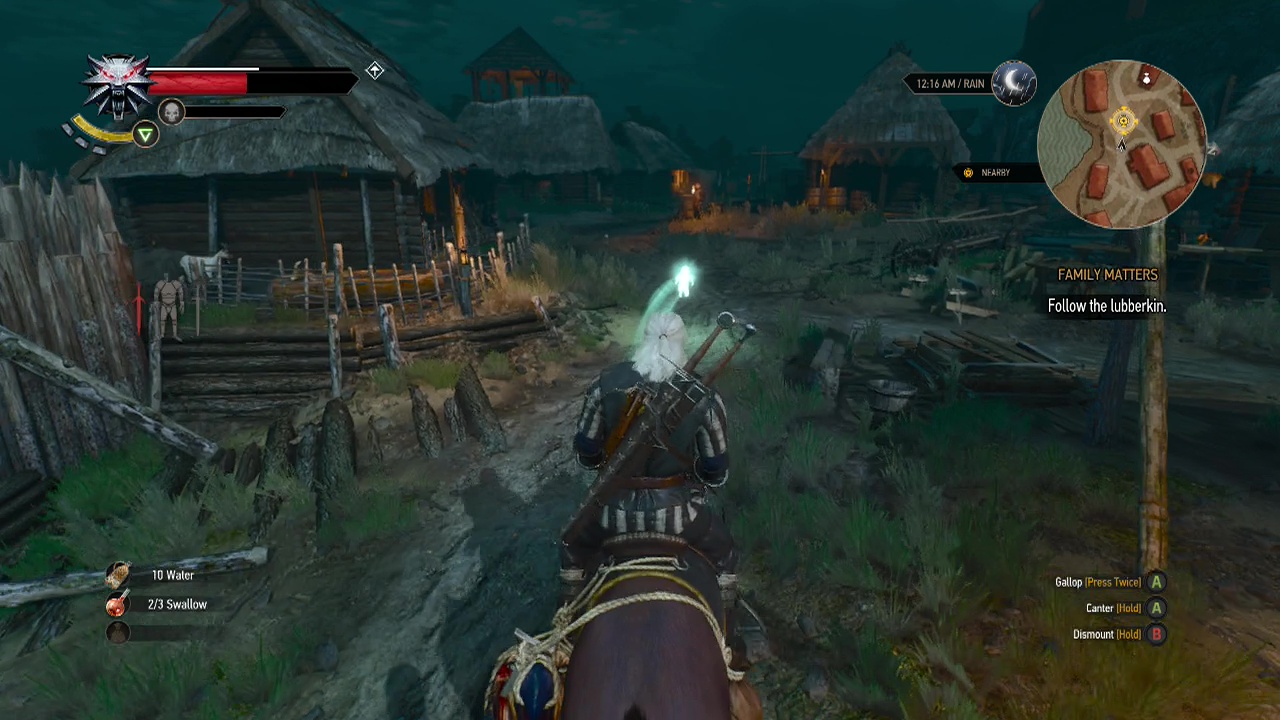
Objective: Follow the lubberkin
Once the lubberkin materializes, it will begin to move away from Geralt. Summon your horse and begin following the floating spirit (it's a long way to travel, so you'll want the horse). Follow the winding path of the lubberkin, running in to drowners or other enemies on the way. After a while, you'll reach an abandond shack, which the lubberkin will circle and signal you from. Step down from your horse and have a poke around the building.
Objective: Search the area around the smokehouse using your witcher senses
The main things to examine here are:
- Bracelet sitting on a barrel near the fence
- Clothing on the ground at the back of the smokehouse
- Hoofprints on the ground next to the smokehouse
Objective: Follow the lubberkin
Once Geralt has examined the footprints, you'll be back on the trail again. A bit more down the trail, the lubberkin will stop and circle in the middle of a group of rotfiends. These enemys attack quickly (in a similar way to drowners), but have one major difference. When they near death (less than 15% health). They stop moving and begin to swell up and lose health. Once their health runs out, they explode, dealing large damage to anything caught in the blast radius (about a meter or so). So be careful engaging these enemies as a single rotfieend death can trigger multiple explosions.
Objective: Examine the dead horse
Once you have disposed of the enemy group, return to the lubberkin and use your witcher senses to spot the horse carcass on the ground. Examine it carefully (use every dialogue option) and draw your conclusions. Back in the saddle now that you're done.
Objective: Follow the lubberkin
Continue following the lubberkin until it reaches a shack yet again.
Note: After this point option two rejoins the main story for the loook around the fisherman's hut objective.
Objective: Look around the fisherman's hut
Enter to trigger a scene and finally find out the whole story of what happened to the baron's family.
Objective: Talk to the baron about his family
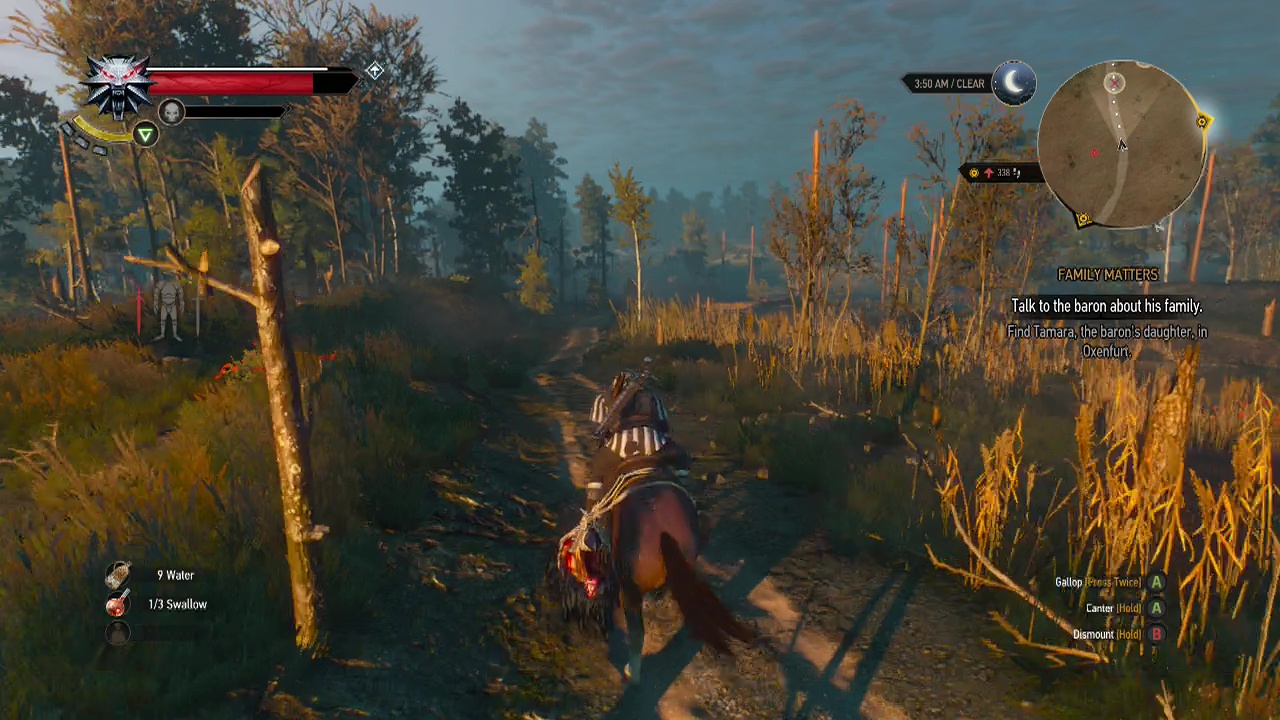
Objective: Find Tamara, the baron's daughter in Oxenfurt
At the moment, you cannot accomplish the second objective in the list as you cannot reach Oxenfurt without the pass the baron gives you later in this quest
Note: You CAN if you swim around the border gate, sail a boat around it or complete the woodland beast sidequest (found at the bridge request board), and buy a pass from the guard when you complete it.
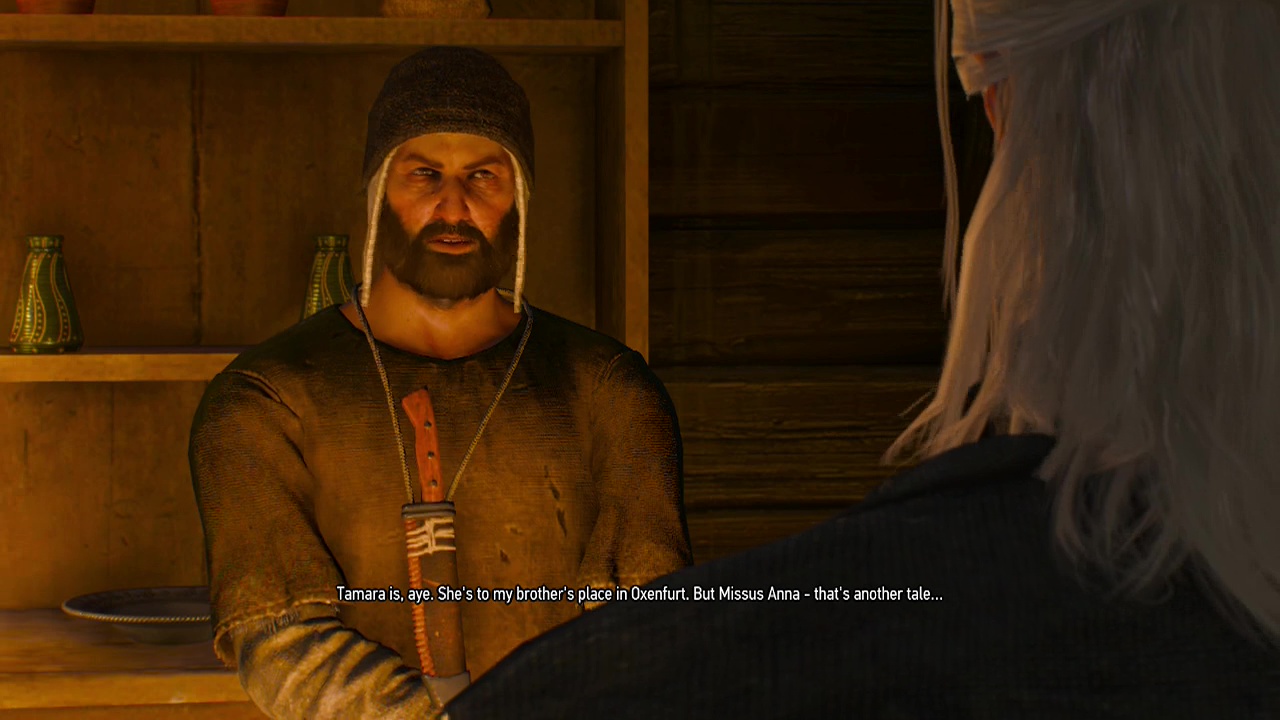
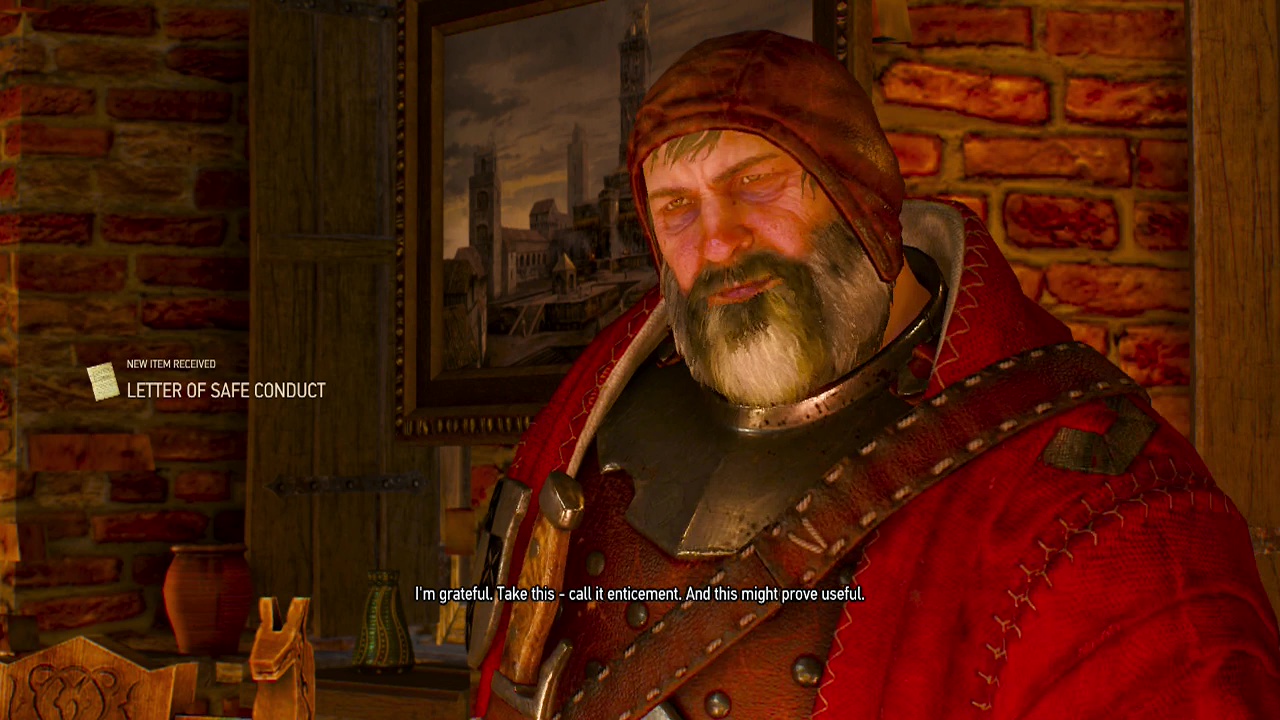
For now, head back to Crow's Perch and meet the baron in his garden once again. The baron will walk you inside and Geralt will share the conclusions of his investigation. After telling the baron of Tamara's location he will ask Geralt to go see her.
I'll go – You'll get 50 crowns as a bonus for agreeing to help
Not gonna happen – You'll be forced to help the baron
After this, the baron will give you a pass which allows you to reach the area of Oxenfurt. After giving you this, he'll finally begin to tell you about what happened to Ciri while she was staying with him.
STORY SUBQUEST: Ciri's Story: The Race
Recommended Level: 5
Watch the scene play out of Ciri, the baron and his men agreeing to a race.
Objective: Beat the baron in the horse race
When you regain control, you'll be seated on a horse next to the baron. You will have two paths on the mini-map (a solid yellow one which is the race path and the mini-map marker trail). Both trails will lead you to the finish line, but taking the dotted one will prevent you from hindering the baron's progress.
Of course, this also prevents him hindering you. So it depends how you want to race (slowing down the baron deliberately to regain stamina or just running flat out). If you run flat out, you should cross the finish line just as you empty your horses stamina bar, finishing a few length in front of the baron. Cross the line first to claim victory and return to Geral and the baron once more.
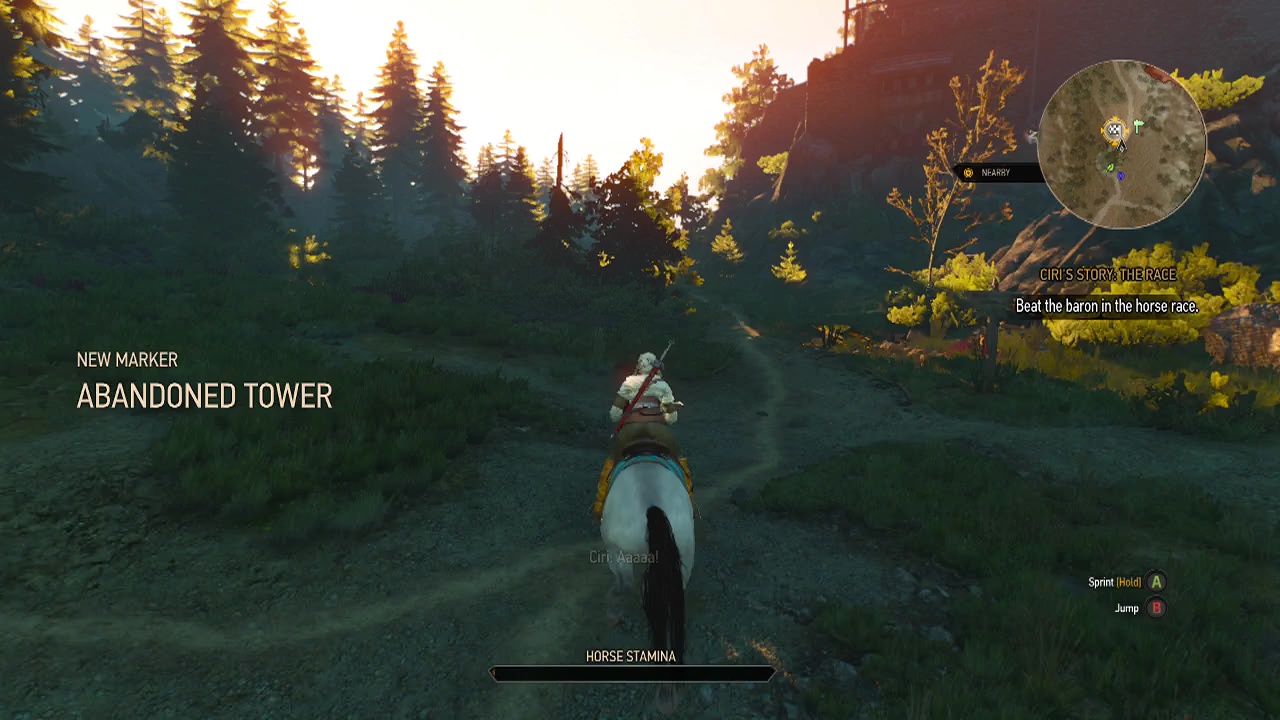
End Subquest
Aaaand the baron ends on a cliffhanger. This guy should write cancelled tv show scripts like Firefly or anime series endings. Anyway, the baron will clam up until you find out some info about his missing wife. Players who have already completed the main story quest "Ladies of the Wood" will have already located the missing wife and will be able to continue straight on. Players who haven't will need to undertake that quest first to finish this one. Yup, how's that for a roadblock?
Once you can continue the discussion with the baron, you'll find out the baron's half of the story on his marriage and what happened after the cockatrice attacked Ciri and the baron.
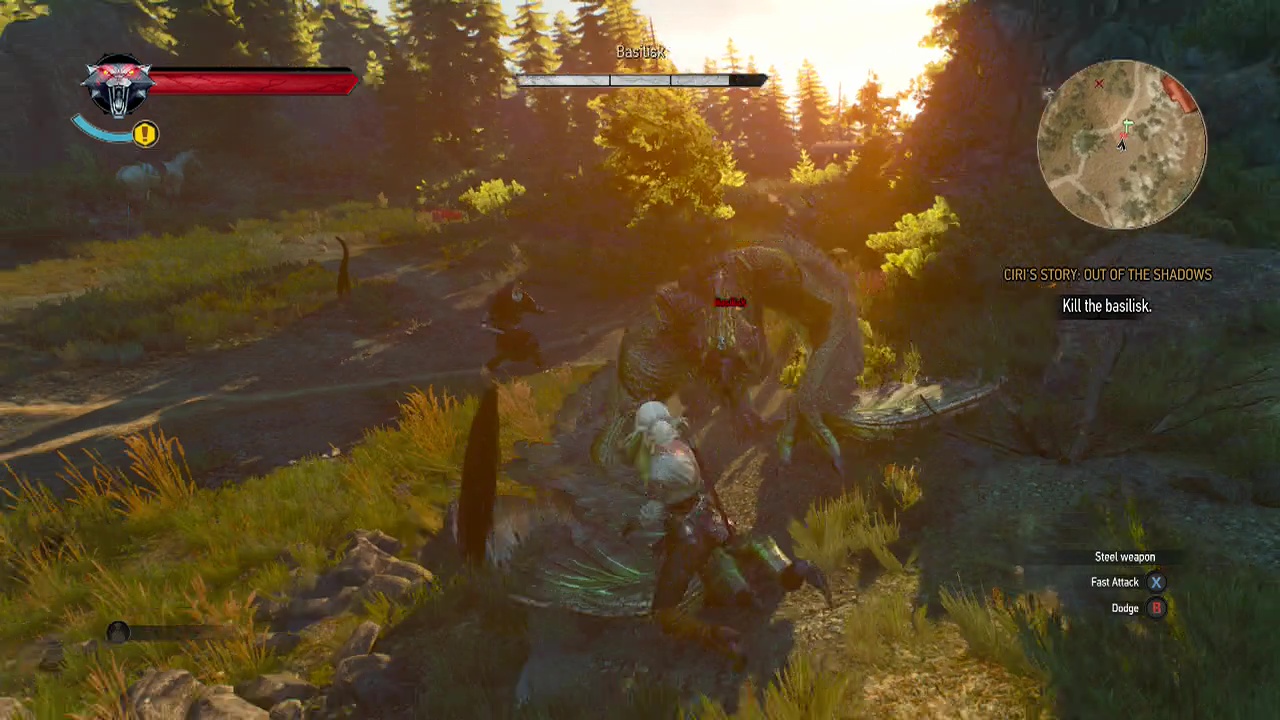
STORY SUBQUEST: Ciri's Story: Out of the Shadows
Recommended Level: 5
Objective: Kill the basilisk
As soon as you gain control of Ciri, you'll be under attack by the basilisk. Unlike the battle against the griffin as Geralt, Ciri can actually do some damage with her sword swings. Use her dodge ability to avoid the swoops of the basilisk as it flies overhead. Once it lands, act like an aggressive loan shark out to collect a debt and slash away at it with your briefcase… er, I mean sword.
It actually does very little damage per hit, so unless you are playing on the hardest difficulty, you can just mindlessly attack it. If you are on the hardest difficulty, you will need to use dodge rolls and time your attacks after the basilisk's strikes to avoid taking damage as you cut up the beast.
After getting the basilisk down to a sliver of health, a scene will take over.
Objective: Get to the top of the tower and rescue the baron
Well, it's definitely not a damsel in distress here. More the other way round. Approach the tower from the South side, using your dodge and jump abilities to climb upwards towards the tower. Move along the stone wall next to the tower to trigger a scene and reach the top of the tower. Watch the rest of the movie play out until you are back with Geralt and the baron once again.

End Subquest
The baron will ask you to help him rescue his wife from the crones in Crookback Swamp:
You convinced me. I'll go. – opens up return to Crookback Swamp sidequest
Sorry. Just don't have the time
After that, just finish off the conversation and watch the strange creature appear and leave the room. Once the scenes are over, so too is the story quest. Wow, that was a hell of a long one (1:40 after editing. Damn).