
MISSION 09 – Sand Castle
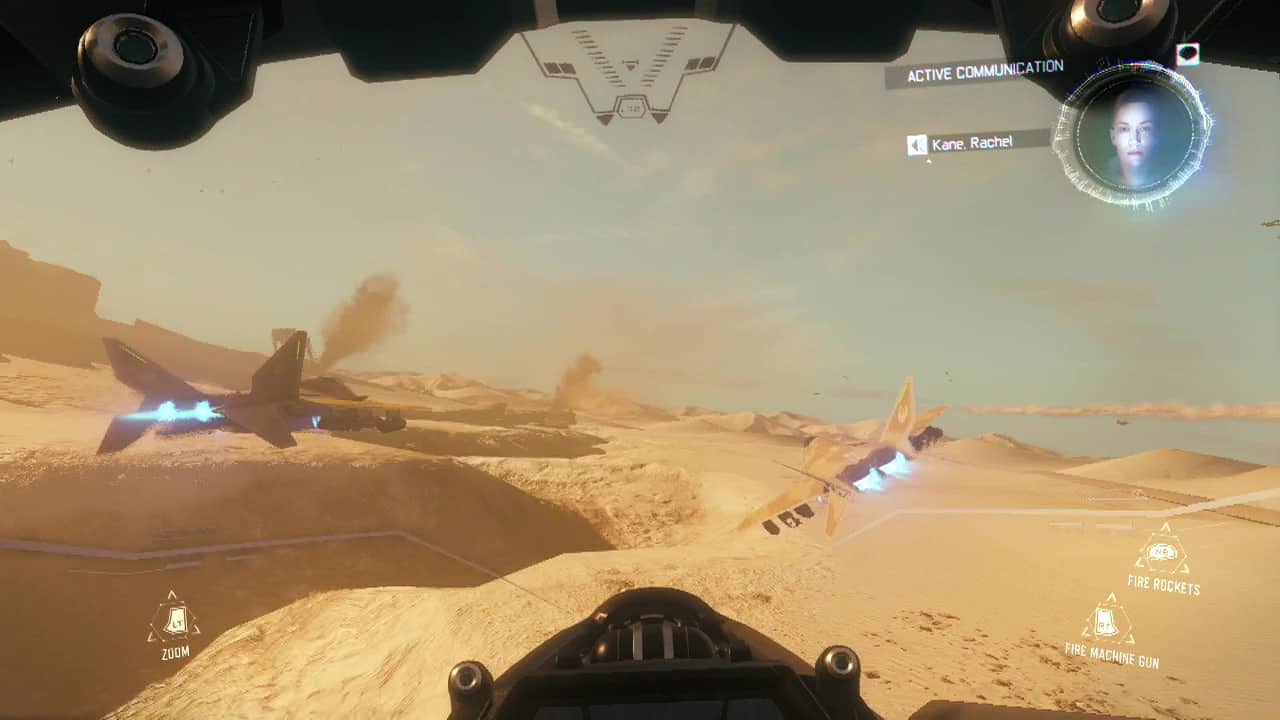
As the mission begins you'll find yourself inside the cockpit of a fighter jet. Uh, guess we learned how to fly a plane pretty damn fast. In the initial sequence you will be tailing another plane, you can rake the enemy aircraft with your machine gun (RT) to deal damage or perform a lock-on by holding the targeting cursor over the enemy plane using the RS for a few seconds, then fire your rockets with (RB) for a guaranteed explosion. Repeat this process for another two planes and you'll throw the plane into VTOL mode which lets you hover, strafing up, down, left and right to move around the huge platform in front of you.
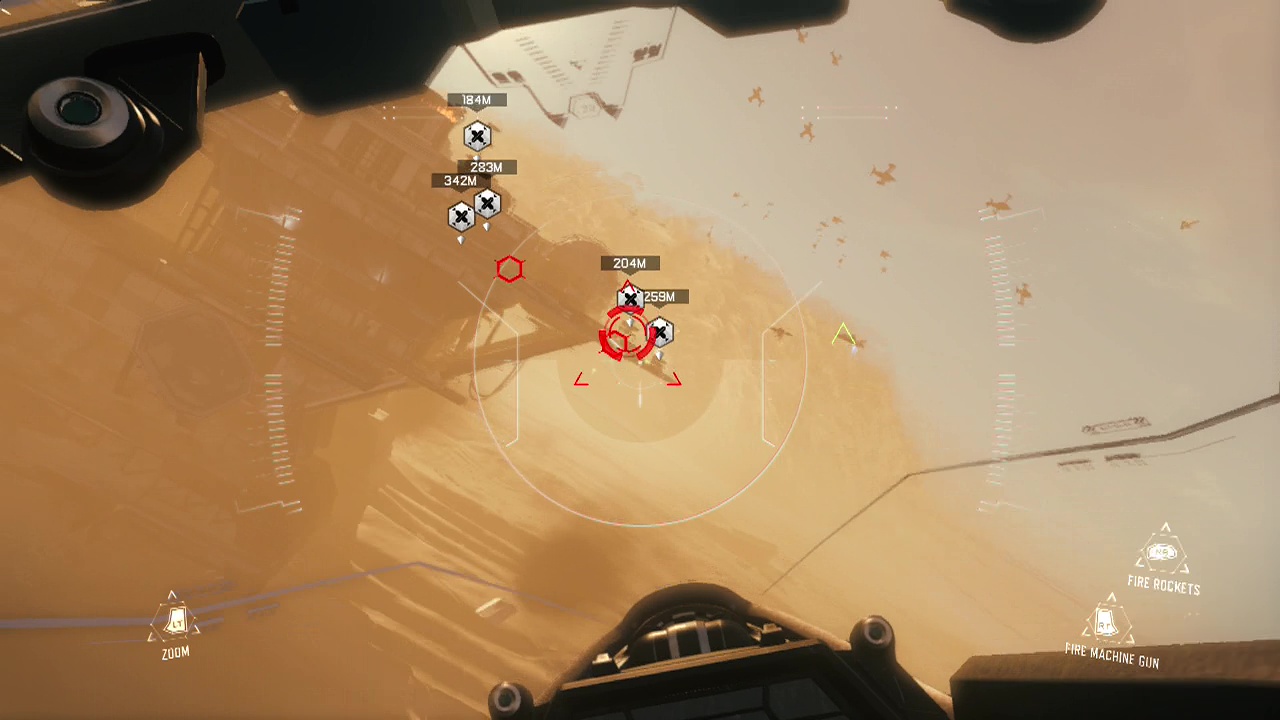
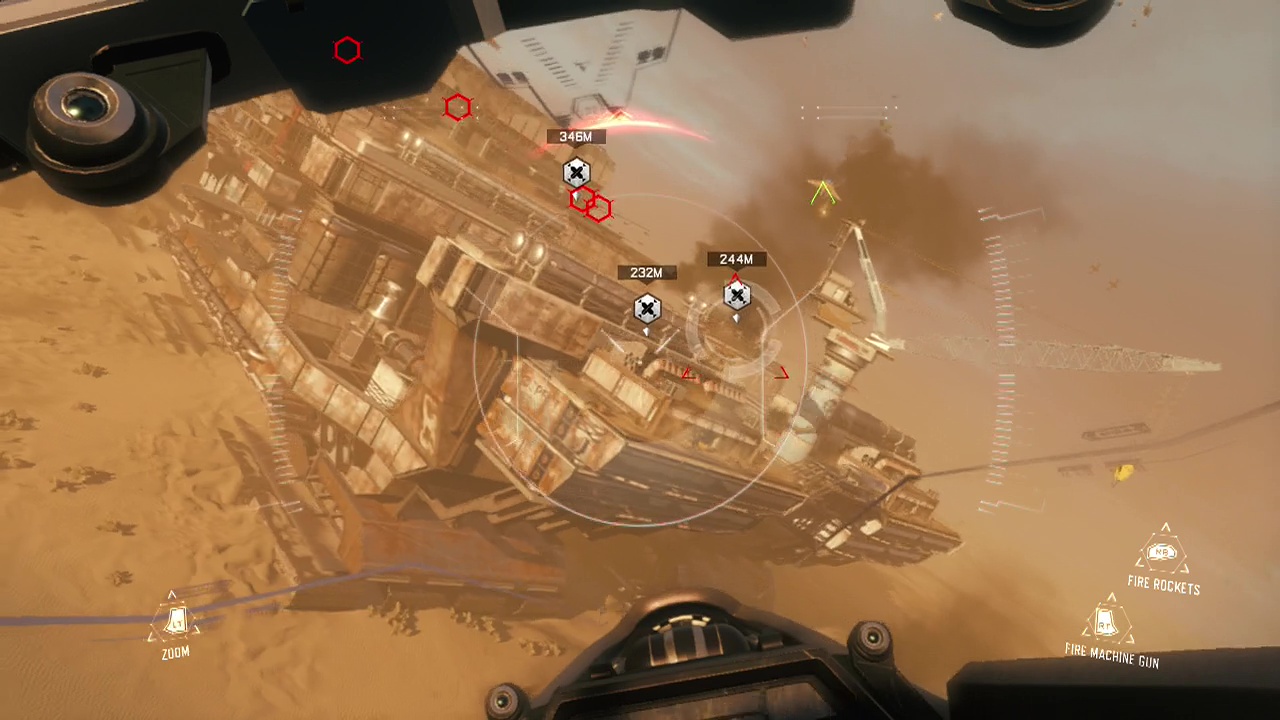
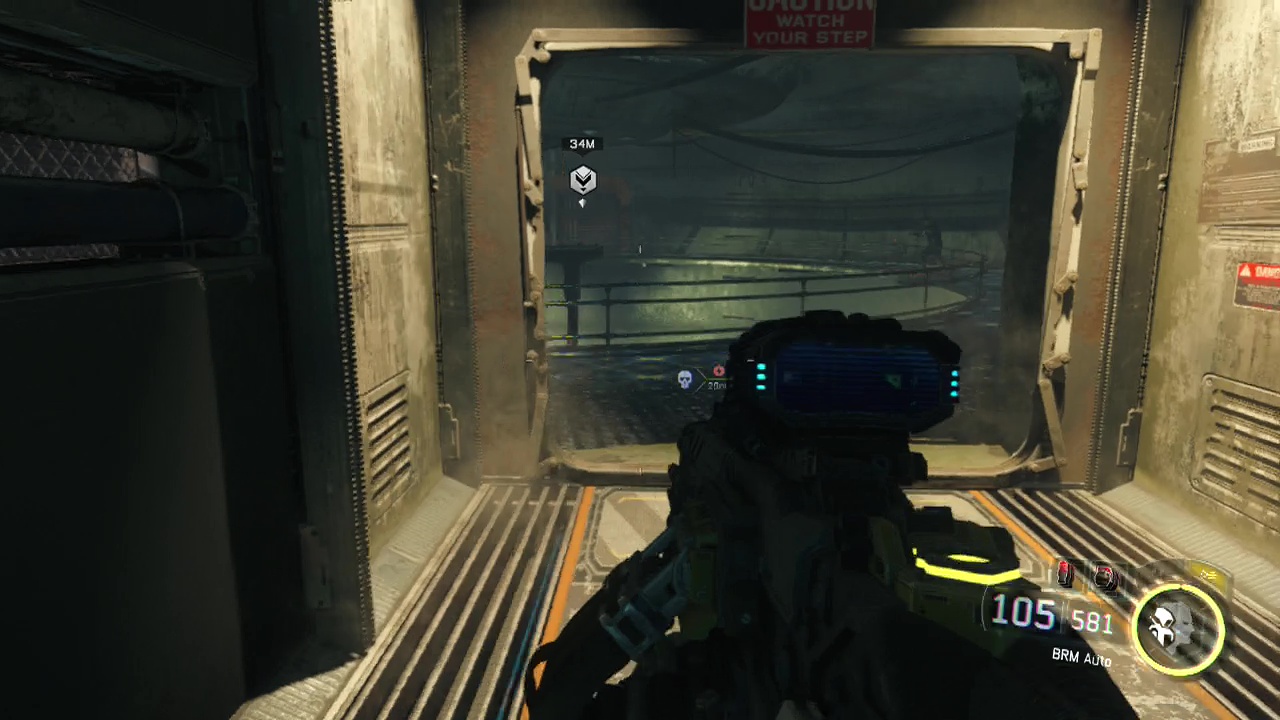
You'll see five large objective markers which show the locations of the platform's anti air defenses, these are what you need to bring down first. The easiest way is to simply get a lock-on and fire at them with your rockets, adjusting your height if something blocks the shot. Your jet can take a significant amount of damage (in fact I was never downed in the jet after taking massive amounts of damage on veteran), so it may need to be a large amount of damage all at once, as you will 'repair' when not under attack. You'll also start spotting red rings outlining enemy troops on the platform. Ignore the red rings (thankfully we can't 'red ring' this on the 360 as there is no campaign on that version) and concentrate on the anti-air installations until they are all down.
While the argument between the squad members goes on, fly around to the rear of the platform where you won't get shot at. Two more new markers will appear after a few seconds, these show landing points for your jet. Hover in close to one of these points (there is little difference whichever one you pick), for the purposes of this guide, I landed on the right landing area when facing from the back area (where you don't get shot).
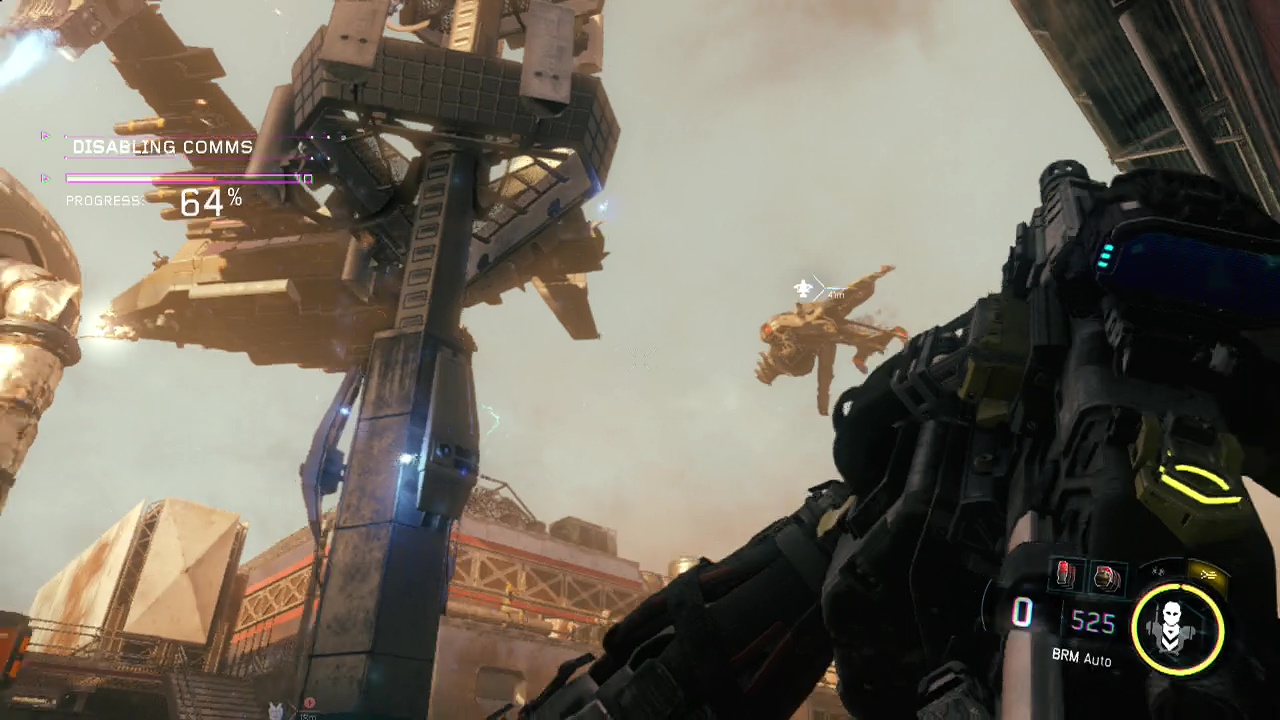
When your boots hit the landing pad, take cover behind a nearby wall of crates straight away as enemies will rush forward to meet you. Turn on your tactical view to see where the enemy forces are placed, then start mowing them down from your cover position. You'll want to stick to the cover along the left wall of this area until you are adjacent to the comms tower (where the objective marker is) in the middle of the area. Sprint across the gap to the building and race up the stairs into the room at the base of the tower to find an ammo crate with a Postcard on the bench directly opposite it and a decent cover position to clear the back area. When the area is mostly clear, run up the stairs leading up to the level above on the comms tower to find Kane crouched next to an access panel for you to interact with. Grab the XM-53 launcher from the railing as you sprint back down the stairs to the lower level of the comms tower. A new wave of enemies will spawn a second or two later and begin assaulting the comms tower as a counter appears in the top left corner, showing the progress of Kane's attempts to disable the tower.
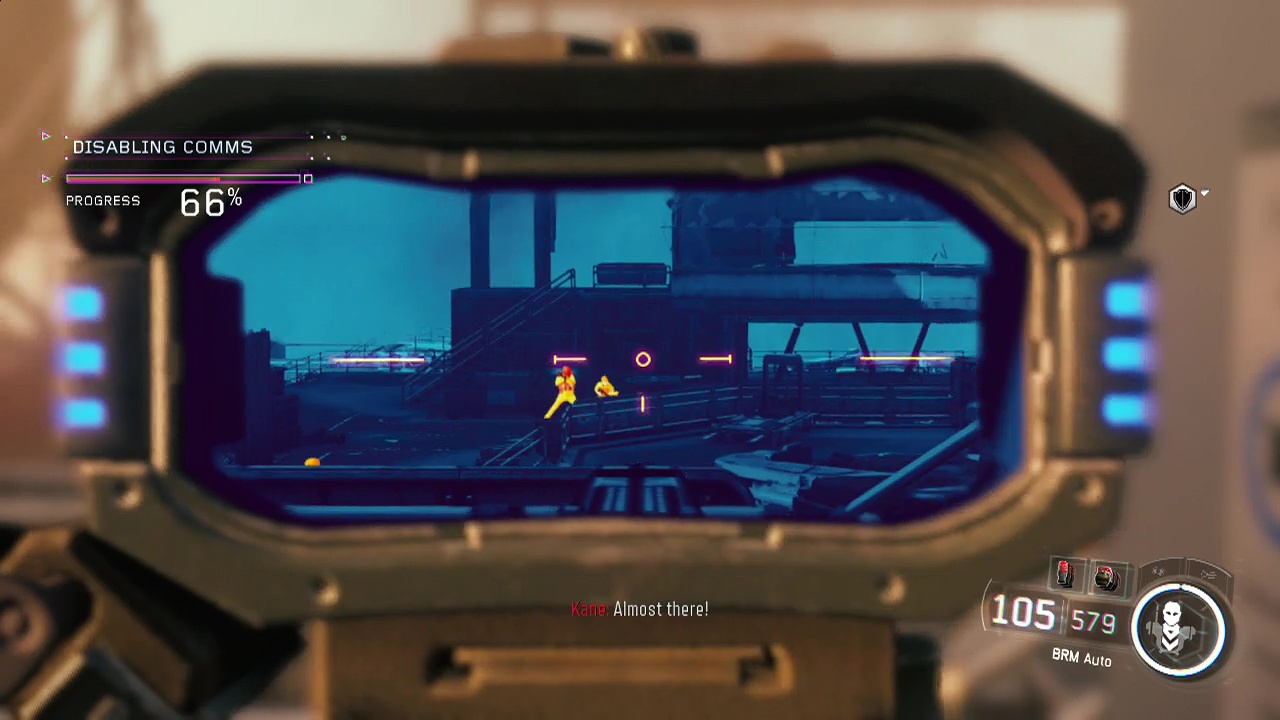
You'll want to use your relatively safe position to suppress the onrushing hordes of enemies so they can't concentrate fire on Kane (Kane dies if she takes too much damage at once, failing the mission). So move around and actively thin out the enemy ranks as the bar fills up, checking both the back and front areas of the platform. This whole sequence is fairly easy from this cover position as you'll stop any enemies climbing the stairs of the tower to shoot Kane directly. When the progress bar is full, it's time to high-tail it back to your jet, moving from cover to cover like you did before back to the landing pad. Race up to the jet and interact with it to hop back inside.
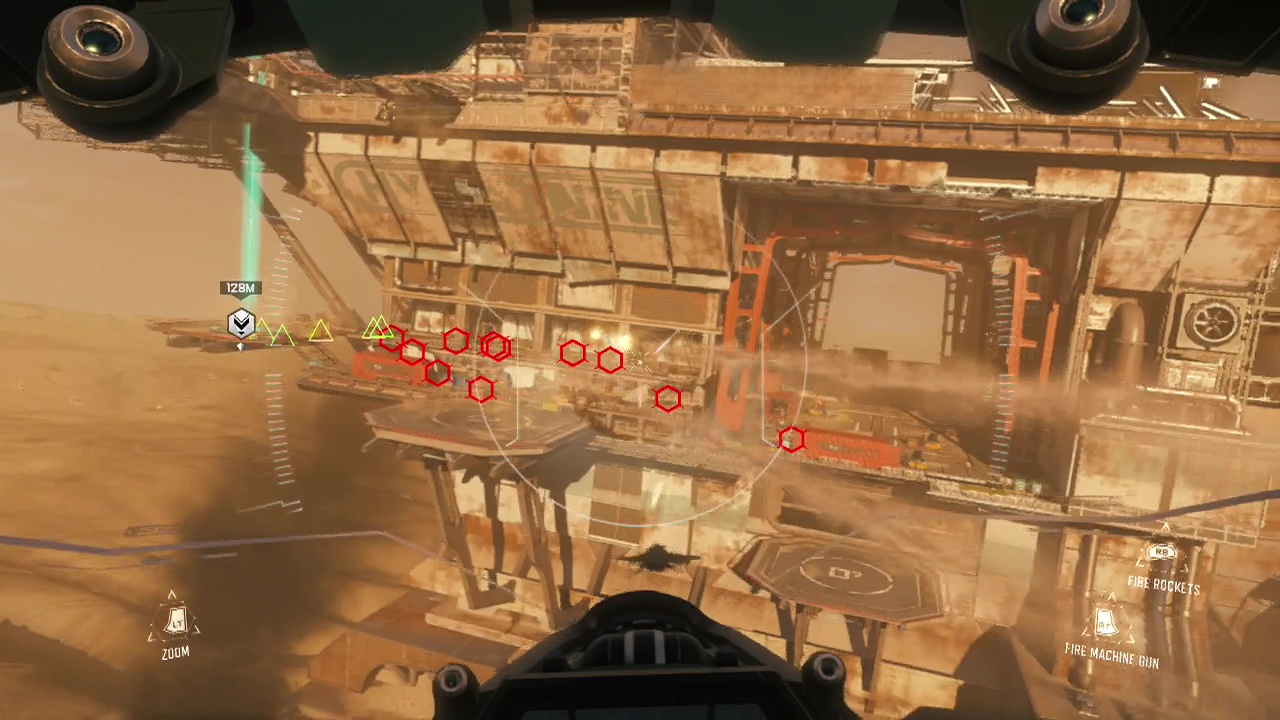
Back away from the platform when you're back inside the jet and then circle around to the other side to find the next set of targets: four A.S.Ps and an enemy jet. Repeat the same techniques that you used before to dispose of these new targets. Lock on and fire your missiles, adjusting your height if they collide with barriers on the way. The enemy jet isn't any different as it's in hover mode and will only move slowly. When the final enemy machine goes down, you will be directed back to another landing pad to assault the second comms tower.
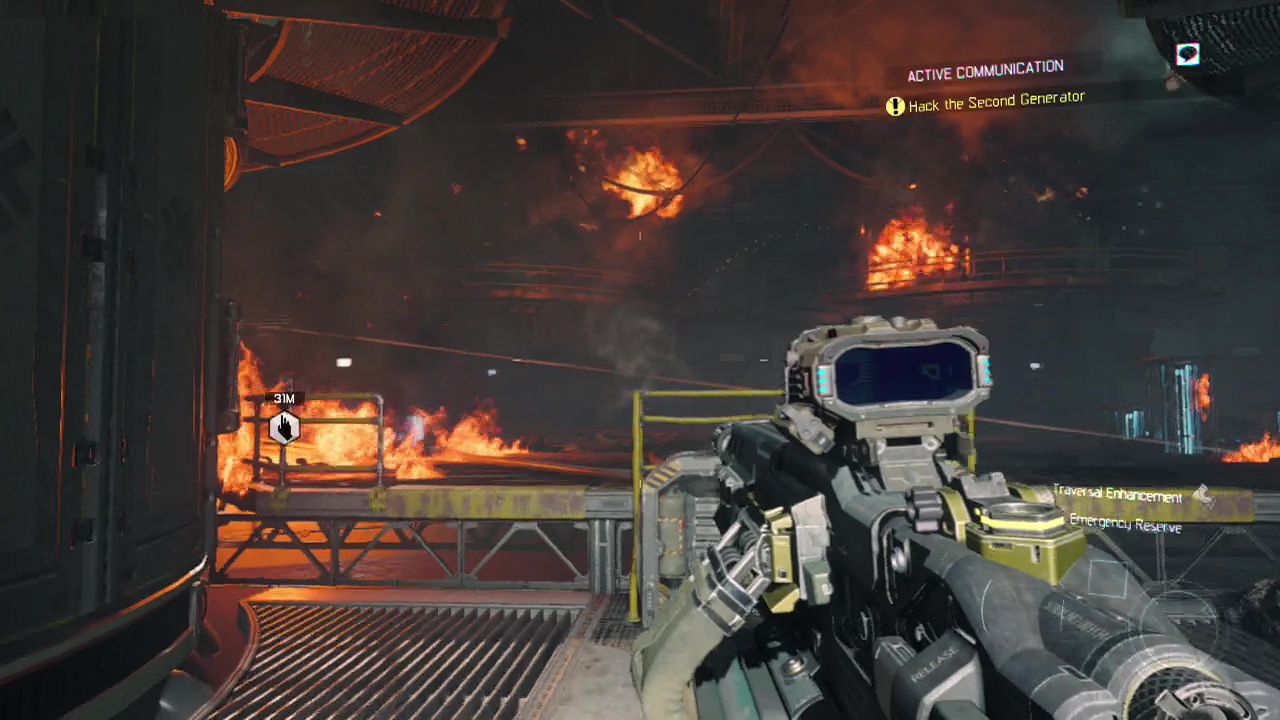
When you reach the landing pad, look for a sign on the wall of the building to your left that says 'prospect' in the gap/ hallway inside this structure are some Industrial Drilling Parts on the ground. Dash for nearby cover as enemies run forward to greet you and the rest of the squad. You'll need to run forward from cover to cover here, heading towards the objective marker on the right side of the back of this area. Be careful of enemies on the catwalks above as you move through the area. Make sure you are prepared before you open the access panel at the back of the area as you will trigger a massive assault. You will also have to remain fairly close to Kane while this goes on or you will fail the mission. As before, if Kane takes too much damage you will fail the mission as well.
I would advise using the large pile of crates to the right when looking at the access panel as your cover location as this should keep you close enough to Kane. The only drawback is you will likely be bombarded with grenades here, so you will have to be pretty good at throwing them back quickly to survive. As soon as the progress bar appears, look to the right to open fire on a bunch of enemy soldiers emerging from inside the building to avoid getting blindsided. During this a wraith will also appear overhead and start firing down at Kane, here you can pull out the RPG launcher I told you to pick up at the first comms tower and unload it on the wraith to bring it down. If you didn't pick it up, you can find a spare next to the ammo crate directly behind Kane, but you will have to run into the open to reach it.
When you've managed to beat back the enemy advance and the second comms tower is down you'll need to escape the swarm around your position and work your way back towards the landing pad once again. There is a fair bit of cover here as you move back across the area, so use it to your advantage by shooting around corners or flanking enemies. Dash across the landing pad and leap into the cockpit to take to the skies once again. You'll need to land on another landing pad on the other side of the platform after a few seconds, so don't get too used to flying.
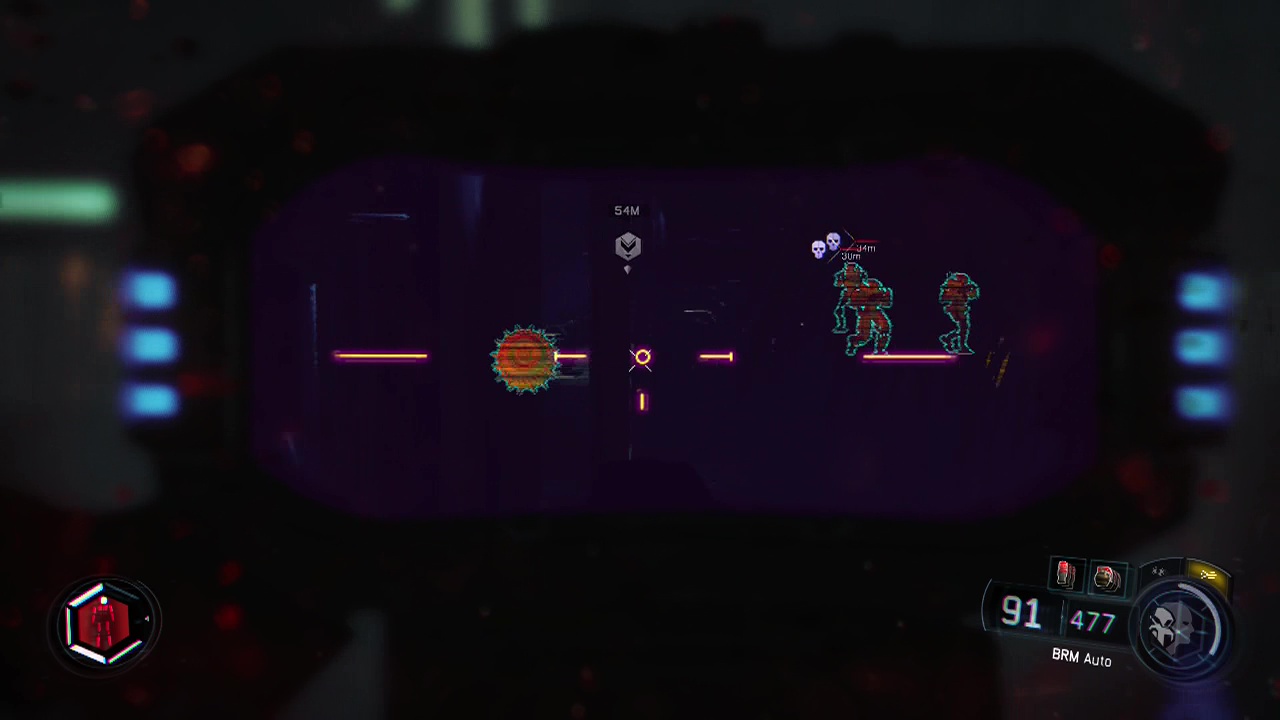
After landing, follow Kane up the nearby staircase and enter the pool of water at the top. Splash. Move straight ahead, turning right at the top of the submerged stairs. A few seconds later a scene will take over, after which you'll regain control with Kane. You'll be inside a gloomy half flooded room with an objective marker ahead of you. Cross the room, wading through the water until you stand beside Kane at the marked doorway. After a quick scene, robot enemies and R.A.P.S will begin entering from the far side of the room. Immediately take cover behind the nearby server racks (the rectangular metal things poking up out of the water). Using these as cover, pick off the R.A.P.S first then focusing on the robots as they move up. Despite the urgency of the dialogue, take your time here and make sure you clear out everything. Of course, if you have a control core, you can make the R.A.P.S attack the robots.
Cross the room and be ready to gun down another couple of robots on the stairs as you approach the marker. Another robot will be waiting for you as you dive into the pool of water, with five or six more around the first sunken corner. Help Kane eliminate them and then swim towards the marker to pull yourself up and out of the water. After a scene, you'll be back in the cockpit of your jet. You'll do another series of three jet chases (as before, lock on then fire missiles to dispose of them). You'll automatically return to VTOL mode afterwards and be tasked with protecting your allies' ground forces on the platform.
Circle around until you can see the side of the platform with the defend marker. Enemy forces will move from each end towards your allies in the center. Defending them is extremely easy, just unload your machine guns, firing rockets at each onrushing group until a transmission interrupts your vision. After a scene and a bit of dialogue with Kane, you'll be on your way to the hangar. Fly around the side of the platform to the new marker to see a mass of red (enemies) near the marked landing zone. To make life easier for yourself, take the time to bombard them from the sky to save you having to shoot them on the ground.
When the massacre is over, land the jet for the last time and hop out onto the pad. Race up to the wall on the edge of the landing pad and use it as cover to shoot the enemy stragglers from your earlier barrage. Some of the troops will jump onto the walkway along the left wall, so be sure to keep an eye on them as well. You'll want to use this same walkway to move up as cover, just remain alert so the enemies don't jump up over the railing and blindside you. A group of three talons will fly down and start attacking, so make sure to bring them down or take them over quickly when they appear.
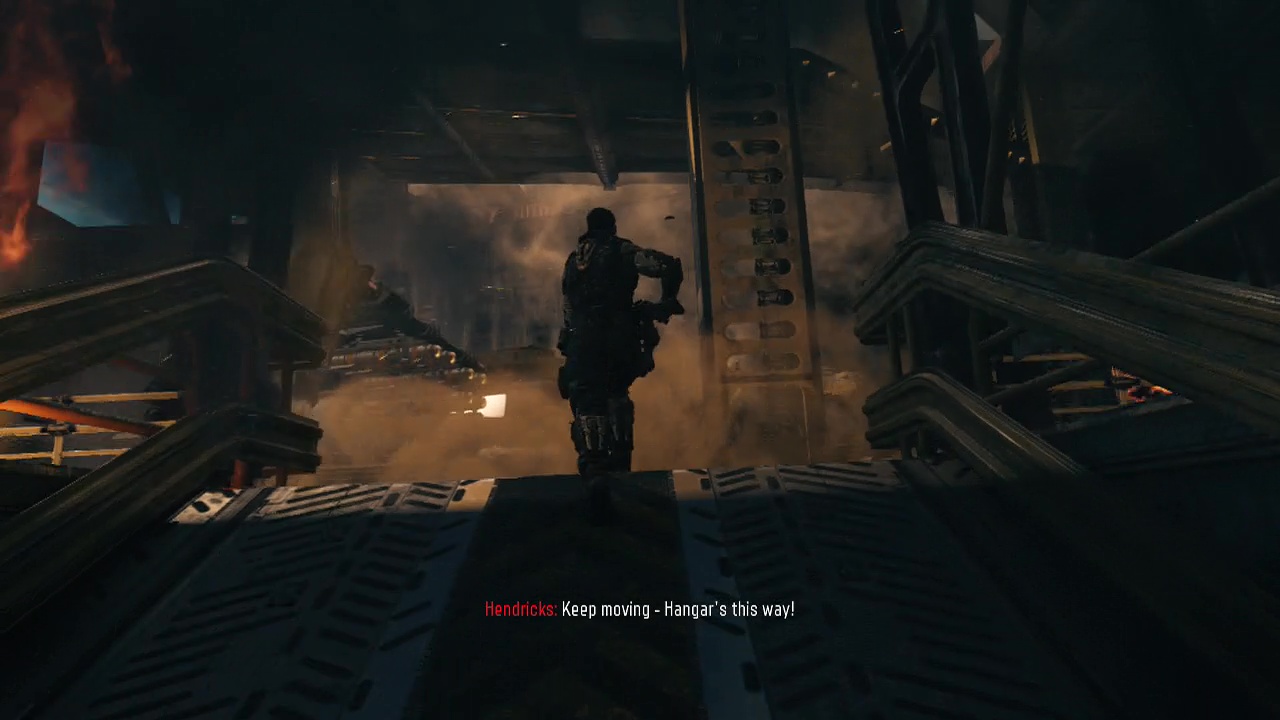
At the other end of the walkway, continue raining lead down at the enemies below. When the final enemy falls, a scene will take over and you'll swing down into another firefight. Bring down as many of the four enemies as you can during the slow motion, grabbing cover behind one of the posts when time returns to normal. Circle around the outside edge of the room using the pillars as cover while you deal with the enemies here. Resupply at the ammo crate in the small hallway leading out of the room and carefully move down the stairs, taking out each waiting human enemy. At the bottom, follow Hendricks as he moves up and help him take out everything in your path until you reach a large room with a big circular room below.
Don't enter the room, instead use the doorway as cover to bring the pain to the large number of enemies inside. When it is empty, cross the catwalk and head down the stairs on the other side with Hendricks. At the bottom turn left and gun down the pair of enemies descending the stairs opposite. Work your way down the twisting hallways after Hendricks and the objective marker. A scene will mark your arrival at the area with your target. You'll be in a huge rectangular room with three large cylinders in a row on each side (they are generators but I'm talking basic layout here). I'll be referring to these shapes during this boss fight. Oh yeah, by the way this is a boss fight.
After the argument ends and you regain control, duck behind the nearest cover. Your target will be covering the center of this room with his sniper rifle. This leaves the only safe areas as being on the opposite side of cover that is facing him, or being in between the cylinders (generators) lining two sides of the room. To reach him, you'll need to cross in a zig-zag pattern, using the broken posts in the middle of the central straight as cover. To start with, take cover beside the first generator on the right side of the room to start shooting up at the enemies that appear on the walkway on the opposite generator. After they are all dealt with, use the cover at the entrance to the room to cross to the left hand generator, taking cover as you just did at the right generator. More enemies will appear on the right hand side generator's walkway. Repeat the mowing down you did earlier
From here, you are going to need to use the broken posts/ barriers in the middle to take cover as you race over to the gap between left generator 1 and 2. Run across immediately turn to look at the generator walkways opposite to start firing at the enemies that appear. You should be able to use the bits jutting out from the generators here as cover while you take out the enemies. When the wave is taken care of, sprint over to the marked control panel and interact with it. Now it's time to do the same thing again. You'll need to cross the middle area to the gap between right generator 2 and 3 using the broken barriers as cover, then shoot the enemies that appear on the walkway opposite, triggering the control panel when you are done. When these are complete, you'll need to carefully clear out an enemy or two at the end of the room (below the target), before racing to the next lot of cover in the center. From here you should be able to sprint forward to the stairs on the right side and open the door at the top to trigger a series of scenes and end the boss fight.
As you regain control, the whole place will start coming down. Race after Hendricks towards the jets above. Follow him down the hallways, thrust jumping over railings until another scene takes over and the level ends.