
As soon as you start the level, head back and melt the ice on the door with a chaos bomb. This enables a way back to Bernhard's Wing. Now you can travel forward along the icy trail. The path will split, with one way going right and one way left.
Life Gem: Take the right path to find the pain box
Travel left across the platforms and travel along the path of grapple points until you hit another set of scaffolding. Jump across the gap.
Void Gem: Head straight ahead to find the pain box
You can also find a map room here that allows you to teleport to other parts of the castle.
Head up the path of grapple points and a cut-scene will drop you to a ledge below. This starts quite a large fight with two new types of enemies. The cleric is a ranged summoner and support character that will lob projectiles, summon and buff his allies. Although he is the target, you will normally have to get through his guards first. The other new opponent that the cleric summons is the heavy soldier. With more life and armour than regular soldiers, they take a bit of effort to put down. My advice for them is to clear away the lesser enemies and then focus on breaking the armour of the heavy. Once that is gone you can attack him just like a regular soldier (albeit with some nastier attacks).
You will probably have to go through at least two waves of summon support until you can deal enough damage to the priest to finish him off. Once he is done for, use the nearby mechanism to clear a path.
Chaos Gem: Before going through the archway, take a left and you will see a pain box across a gap. Jump and turn into mist as you cross to just reach the ledge.
Head through the archway and keep going until you reach one of the statue mechanisms and when the door opens, Trevor. Hmm, let's go looking for a mirror. I suppose it's just as likely as a shrubbery. Take the hallway towards the arrow on the mini map and out into the cold once more.
Diary: On a body you pass along the way before the next group of enemies appears.
You will be greeted by a heavy soldier and his squad. Deal with the weak enemies first, remove the heavy's armour, spankdown. Yay. Head inside again and use the door opening statue. This will take you out to one of what feels like the first area in the game with living trees. Huh. Follow the path down and meet Agreus.
Y'know I'm kind of getting the reason why Dracula keeps killing everyone he meets. If he leaves them alive, they play silly buggers with him next time. Sigh. OK, ready for a really annoying section? Yeah, me neither. Agreus has set up a maze with dead leaves all over the floor. He is also going to hunt you (yes, like Camilla only worse). If you step on the dead leaves he will instantly sprint for that position. There are a couple of things you can do to avoid him but he is a pain in the butt.
You can use your blood projectiles to hit bells around the area that lure him away, this sounds great but they are often too far away or closer to you than he is. Only handy in certain situations. Your real lifesaver here is your mist ability. While you are in that form you can flow right past him. The only downside is it's short duration and excruciatingly (in this section at least) cool-down. The area is split up into three main sections. The starting area (which you will see a lot of) is well lit and has a bell up and to the left which you should use at the start of every attempt to get him as far away as you can at the start.
The second area is lit by torches and is covered in heaps of dried leaves. There is also a barrier of dried leaves between it and the third section that you absolutely must mist through to prevent tipping off Agreus. The final area is lit up with longer barriers and contains the switch. Thankfully the longer barriers will let you regenerate your mist before going after the switch. Because when you hit that switch Agreus will know where you are and you will need to mist past him and sprint through the newly opened gates to escape (and give a big sigh of relief that this mini-game is over).
Use the elevator within and replenish your health and magic reserves at the top before heading through the vine encrusted gates. After finagling with the bird (freeze it with your ice projectile) Agreus will confront you and it's time to rumble once more.
_________________________________________________________
Boss: Agreus
Attacks – Spear Form
Shockdown: Agreus will raise his spear over his head with both hands, the unlbockable symbol will appear and then smash it down towards Dracula twice. Due to the speed and area the attack covers, dodging is made difficult but it is still the best option to avoid damage.
Impaler: Agreus will leap into the air, the unblockable symbol will appear on his arm and then he will lob two spears at your current position. Dodge sideways to keep out of harms way. If you do get hit, you will have to complete a QTE or else Agreus will charge into you dealing more damage.
Dual Swing: Agreus will swing his spear with a normal attack towards you and then hit with a second unblockable swipe. Dodge backwards to avoid this attack as the arc is quite wide.
Charge (Both forms): Agreus will lower his head and then perform an unblockable charge towards your position. A quick sideways dodge will allow you to avoid it.
Attacks – Sword Form
Crescent Moons: Agreus will sweep both swords in front of him and then perform an unblockable second sweep. Dodging backwards immediately after the first sweep (and jumping if possible) will make avoiding damage easier.
Slashterpiece: Agreus will pull both swords up behind his head for an instant and then lunge forward with a regular attack. Can be blocked or easily dodged by dodging backwards.
Spinning Blades: Agreus will throw both blades towards your location. They do have a set range so if you are outside it they cannot reach you and just return to him. If you are, jump and dodge away from him to avoid damage.
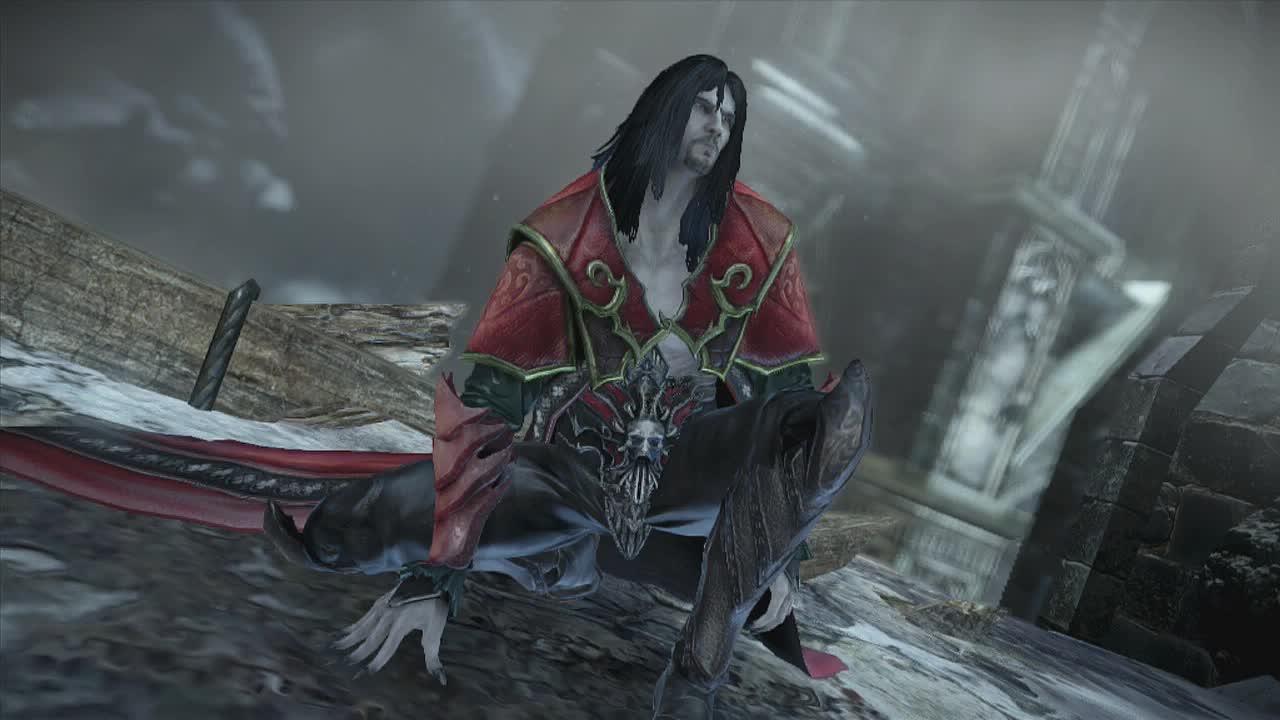
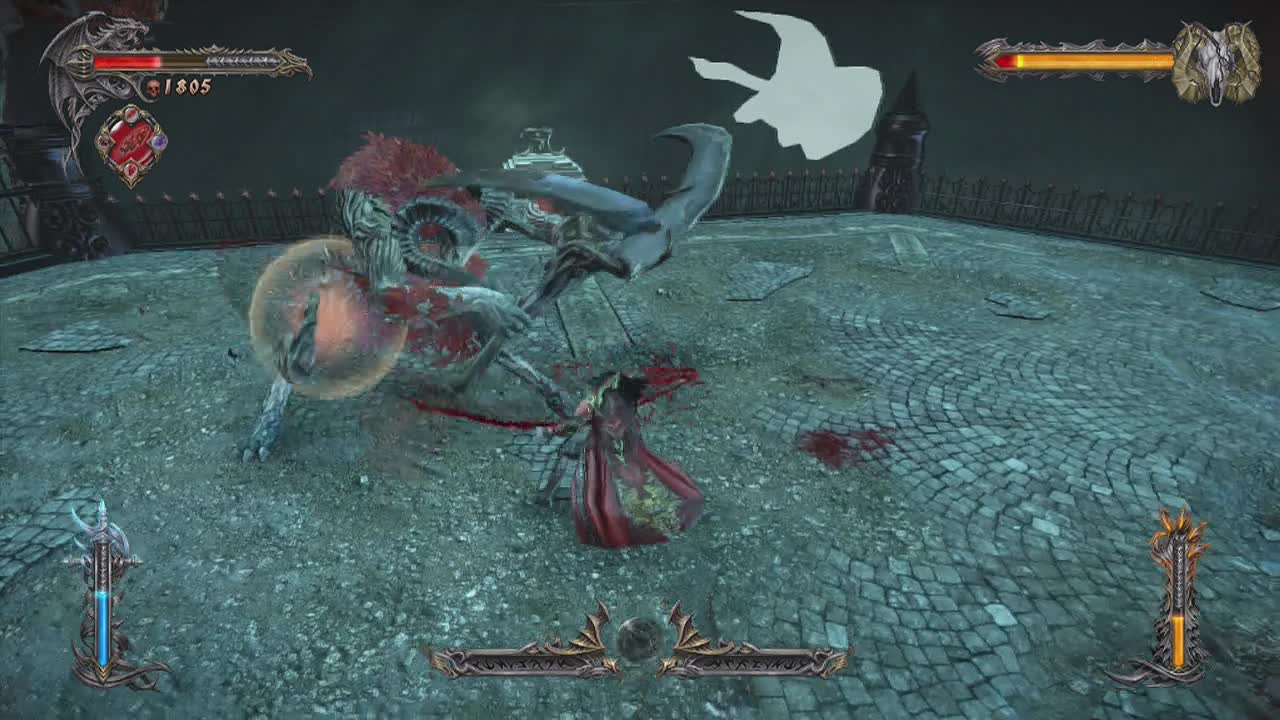
Good news everyone! We get to beat down this annoying fellow. The bad news is that he is very fast, blocks almost constantly and has a large variety of attacks. Agreus will move around the area rapidly and will change back and forth between two forms as the fight progresses. His first form "spear" is the easier to manage of the two. He only has one easy to dodge projectile attack and most of his other moves are easy to see telegraphed.
This doesn't make him a cakewalk however as you will need to be constantly dodging away and back towards him to keep dealing damage. After each attack you can get in one or two hits with your whip before he starts blocking or attacking again. I definitely recommend the whip here as getting close enough to use the other weapons is quite difficult with his constant movement. His other form is the sword version. This can be much more damaging and still just as fast as the other. His projectile attack is far more dangerous (it takes up large chunks of the area) and he will block or counter-attack quite quickly when you damage him.
The best strategy is to dodge an attack, dodge towards him quickly and hit him twice with the whip before dodging away. This prevents attacks getting blocked (which he automatically does after three or more hits), and gets you far enough away to react to his next attack. Remember about those items as this guy can deplete your health quite fast. The plus side of fighting Agreus is he doesn't have all that much health (despite how it appears) and he can be taken down in less than three minutes by an experienced Castlevania player (3:40 for my first successful attempt). This is a lot less than some of the bosses we have already fought. Once you get into the rhythm of attacks and dodges, he will go down before you know it.
_________________________________________________________
After the grueling fight, head back the way you came to these gates until you area outside again, upon which three harpies will appear and attack you. Remember, aerial attack and concentrate on one foe at a time to bring them down quickly (you can also use your ice projectiles to drop them out of the sky). Two more will try to stop you as you continue but they shouldn't pose too much of a threat.
Return to Trevor and find out that there are a lot of pieces missing from that mirror. Head to the large circular room and pull the lever for a short shooting range section. You are rewarded with xp and it only takes about 20 seconds so it isn't too tough. Once you are finished, head towards the arrow on the mini map to reach outside once more. A priest and his lackeys will be outside waiting for you. Thankfully there is no heavy to worry about so you may want to just aim for the priest first and take him out quickly. Once the rabble in your path is cleared away, spin the column with the gold points all over it to create a bridge. Keep in mind it will only stay up for a short while so book it up the slope.
Life Gem: Drop down on the right side of the area to find the pain box (a similar bridge can be made from this side)
Enter the theater-like area.
Chaos Gem: Turn right as you enter the area to spot the pain box
Drop down to the lower area to fight three shielded knights. If you still have some chaos magic this should be a breeze. Break shields and trounce them.
Diary: Against the wall in this area
Use the nearby grapple point to reach the upper floor and travel along the corridor until you reach the theater. This large area has a magic font that can be revealed on the left side and some collectibles on the right side (via a grapple chain).
Diary: Up the grapple chain on the right
Void Gem: Up the grapple chain on the right
Head up the grapple points on the right side of the stage and down into the lower area. There is a shadow portal here that allows you to pass through the grille nearby. There is another grille on the front of the stage that lets you down into the power room. Transform back and use a chaos bomb on the furnace. This should start everything up but you need to get out of here. Transform into a rat again and use the ramp to the right of the furnace. Several pieces of moving machinery mean you have to time your dashes well. Make it through and gnaw at the rope to the left to stop the machines (and die an ironic death). Head out of the exit in front of the stage and back to the shadow portal. Turn back into yourself and climb back up and drop down to the lever below.
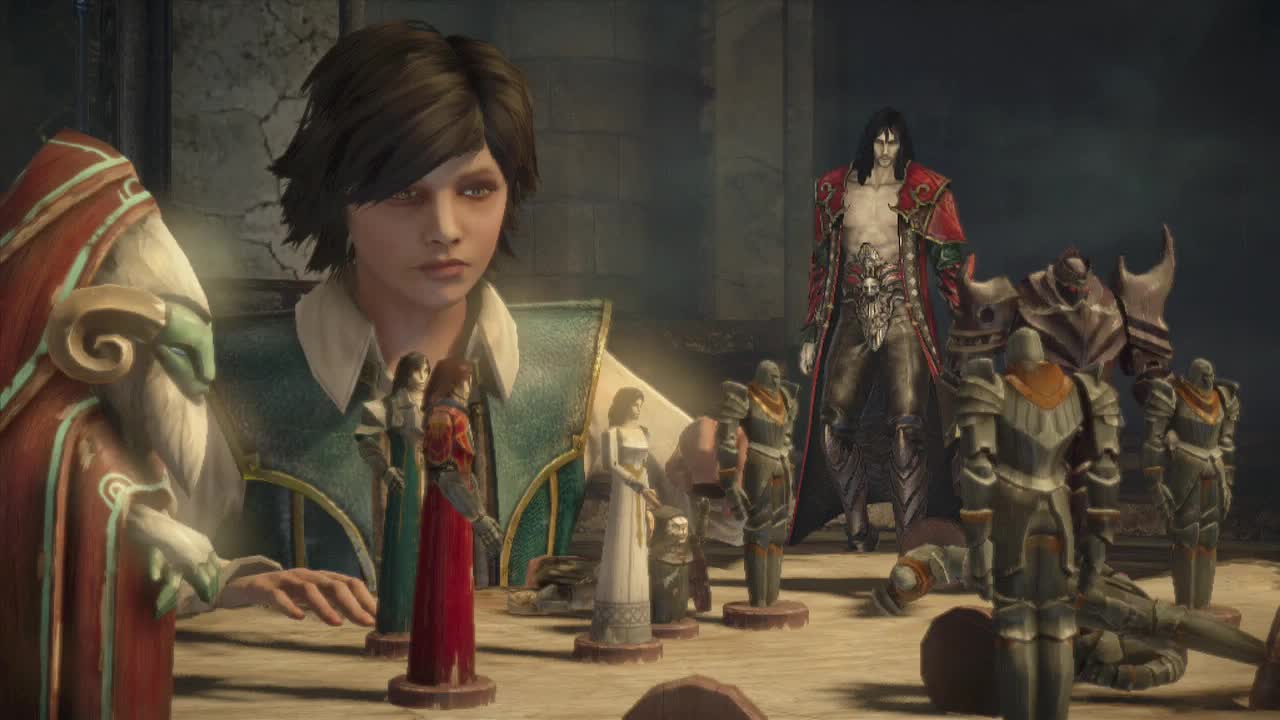
Use the lever and watch the show. After the monologue, head over to the toymaker's device and operate it. Now it's time to put on a show. The narrator will provide the story and you must place the character and backdrops on the stage to suit it. The first set is: toymaker and workshop. The second set is: just Walter Bernhard. The third set is: castle backdrop. The fourth set: Demon. The fifth is the theater and the kid.
Once the play is over, head onto the stage and interact with the Toymaker's heart. After the cut-scene it will be boss fight time once more.
_________________________________________________________
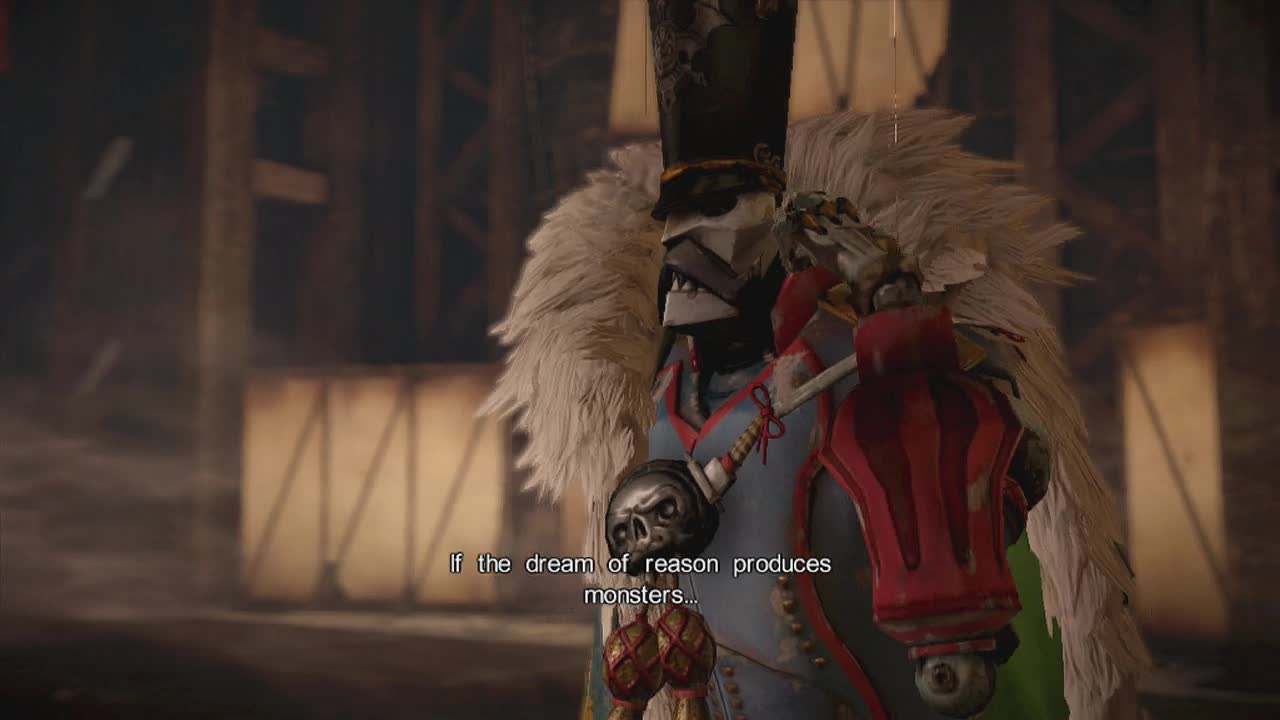
Boss: Toy Maker
Attacks – Sir Walter DeGray
Butt stomp: Sir Walter will launch himself into the air and land causing a small shock wave to ripple out around him. Due to it's small size, dodging away from it is quite easy. You can also jump to avoid it.
Lance Spin: Sir Walter will move the lance behind him and an unblockable symbol will appear on it before he spins in around in a circle around him. Dodging backwards or staying back out of range are good tactics to avoid this.
Lance Smash: The knight will raise his lance high behind him, an unblockable symbol will appear and he will bring the lance straight down towards your position. Dodging to the sides is the best way to keep safe.
The first phase pits you against a portly knight with a massive lance. The good thing is that his shield is useless and you can hit him from any direction. His attacks are quite slow and easily dodged and your whip should take him to pieces in less than a minute. Dodge away from his attacks and keep up the pressure to bring him down fast. A good strategy is to use your aerial attacks combined with the guillotine move to hit several times for big damage before you touch ground again. Aside from his looks, his power is only as strong, if not weaker than some of the regular enemies you have been fighting. After taking down all the knight's health he will dissolve.
Attacks – Toymaker (Ground)
Double Slam: The toymaker will raise both his machine's hands over its head and then bring them down, causing two shockwaves. His arms are very slow so dodging away shouldn't be too much of a problem.
Clawed Grab: The toymaker's machine will splay both it's arms out wide, an unblockable symbol will appear and then clasp them together trying to grab you. Once again this is a slow attack and dodging backwards out of danger should be a doddle.
Scratch: The only real potentially damaging attack as it is a bit faster and can catch you off guard. The toymaker's machine will pull one arm back and then scratch forwards a couple of times in large arcs. Dodge back quickly to avoid the hit.
After taking down the knight, the toymaker will drop down and engage you directly. His slow and lumbering attacks, combined with his easy to damage form make him a joke in comparison to the last boss. Whack away at him with your whip (looking out for the quick scratch attack), dodge when you need to and he should retreat very quickly (after taking two thirds of a bar of damage).
Attacks – Sauraganthorix
Tail Whip: The dragon will spin around and an unblockable symbol will appear on it's tail before it whips it around in a circle, damaging anything on the ground nearby. Jump over the tail or simply dodge backwards out of it's range to avoid damage.
Firework Discs: The dragon will shoot out four pinwheel firework discs that rotate rapidly. They explode after a while. Just keep away from them if you can to avoid any problems.
Flame Breath: The dragon's head will move back and it will blow out a long stream of flames in a specific direction (left or right). Aim to get past the start point (i.e. if it is going left to right, dodge left past where it starts) to avoid damage.
Shockwave: The dragon's whole body will lift up slightly and it will quickly drop and cause a shock wave in all directions. The range is quite large so jumping is the best method to avoid pain.
Probably the closest thing to a threat this whole boss fight sequence has. The Dragon may not really hit hard but he does have a few annoying attacks. To take him down quickly, use your single target aerial whip attacks, finished by a guillotine attack. This will take off a nice chunk of health and make you immune to everything except the flame breath attack (as you are in the air). Repeat this attack sequence and dodge away when you see him preparing his flame breath and he should go down quickly.
You will need to defeat the toymaker on the ground again before entering the final phase. He still doesn't pose much of a threat so just keep hitting away.
Attacks – Toymaker (Air)
High Kick: The Toymaker will kick his machine's leg in the air, sending a blast of air and dust in a straight line towards you. Dodge to the side to avoid it.
Stomp: The toymaker's machine will raise a leg in the air and stomp down, creating a shock wave. As you should be away from the machine to throw daggers this shouldn't pose a problem.If it is, dodge backwards to avoid it.
At, the final gambit of a desperate enemy, grow thirty feet taller. This final phase is very easy really. Swap to your blood daggers and toss four or five at the toymaker. This will bring him crashing to the ground and give you some free time with his face. You will need to repeat this two more times to finish him off.

_________________________________________________________
Now you have the mirror piece, head back up the grapple points (opposite the stage) and back outside. Two priests and their legions will be waiting for you below. Employ area attacks or target only the priests to hack your way through. Head back to Trevor (with the throwing mini game) and give him the piece of the mirror.