
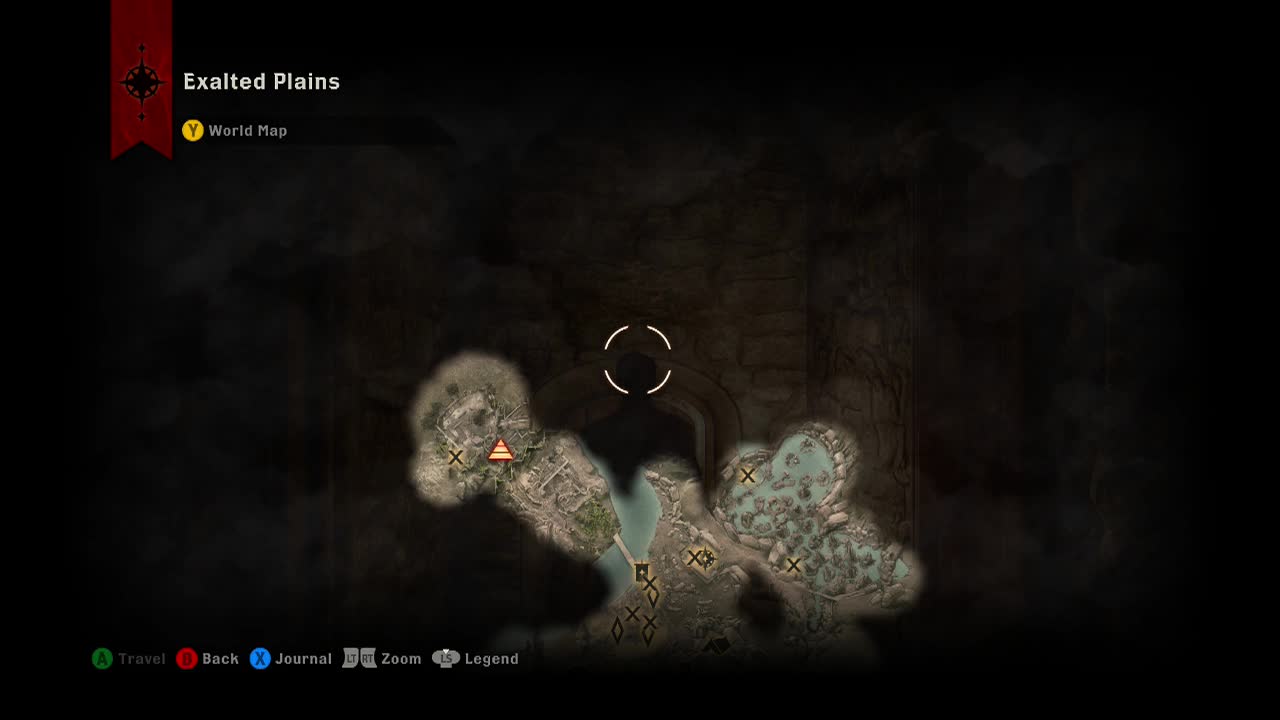

SIDEQUESTS – Exalted Plains
(Enemy Level 11-15)
A familiar ring (reward: +80 Influence) *Note: Requires rogue to reach start of quest
From: Wounded Chevalier at Victory Rise fort to the north-west of Path of Flame Camp, inside locked door
With her dying breath, a soldier fighting for Celene has asked that a ring be delivered to her commander in the citadelle.
Give the ring to Commander Jehan
Head on over to the Northern Ramparts to give the ring. Totally quick and easy to accomplish. You only have to head up there, unlock the operation, complete that, fight your way through swarms of undead, arcane horrors, revenants, and a firey laser beam from the sky. Nothing much. Reward is well worth it.
A father's guidance (reward: +80 Influence)
From: Book to the north-west of Path of Flame Camp (icon will appear on map)
A farmer abandoned his home during the war, but hid what valuables he could, afraid they might be stolen by bandits.
Locate the farmer's valuables
Travel to the marked location and look for the lone bent tree. The box will be at its base.
A well stocked camp (reward: )
From: Nissa in Dalish camp in Halin'sulan, directly west of Path of Flame Camp
With the war ongoing and demons preventing safe travel through much of the Dales, the Dalish in the plains have had trouble keeping supplies stocked. An elf named Nissa has made a list of what they need for their camp in her ledger.
Read Nissa's ledger
Read the ledger next to Nissa. This will give you an objective to hand in resources. If you already have them you may turn them into the box nearby. Once completed, you will be able to keep going back to the ledger to get the next one.
Find and deliver five bushels of spindleweed (+80 Influence, +1 Dalish favor)
Find and deliver ten bushels of elfroot (+80 Influence, +1 Dalish favor)
Find and deliver ten pieces of canine leather (+80 Influence, +1 Dalish favor)
Find and deliver five pieces of iron (+80 Influence, +1 Dalish favor)
Find and deliver three pieces of great bear fur (+80 Influence, +1 Dalish favor)
Another side, another story (reward: +200 Influence, +2 Power)
From: Automatically after completing Lay rest the western ramparts sidequest
Now that the undead trouble has been dealt with at the Western Ramparts, it would be wise to meet with Gaspard's marshal, who is holding Fort Revasan in the name of the usurper.
Enter Fort Revasan (+200 Influence, +2 Power)
On the approach to the entry are some corpses and an arcane horror. Dispatch them and head inside.
Speak with Marshall Proulx
Find Proulx and talk to him.
(Potentially glitched. Will say hi and zoom in, but won't initiate conversation. If this happens, save and reload, and he should talk to you.)
Armor requisition on the Plains (reward: )
From: Requistion officer in any camp
An Nevarran noble is crafting a set of burial armor for an esteemed elder, but they are short some key materials.
Gather the armor materials (x4 malachite)
Collect the materials and hand in to a requsition officer at any camp.
By the grace of the Dalish (reward: +200 Influence, +2 Power)
From: Loranil in Dalish camp in Halin'sulan, directly west of Path of Flame Camp
Dalish would be skeptical of any force as powerful and connected as the Inquisition. It will take considerable effort to earn the favor of Hawen's clan.
Earn enough favor to recruit Loranil
Dalish favor
Other quests from the Dalish will award favor as well as their regular rewards. Once you have enough favor, the other quests will stop giving it.
Speak to Loranil about joining the Inquisition
Speak to Loranil since you apparently have the Keeper's permission to recruit him.
(+Agent, +100 Influence, +1 Power)
Calming Victory Rise (reward: +200 Influence, +2 Power)
From: Marshall Proulx, during Another side, another story sidequest
Pits are piled with bodies, attracting spirits and causing undead to rise. To make matters worse, the pits are protected by magical barriers, preventing anyone from reaching the dead to burn the remains. Once all the bodies are burned, a signaling horn will alert Gaspard's troops that the undead threat to the ramparts has been dealt with.
Set fire to the east pit
Set fire to the west pit
Fight your way to the pits and set fire to them.
Blow the signaling horn
Find the horn. Bwaaaaah.
For the empire (reward: +200 Influence, +2 Power, Dalish Banner Crown)
From: Entering Northern Ramparts, north-west area of Exalted Plains, need to complete Repair Pont Agur operation to access
The bridge to Citadelle du Corbeau has been repaired by the Inquisition. Celene's forces were stationed beyong the bridge and have not been since it was destroyed.
Body pits burned (2)
Go to Citadelle du Corbeau
Fight your way through the hordes of undead minions to the body pits. They are guarded by an Arcane Horror, and protected by a magical barrier. Use a mage or elemental damage to take out the barrier and burn the pit.
As you approach the citadelle doors, a Revenant will burst through them. Take it out.
Reach the stranded troops
In this area, anywhere there is light from the sky, there can be a beam of light/fire that will burn the ground. At some points it will look like a beam, others a whirlwind. It can also burn the enemies for you. Stay out of these areas, or run through it quickly to minimise damage. Once you get to a more outside area, the fire will stop. At the top of this area, you will see a pile of orlesian citizen bodies. Up the ladder is the crank to turn off the fire beam of death.
Rescue Celene's troops
[Special] "Cassandra?"
"I won't hurt anyone."
"You haven't heard of me?"
"Open this door!"
From the beyond (reward: +200 Influence, +2 Power)
From: Keeper Hawen in Dalish camp in Halin'sulan, directly west of Path of Flame Camp
There's an old Dalish ritual site in the plains known as Var Bellanaris. Spells protecting the dead there have been broken, attracting demons. Cleansing the ground of the demons would gain favor from the Dalish.
Defeat the demons at Var Bellanaris
Travel to the marked location and kill the very few demons that are there.
Speak to Keeper Hawen
Return to Hawen to finish the quest.
Dalish favor +3
Ghilan'nain's Grove (reward: +80 Influence)
From: completing the operation: Gain access to Ghilan'nain's Grove
Inquisition labourers have opened a passage to Ghilan'nain's Grove.
Investigate Ghilan'nain's Grove
You will need to have completed the operation Gain access to Ghilan'nain's Grove operation (can be found by reaching the edge of the area in the Exalted Plain and finding the operation banner). Once the operation is completed, you will be able to travel to the marked area. Just past where the operation is, you will be attacked by around four lv 15 gunthers. Once they are defeated, you will complete the quest.
God of secrets (reward: +400 Influence, +3 Power, Dirtham's wisdom (unique shield)) *Note: This sidequest actually takes place in the side area: the Lost Temple of Dirthamen – mage warrior and rogue required for this quest
From: Completing the sidequest: Scattered Glyphs
Cillian's reading of the glyphs has revealed the location of the Lost Temple of Dirthamen. Who knows what secrets this ancient elven ruin may hold.
Investigate the area
You will arrive in a dank stone tunnel with many markers on the map ahead. The book on the table at the bottom of the stairs will illuminate you a bit on what is going on if you want to read it. Slosh down the waterlogged passage and start lighting the veilfire torch brackets as you go with a mage. Grab a veilfire torch before moving on. Take the first left to enter the chamber of misery to find the option to "take the head of misery" when you approach the altar.
Take it, and you will be surrounded by a mob of around six or seven ghouls and ghoul archers (lv 11). Cut through them and resume your exploration.
Remains uncovered (6)
Looks like we are reassembling the body of some creature, folks. The door on the right side of the corridor can only be opened by a mechanism, so ignore it and keep walking along the wet path. Slightly to the South-West of the North-West marker on the map, you'll find a lever you can pull to stop the water flow in the nearby doorway.
This allows you to enter the next chamber without your veilfire torch going out. Enter the North-West marker room to find the chamber of whispers. Examine the rune next to the doorway to obtain an optional objective.
Runes in the lost temple (7)
Approach the altar in the chamber of whispers with a veilfire torch when you are ready and grab the tongue of whispers from it. Four or so corpses will materialize at the door to the room and attack. Once they are dealt with, leave the chamber and take the path to the East. Just a few steps along this path, you'll spot a hole in the wall to the left with a barrier down it. Use your mage to break it down to find a mosaic piece, some loot and a dead explorer behind it.
Return to where you left the main path and descend the stairs. You will arrive in the main central area of the ruins (the sanctuary). In the water-logged square is the site of the ritual, with a book and six pedastals nearby (one for each organ). Place down the two parts you have already and a new objective will appear.
Complete the ritual (6)
Once you have placed the parts, leave the watery square and enter the dark doorway in the South-West corner of this large room to find the chamber of sorrow. With a lit torch, you can nab the eyes of sorrow off the altar. This time you'll be attacked by an arcane horror as well as the usual cluster of 5 or 6 ghouls. Return to the large sanctuary chamber after the battle.
Your next destination is the door on the right in the North wall of the sanctuary room. In here you'll find a rune, some loot, another veilfire brazier and a locked door. Use your rogue to open it and walk into the chamber of tormen (lovely names arent they?). On the wall next to the door is a lever to pull. Another rune lies on the wall just ahead, so pick it up before going inside the alter room. A group of seven or eight possessed explorers will attack you when you take the hands of torment. One of them will drop an ornate elven key upon death which you will need shortly.
Return out the doorway you came in by unless you want to get another torch. Now that you have the key, step over to the door at the South East corner of the sanctuary room and open it up. Past the first archway, another lever for you to pull will be hiding. Doing so opens the gates next to it. Enter and use a warrior to bash a hole in the left wall here. Inside is another rune and some more loot to snatch (There's a veilfire brazier over the fallen pillar nearby if you need a new one).
Head North-East to the next quest marker (jump the pillar where the veilfire is), and enter the chamber of unheeding. Take the ears of unheeding off the altar and you'll be attacked by two arcane horrors and a couple of ghouls. The limited space can make this fight a headache, so jump back over the pillar if you need room. The room next to the altar contains another rune, but entering will douse your torch.
You can find one of Solas's artifacts here for +40 Influence. Return to where you bashed in the wall with your warrior and go through the door opposite, circle around and activate the rune this way instead. Leave the room where you bashed down the wall and return to where you pulled the lever to enter here (room directly to the south of the sanctuary room). Here you will find another locked door for your rogue. Inside is some more loot to pick up.
Exit the small room and travel West, climbing the stairs in the large open room. Look carefully at the stonework on the left wall to find another rune to activate. Enter the room to the West of this one to reach the Chamber of Despondency. Inside is the final altar with the heart of despondency on it. Take organ, get attacked by two arcane horrors, yeah we all know the drill. Pull the lever next to the altar to open up a shortcut back to the start of the temple if you need to restock. Leave through the newly opened door to find the final rune.
(+200 Influence)
When you are ready to go, return to the sanctuary room and deposit the pieces on the pedestals.
Summon the highest one
As you place the final piece, a resurection spell will appear in the center of the water. Approach the glowing figure and interact with it. Yup, demon. Didn't see that one coming (yawns).
The highest one is a more powerful (lv 15) version of a regular despair demon. Ghouls will also begin pouring out of the lake as well, so try and finish the fight quickly (yeah, the despair demon's barrier is a pain to deal with). The ghouls do eventually stop spawning, so you can just wait for them to stop before focusing on the highest one.
Search the chamber of the oracle
Now that the demon is dead, the magically sealed door to the east is open to you. Enter the chamber for a supply cache, mosaic piece and loot. The glowing chest in the room's center holds Dirtham's wisdom (unique shield) and some other loot. That's it for the ruins and quest. Exit stage left.
Holding the Exalted Plains (reward: +100 Influence, +1 Power per camp)
From: Inquisition upon arrival to area
Establish camps to hold the Exalted Plains and support Inquisition activity in the region.
Camps established (3)
One of these camps will be already established when you enter the area.
Lay rest the Eastern Ramparts (reward: +200 Influence, +2 Power)
From: Marshall Proulx, during Another side, another story sidequest
Pits are piled with bodies, attracting spirits and causing undead to rise. To make matters worse, the pits are protected by magical barriers, preventing anyone from reaching the dead to burn the remains. Once all the bodies are burned, a signaling horn will alert Gaspard's troops that the undead threat to the ramparts has been dealt with.
Set fire to the body pit
Head over to the body pit and take out the leader of the Freemen, Gorian. The bodies are protected by a magical barrier, take it out with a mage or elemental damage. Then burn the pit.
Blow the signaling horn
Horn. Blow.
Lay rest the Western Ramparts (reward: Obtained during quest) *Note: Mage required
From: Talk to Corporal Rosselin at the undead ramparts, after completing Undead ramparts to the west sidequest
Pits are piled with bodies, attracting spirits and causing undead to rise. To make matters worse, the pits are protected by magical barriers, preventing anyone from reaching the dead to burn the remains. Once all the bodies are burned, a signaling horn will alert Gaspard's troops that the undead threat to the ramparts has been dealt with.
Set fire to the south pit
Set fire to the north pit
Work through the village and kill any corpses in the way. There will be an Arcane horror guarding the pit surrounded by a glowing barrier. Use a mage to break through the barrier, and use anyone to set fire to the pit. Do this for both pits.
Blow the signaling horn (+200 Influence, +2 Power)
Walk to the horn and blow it.
Return to Corporal Rosselin
Return to finish the quest.
Left to grieve (reward: +80 Influence)
From: Sergeant Meursault, in Fort Revasan
Letters from soldiers who fell on the plains were left behind in the midst of battle. Sergeant Meursault wants to return them to the families of the dead.
Soldier letters found (7)
Look around the areas for the letters. They will usually be on or around bodies/carts. Not all of them will glow with search, but they will have an action prompt when looking at them.
Deliver the letters to Sergeant Meursault
Head back. Talk to her.
Map of Enavuris (reward: +80 Influence, Cleave (unique axe))
From: Scroll found inside fort at Victory Rise to the south-west of Riverwatch Camp
This map, found in a bunker of Celene's Victory Rise Ramparts, depicts a spot visible through three tall windows.
Find the spot marked on the map
Head to the location shown and use advanced search to reveal the buried loot.
No word back (reward: +80 Influence)
From: Marshall Proulx, during Another side, another story sidequest
Marshall Proulx sent a patrol out in the hopes reclaiming Riverside Garrison. No word has been heard since.
Investigate Riverside Garrison
When you arrive, you will find soldiers under attack by demons coming from a fade rift.
Close the rift (+200 Influence, +2 Power)
Go do what you do, so well. Find the giant hole in the basement. Will lead to demons.
Blow the signaling horn
You heard the man, blow the horn.
Obsidian survey of the plains (reward: +200 Influence, +1 Power)
From: Requistion officer in any camp
The University of Orlais has requested obsidian and veridium samples for a geological survey ofthe Exalted Plains.
Fill the requisition (x10 obsidian, x10 veridium)
Collect the materials and hand in to a requsition officer at any camp.
Pressed for cache (reward: )
From: Commander Jehan in Citadelle du Corbeau (north-west of Exalted Plains, requires Repair Pont Agur operation completed to access)
Supply caches belonging to the Imperial Army have gone missing in Lake Town. Mark the crates so they can be collected.
Supply caches found (10)
Rifts in the Fens (reward: +200 Influence, +2 Power per rift)
From: Inquisition upon setting up the Fens camp
Active fade rifts have been spotted in Montevelan village, Dirthmen's Grove, and the Crow Fens.
Fade rifts closed (3)
All locations are in relation to the Fens Camp.
South rift: Normal
North rift: Normal
North-east rift: Normal
Rifts in the Old Plains (reward: +200 Influence, +2 Power per rift)
From: Inquisition upon arrival to area
Active fade rifts have been spotted in Enavuris and Halin'sulahn, as well as near the ancient bathhouse.
Fade rifts closed (4)
All locations are in relation to Path of Flame Camp.
North-west rift: Normal
West close rift: Normal
West mid rift: Normal
West far rift: Normal
Rifts on the battlefield (reward: +200 Influence, +2 Power)
From: Automatically after claiming Riverwatch Camp
Active fade rifts have been spotted at the Riverside Garrison, Northern Ramparts, and Riel.
Fade rifts closed (4)
All locations are in relation to Riverwatch Camp.
North-east (close) rift: Normal
North-east (mid) rift: Normal
North-east (far) rift: Normal
South-east rift: Normal
Scattered glyphs (reward: +200 Influence) *Note: Mage required
From: Keeper Hawen in Dalish camp in Halin'sulan, directly west of Path of Flame Camp, after completing From the beyond sidequest
There are ancient elven glyphs scattered across the plains that appear to be pieces of a greater message.
Investigate the glyphs in the Shrine of Sylaise (4)
Head to four of the marked locations, find the glyph, and locate the nearby veilfire torch holder. Use a mage to light a torch, and examine the glyph.
Go to the war table to investigate the glyphs (Power required 2)
Travel to Skyhold and look over the Orlais side of the war table to find the operation. Complete the operation to unlock a new area and complete this sidequest. This triggers a new sidequest in the side area of the Lost Temple of Dirthamen. For simplicity's sake, the sidequest involved "God of Secrets" will be added to the Exalted Plains section.
Sketch of Enavuris River (reward: )
From: Scroll found on dead body to south-west of Fort Revasan, see screenshot
Someone died with this sketch of a river in his hands. A spot is marked on the water's edge.
Find the spot marked on the sketch
Someone to lose (reward: +80 Influence)
From: Emalien in Dalish camp in Halin'sulan, directly west of Path of Flame Camp, after completing From the beyond sidequest
A Dalish teenager named Valorin ran off after being passed over for the Keeper's apprenticeship. He has yet to return and his sister Emalien fears the worst.
Find Valorin
Head to the marked area and look for the destroyed house with a pile of rubble with a corpse on top. Examine the corpse.
Return Valorin's effects to Emalien
Return to Emalien to tell her the fate of her brother. Depending on your answer, the amount of favor you gain, or even lose, will be different.
He was brave. (+2 Dalish favor, Cole++, Solas-)
Teenagers are stupid (+1 Dalish favor, Solas+, Cassandra-, Cole++)
Blood magic (-2 Dalish favor, Varric-)
Something to prove (reward: +80 Influence)
From: Valorin's body during Someone to lose sidequest
Valorin was searching for Lindiranae's talisman, a lost Dalish artifact of particular importance to Hawen's clan. Valorin's journal mentions ruins on the plains where the talisman may be found.
Search for Lindiranae's talisman
Head to the marked ruins and use a mage to break down the barrier blocking your path. Behind it you can find the talisman.
Return Lindiranae's talisman to the Dalish camp
Bring the talisman back to Emalien at the Dalish camp to finish the quest.
Dalish favor +3
The golden halla (reward: +200 Influence, +2 Power)
From: Ithiren in Dalish camp in Halin'sulan, directly west of Path of Flame Camp
A golden halla known as Hanal'ghilan is said to visit the Dalish in time of great need. A hunter named Ithiren believes the legendary halla now roams the Exalted Plains.
Find the golden halla
Head to the surprisingly close marked location to find the halla.
Herd the halla to the Dalish
Chase the halla into the general direction of the Dalish camp. Be grateful for the closeness.
Return to Ithiren
Head back to the Dalish camp to complete the quest.
Dalish favor +3
The spoils of desecration (reward: +160 Influence)
From: Attempting to open the door to Unadin Grotto, to the south of the Dalish Camp, and south-west of Path of Flame Camp
The entrance to Unadin Grotto is locked.
Find the key to Unadin Grotto
Quest helpfully shows you the location nearby in the graveyard. Start destroying tombs (and killing the demon that spawns) until you loot the first piece.
Tomb key pieces (3)
Keep looting and killing tombs until you find all three pieces.
Use the key to open the tomb door
Head back to the door and open it. You monster.
Undead ramparts to the west (reward: +80 Influence)
From: Inquisition upon arrival to area
Corporal Rosselin reports undead holding the Western Ramparts. They are rising from somewhere within the trenches. He believes it may have something to do with the Freemen.
Investigate the Western Ramparts
Head to the marked area, killing the corpses on the bridge. Cross the bridge to complete quest.