The Vault
The Vault on Voeld is small, but complex, with a shifting layout. Be sure to check your ingame map frequently to see how everything relates.

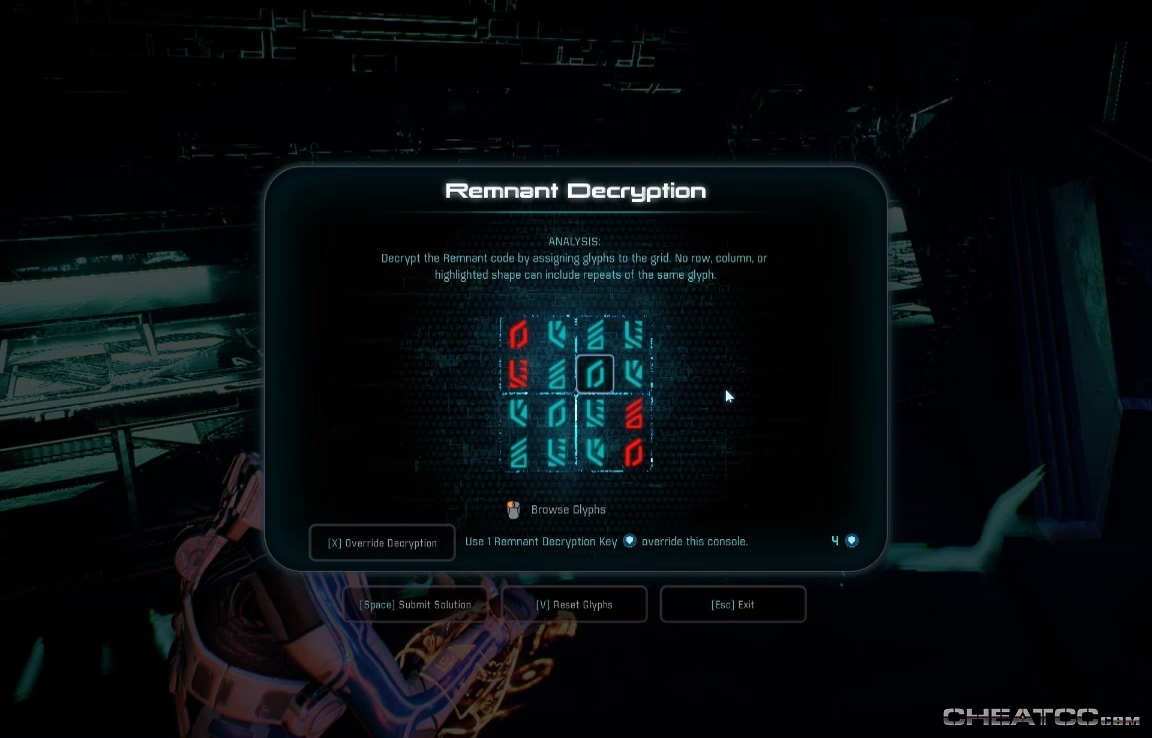
The Console Puzzle
Between the time limitation and the dozens of consoles here, this area seems more complicated than it is. But there are a few rules that make things easier-
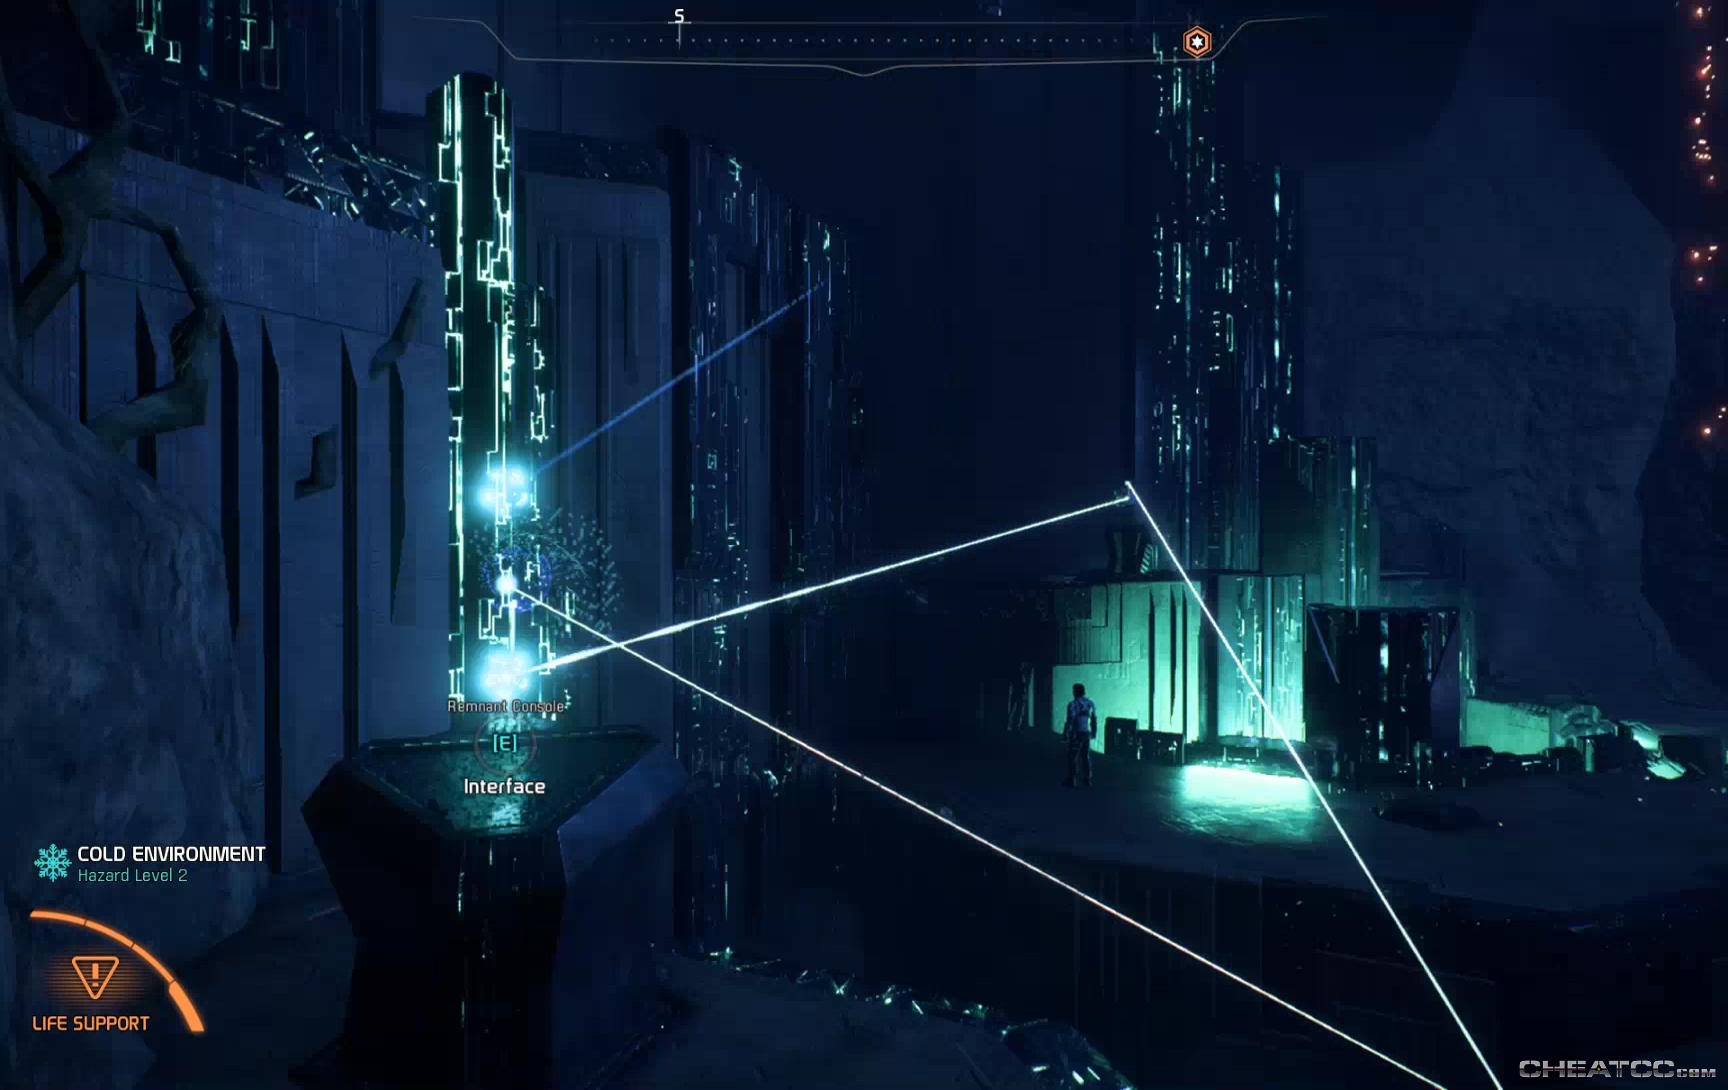
Each console only has two settings, up and down. Activating the console toggles between the two. You can tell which is which, because the beam leaving the console will be coming from either the top holographic sphere or the bottom holographic sphere. This means that each console can only activate, at most, two other consoles.
Each console can only be activated by one other console. If the console you're at throws a beam to the westmost console, you can rest assured that no other console will activate the westmost console. This means you can never create loops in the system, and don't have to worry about repeating discoveries.
Some consoles are dead. Some consoles can receive beams but do nothing with them- they're just there to provide dead ends. Likewise, some consoles will have dead nodes- when they're in the 'down' position they might throw a beam to far console, but in the 'up' position they do nothing at all.
So that narrows down the possibilities, let's look at what's left. Here's a map of the area.
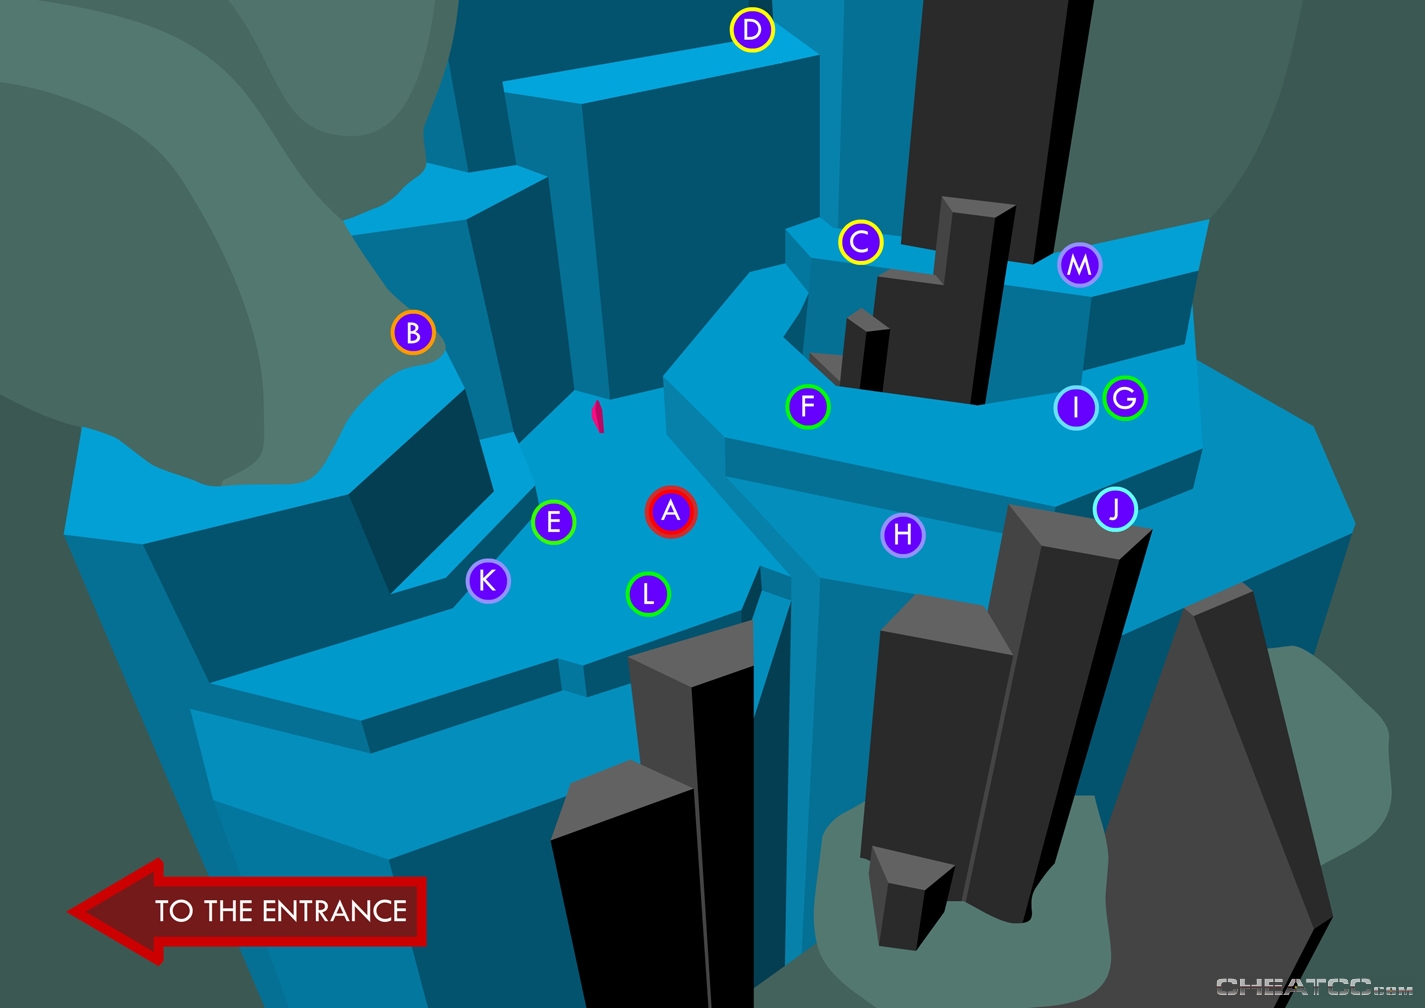
Each console is marked by a letter, but that's just for reference. All you need to know to get every treasure here, is the sequence of 'up' or 'down' for each console.
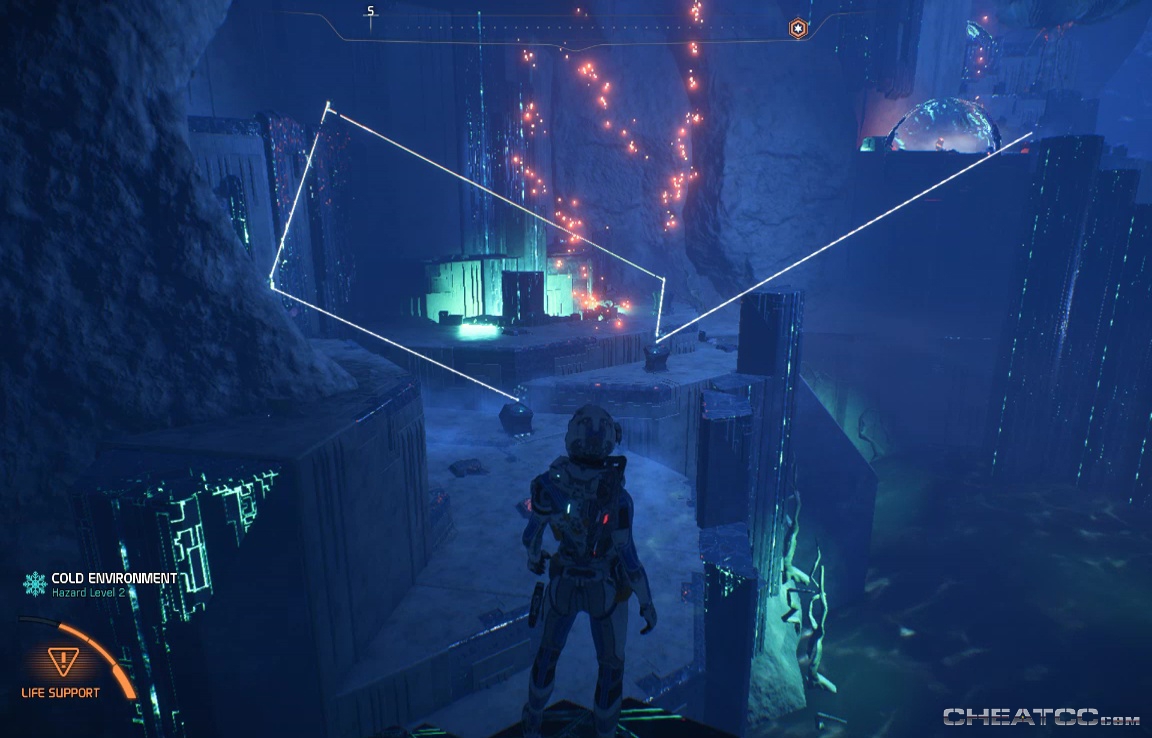
Let's start by getting the first hidden container. Switch the heat bubble console DOWN to activate a console up a ledge to the east.
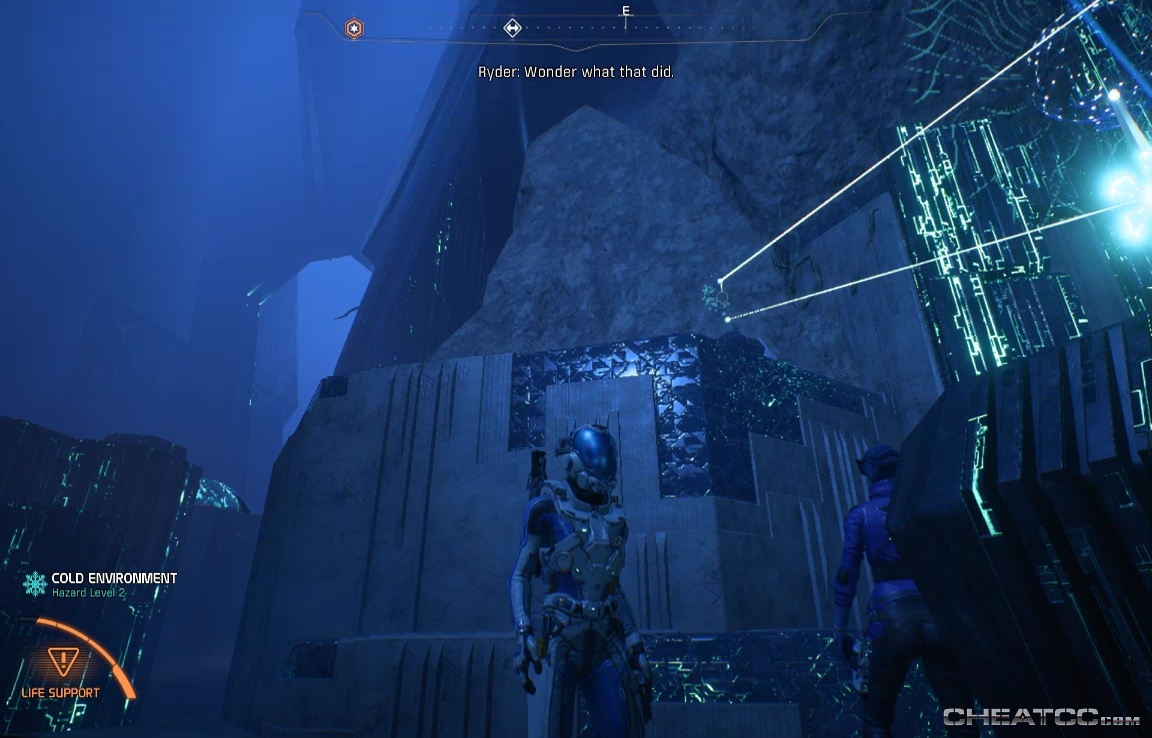
Set that console DOWN so that its lower beam is active, pointing to console on the middle level.
That console is already in the UP position, as is the next console in the sequence. The beam terminates in a newly raised pillar with a container on it.

Jump down and claim it, then dash over and reactivate the heat bubble. You can always raise this pillar again by remembering that the sequence to unlock it is DOWN-DOWN-UP-UP. You can also double-check it against the map by knowing the console order is ABCE.
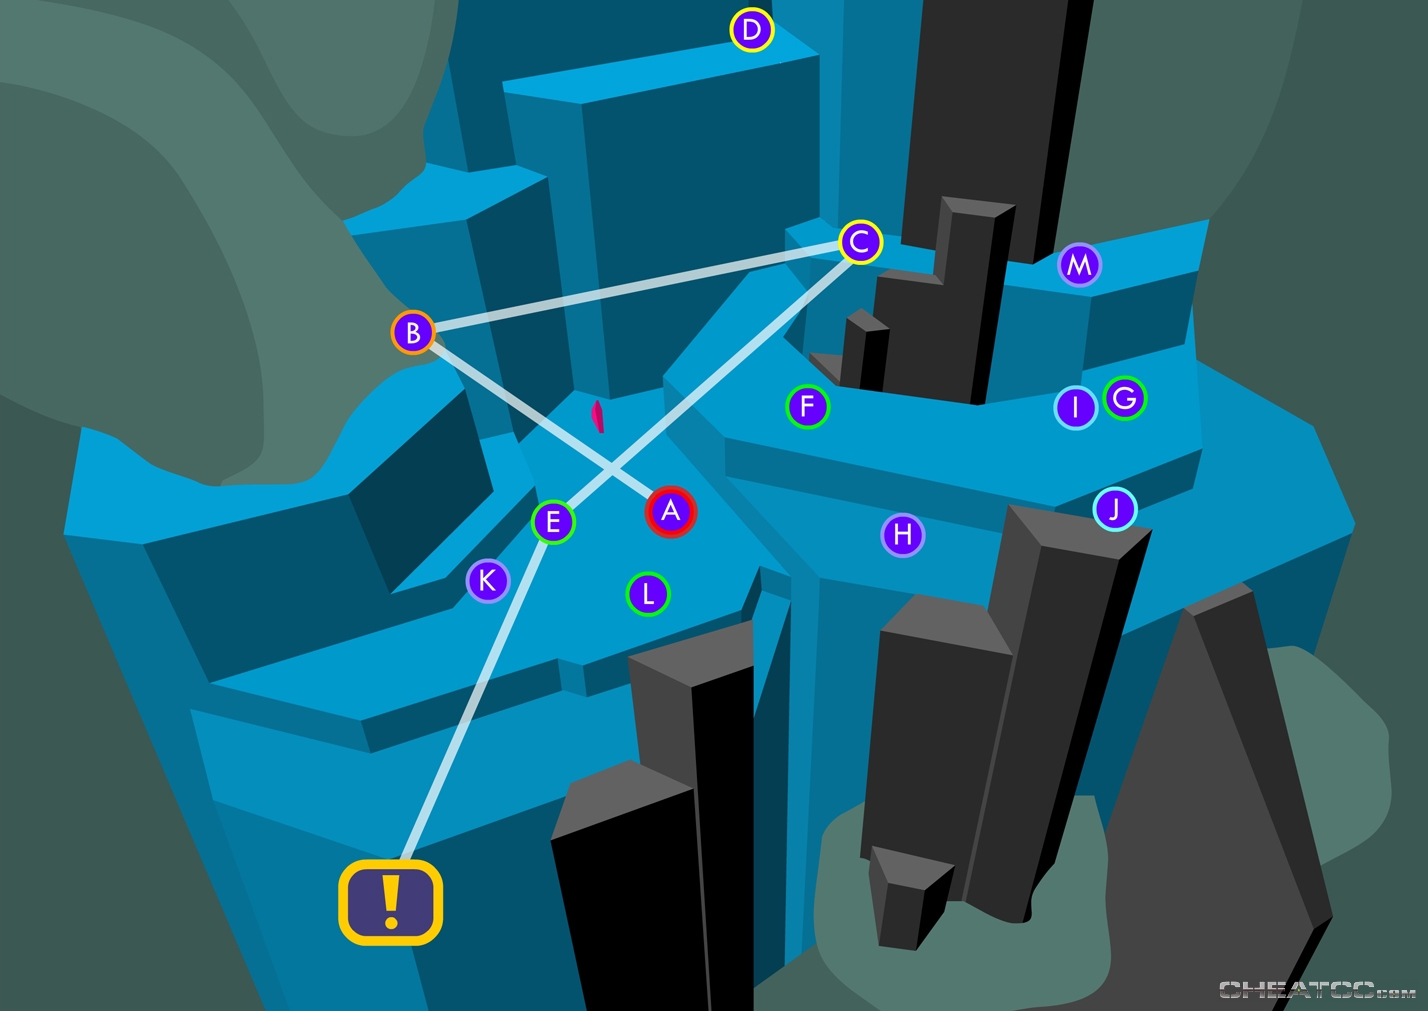
With that in mind, here's the key to absolutely everything that can be claimed in this section.
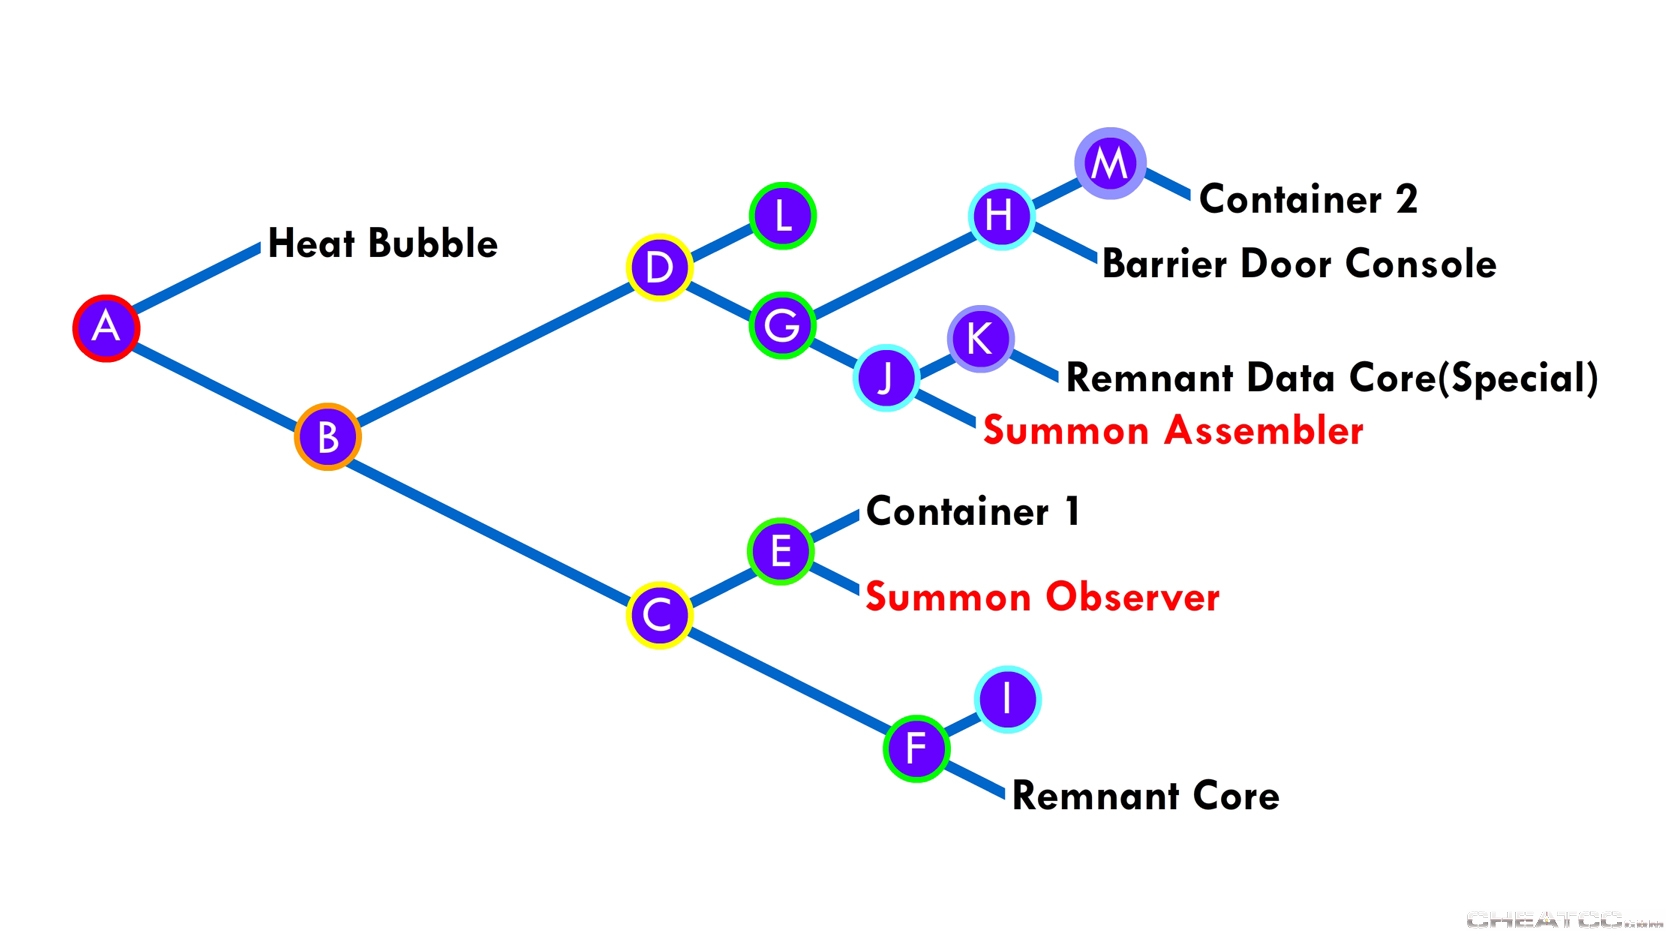
To get what you want, start at the 'A' console (the one which powers the heat bubble). If the line to your goal goes up, then set the console to the up position, if it goes down, set the console to the down position. Follow the beam to the next console in the sequence, and make the same choice. Again, you can see that the path to Container 1 is DOWN-DOWN-UP-UP, and the consoles are ABC&E. Here's what you're unlocking:
Heat Bubble: The shielded sphere that's already active when you enter the region
Container 2: A container with medium to high grade loot
Barrier Door Console: This activates a console on a high platform to the west. You will need to activate that console to open the door to the Barrier room, for the traditional grab-the-remtech-while-outrunning-the-death-cloud portion of the Vault. When you leave the area, be sure to leave the grid in this configuration.
Remnant Data Core (Special): This raises a pillar on the north side of the room, containing a Remnant Data Core. This has all the hallmarks of being an item from a scrapped quest- it's obviously special, but when you pick it up you get no journal entry, no new task, and it doesn't show up in your inventory at all. Still, it's yours if you want it.
Summon Assembler: A pillar pops up with a hostile Assembler. There's only one Assembler, however, and it can only be summoned once.
Container 1: A container with low to medium grade loot.
Summon Observer: A pillar pops up with a hostile Observer. There's only one Observer, however, and it can only be summoned once.
Remnant Core: One of those spinning, spindly cores that can be scanned for data.
When you've got all that, you've got everything. Remember to leave things in the Barrier Door Console configuration if you want your bonus rem-tech [That configuration is DOWN(A)-UP(B)-DOWN(D)-UP(G)-DOWN(H)].
Destroyer Decryption